Voiceflow named a 2026 Best Software Award winner by G2
Read now

Here is what you'll need to create your very own Telegram bot using Voiceflow
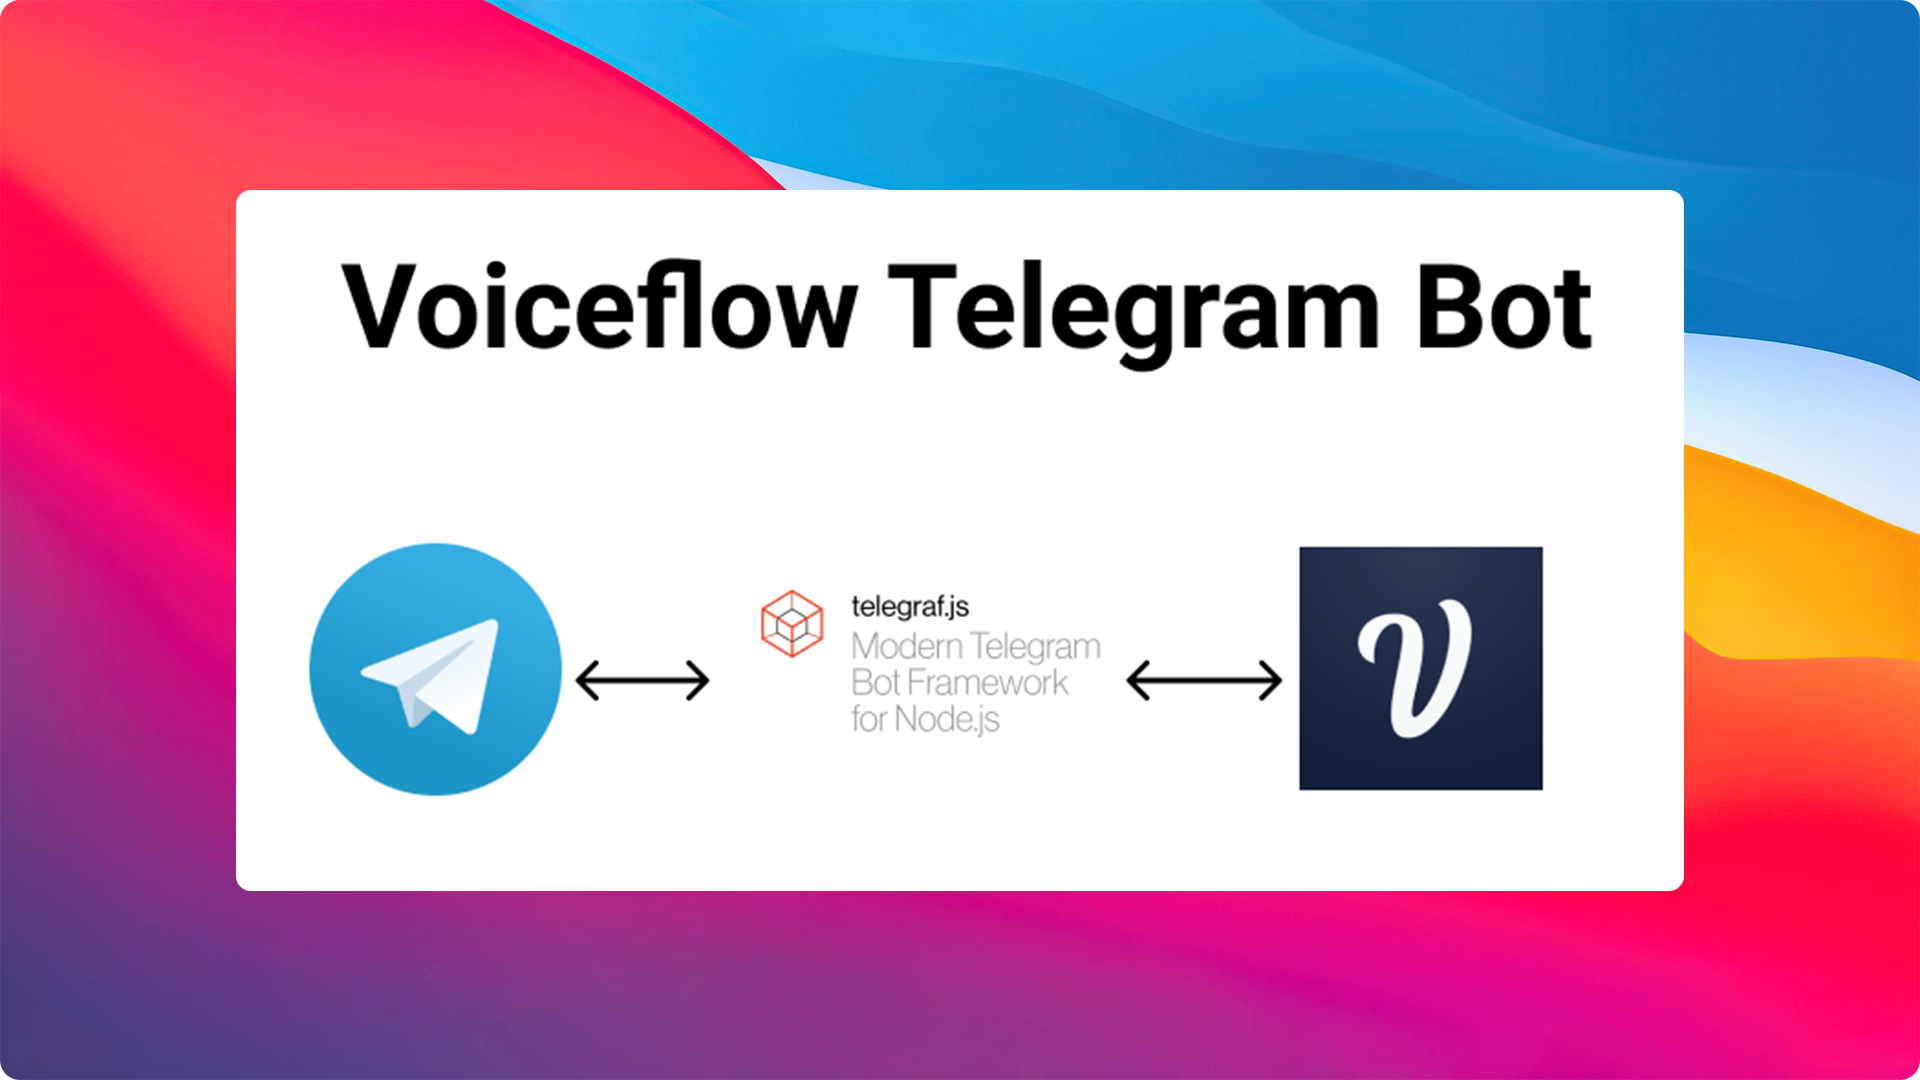
In this example, we are going to use the Telegraf library for NodeJS projects to interact with our Telegram Bot. As mentioned above, every user interaction in the Telegram bot will be sent to Voiceflow using our Dialog Manager API.
First, we need to use botfather to create our very own bot inside Telegram. BotFather allows you to create new bot accounts and manage existing ones in a few simple clicks. To start the process of creating your bot, you just need to talk to the botfather while following the steps outlined below.
To open a chat with botfather, click on the "start" button.
We'll need to create a new bot by clicking /newbot command. Next, you can name your bot. In this example, we have named ours "Voiceflow bot".
It's that easy. The Telegram setup is now complete! Remember to add your Telegram token to your {% c-line %}.env file{% c-line-end %} in the property {% c-line %}TELEGRAM_TOKEN{% c-line-end %}.
Install and run the project:
1. Clone this repo:
{% c-line %}git clone <https://github.com/xavidop/teelgram-voiceflow-bot.git>{% c-line-end %}
2. Install dependencies:
{% c-line %}yarn install{% c-line-end %}
3. Launch project:
{% c-line %}yarn start{% c-line-end %}
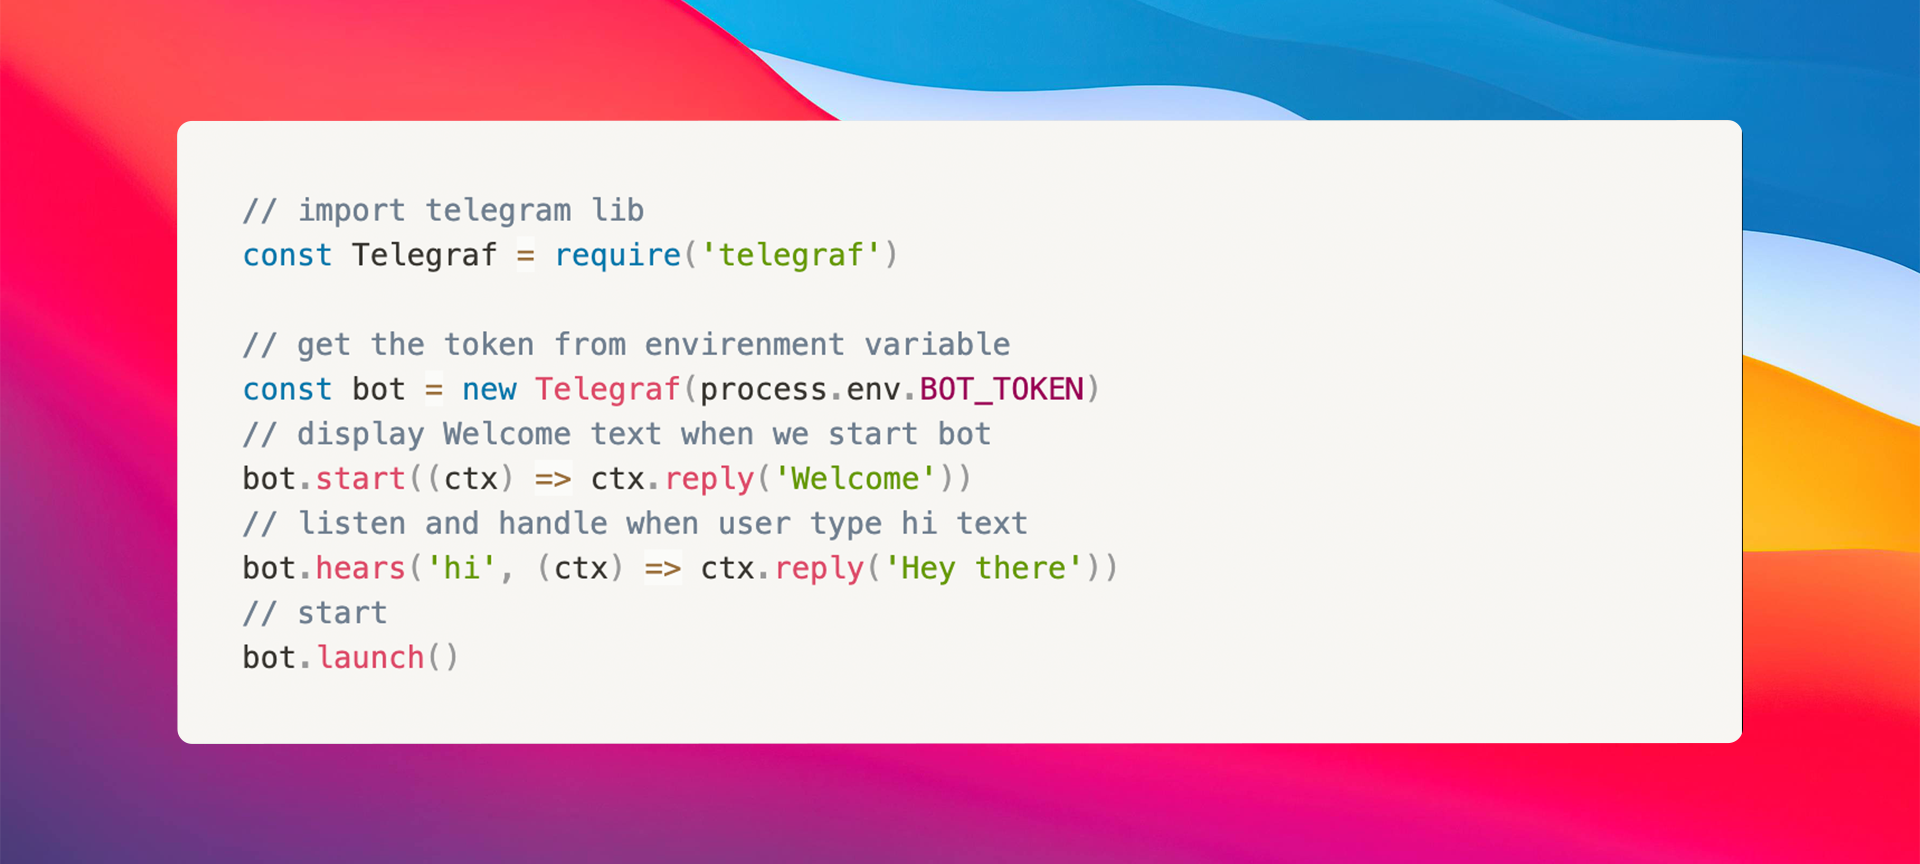
We can create bot by the following code lines:
NOTE: It's important to note that you will need to create a General Project type on Voiceflow for this experience to work.
Now, let's implement the Voiceflow client to work with Voiceflow's cloud using its Dialog Manager API.
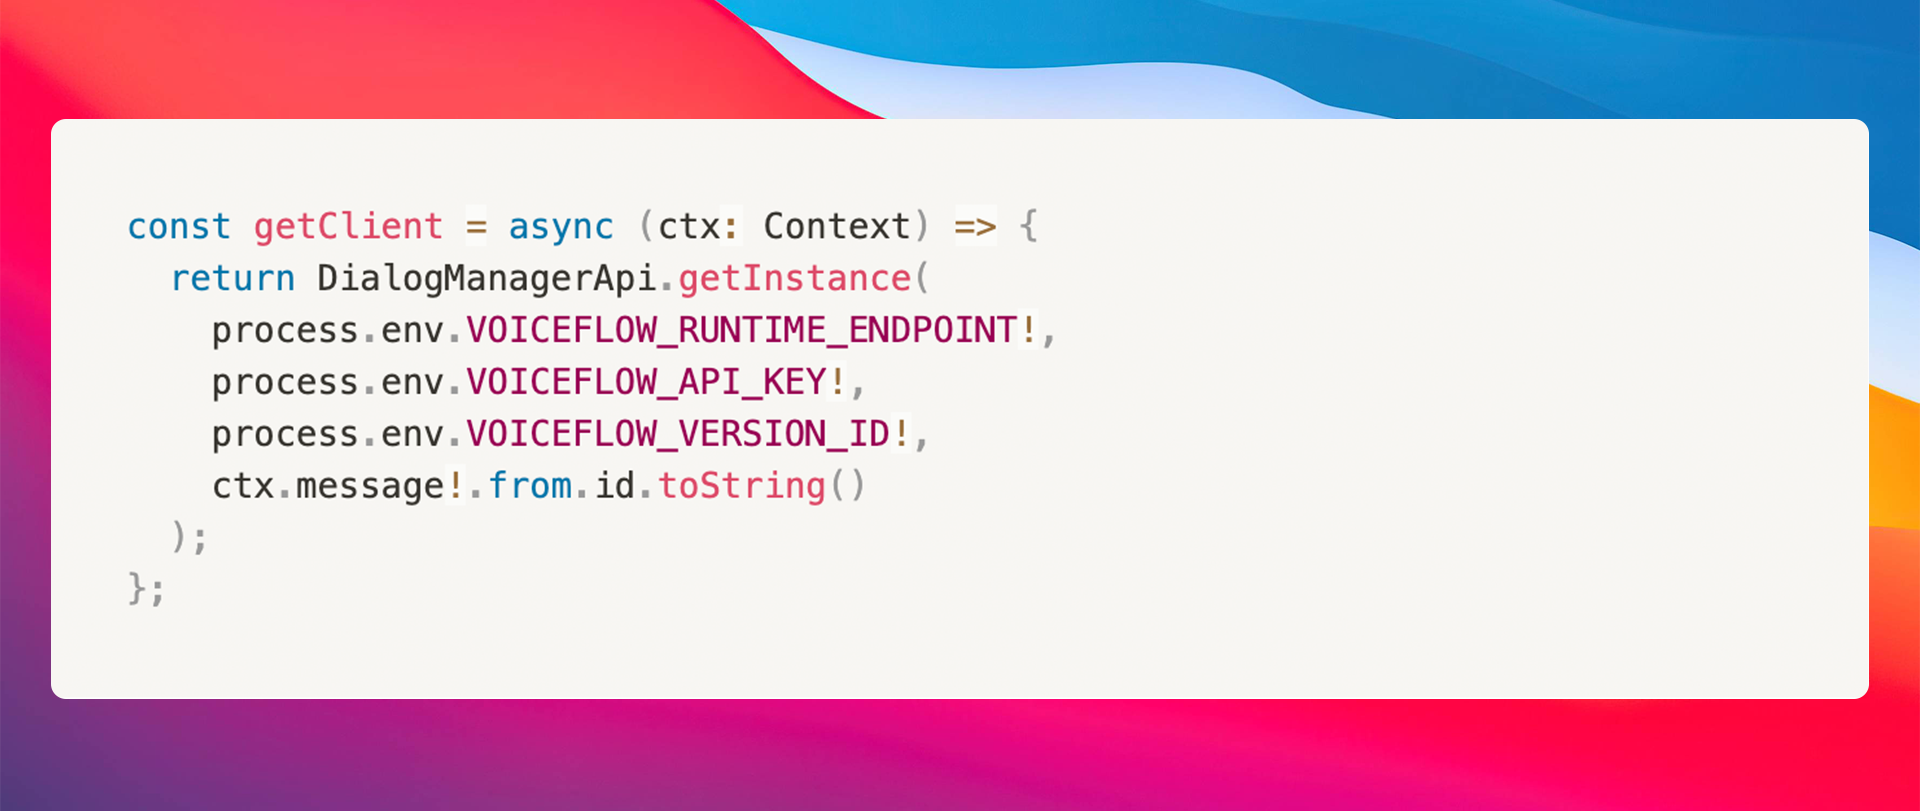
The {% c-line %}getclient(){% c-line-end %} function calls the {% c-line %}DialogManagerApi.getInstance{% c-line-end %} a REST API client that will interact directly with the Dialog Manager API.
As you can see there are some values that will be added to our {% c-line %}.env{% c-line-end %} file. Let's explain how to obtain those variables.
To obtain your VersionID you have to go to your Voiceflow Project:
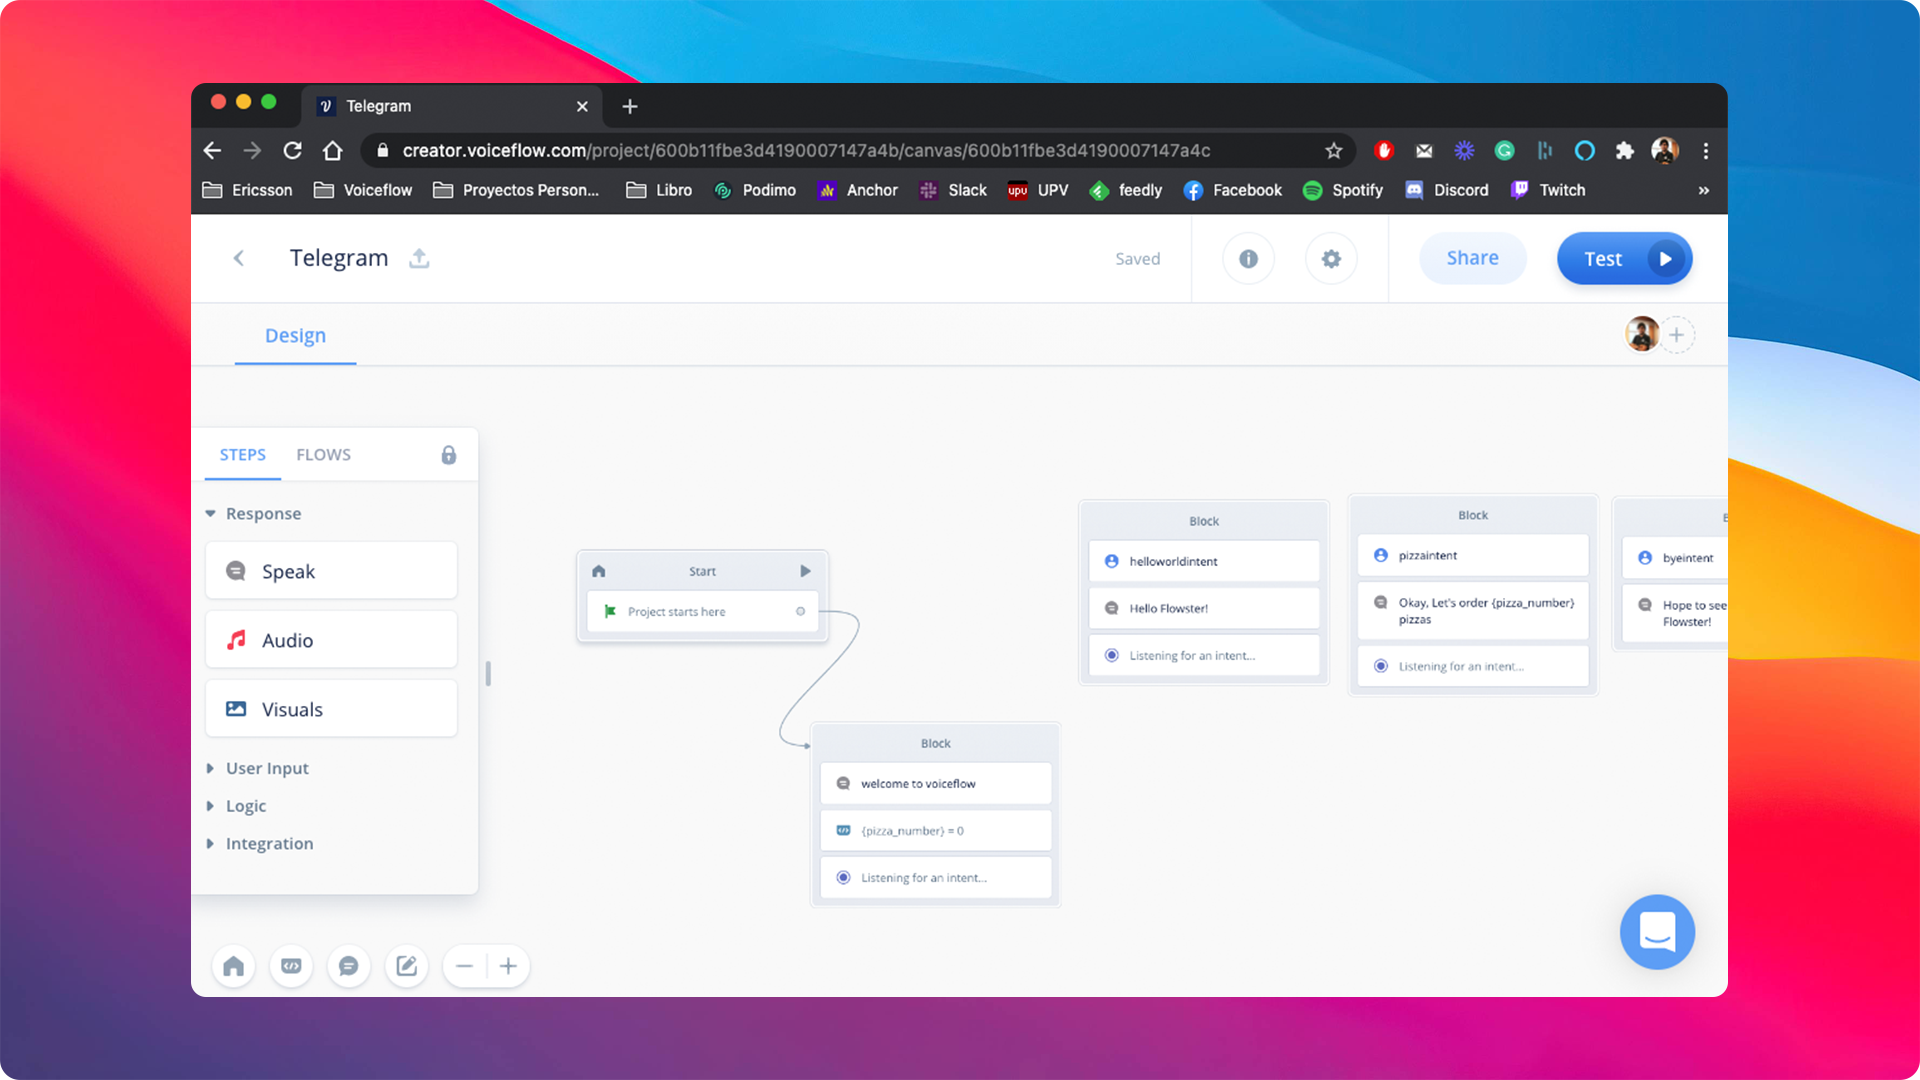
Then copy the {% c-line %}VOICEFLOW_VERSION_ID{% c-line-END %} from the URL in your address bar. When you are inside a Voiceflow project, your address bar should have a URL of the form:
{% c-line %}https://creator.voiceflow.com/project/{VOICEFLOW_VERSION_ID}/...{% c-line-end %}
To obtain the API Key we have to go to our workspace where we have created our General Project. After this, head to workplace settings and click on the developer tab.
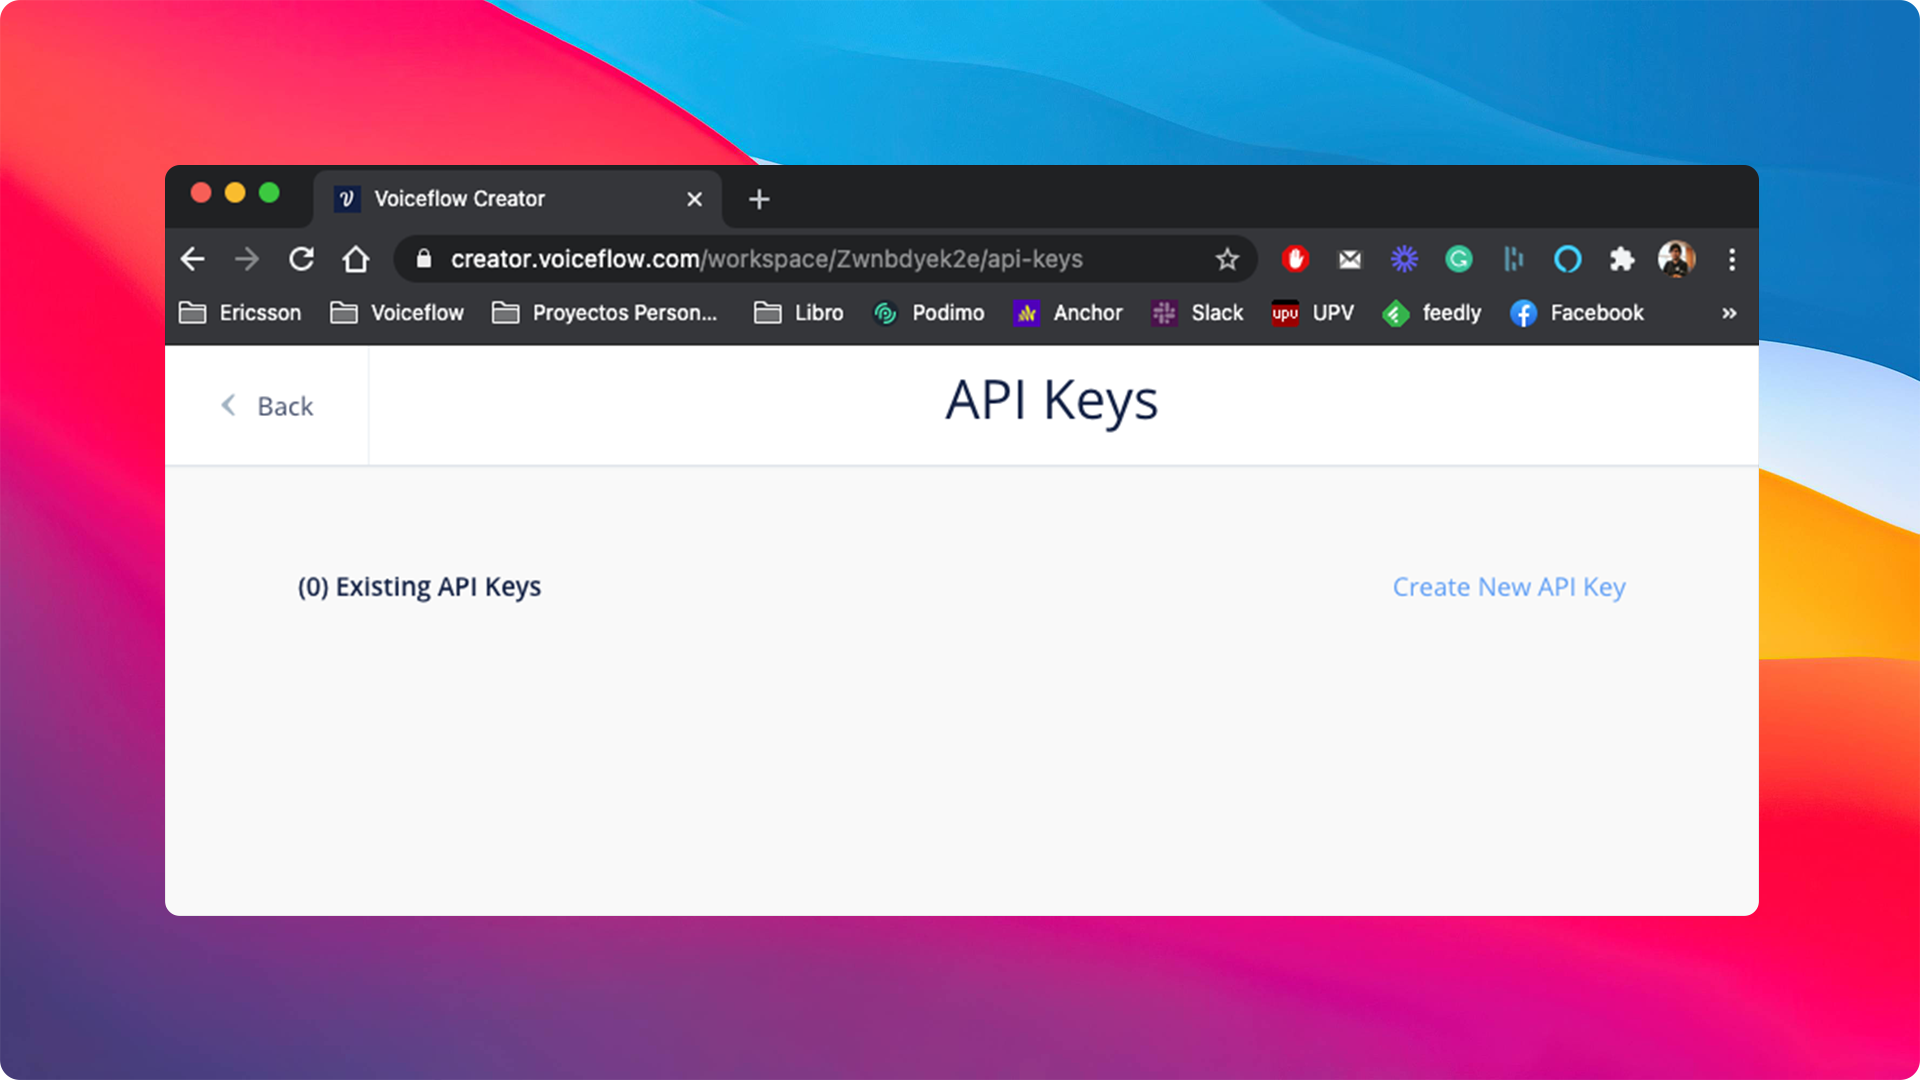
Then we have to click to {% c-line %}Create new API Key{% c-line-end %} button to create a new one:
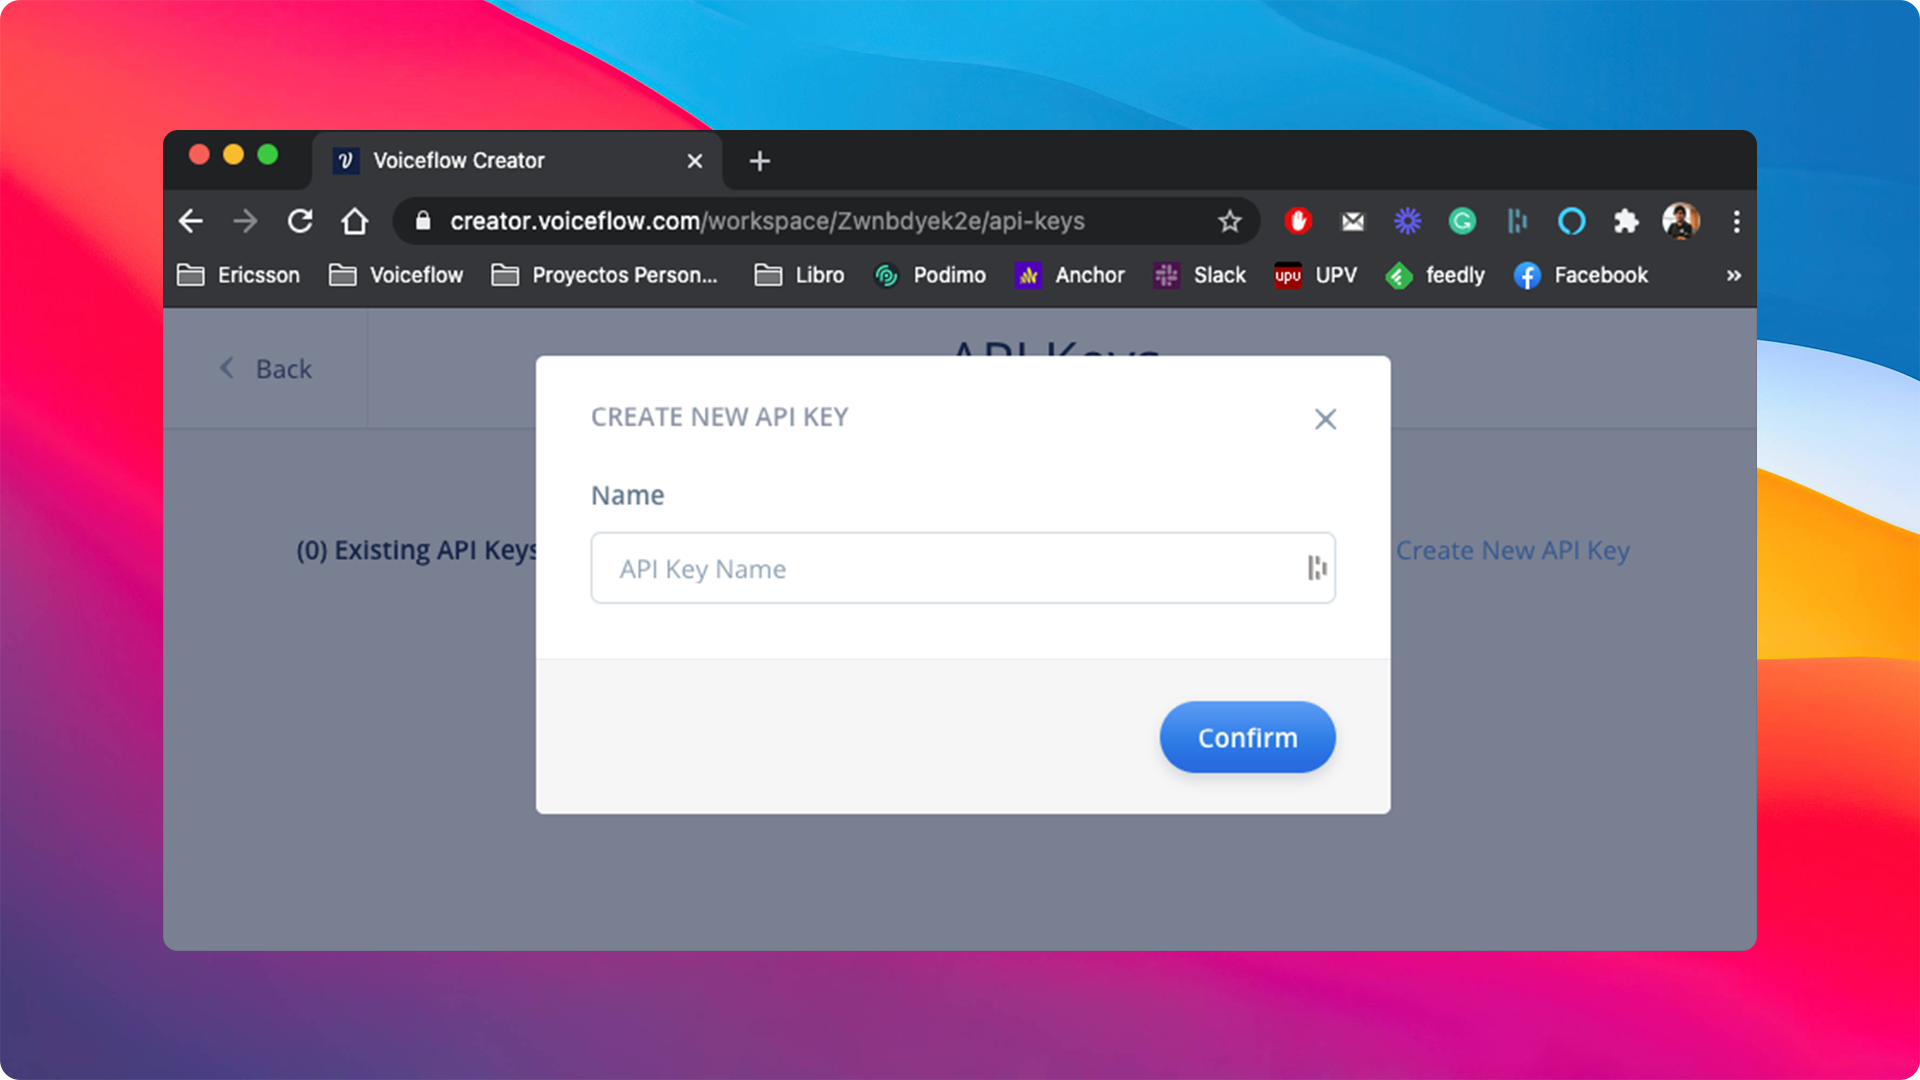
You need to add a name to the new API Key, for example, {% c-line %}telegram-bot{% c-line-end %}. Once we have filled it, we can click the {% c-line %}Confirm{% c-line-end %} button:

Finally, we have to add these variables to our final {% c-line %}.env file{% c-line-end %}. It should look like this:

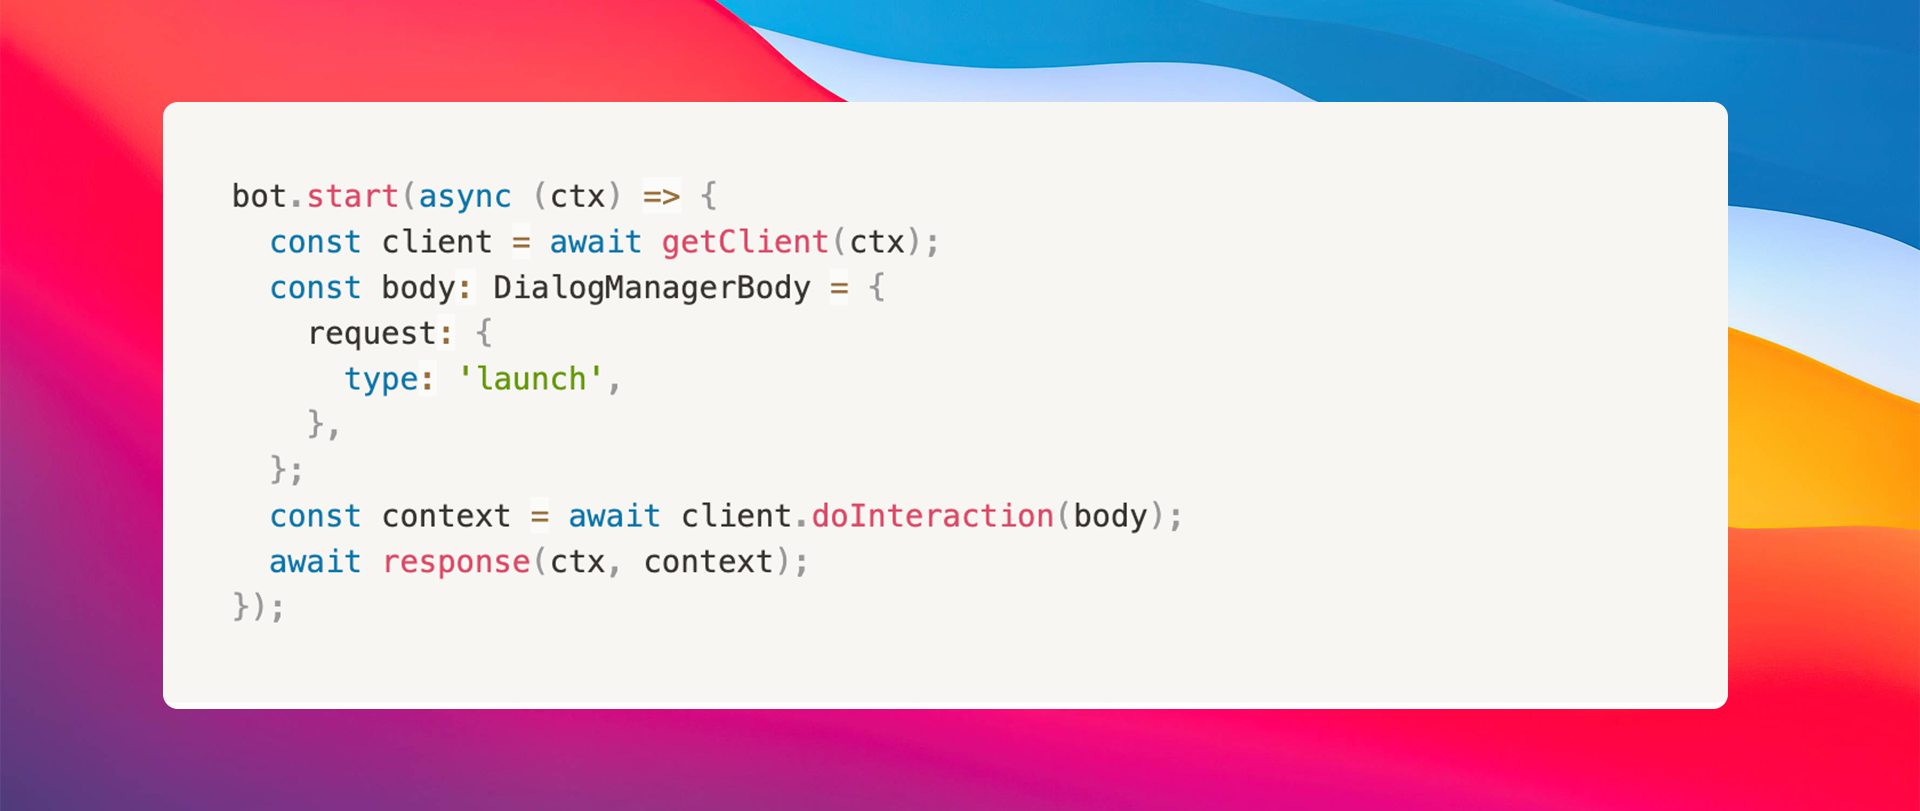
Everything is ready. Let's continue with our Telegram bot code. Let's replace the standard start replay for the one below, getting the correct replay from Voiceflow:
Then we replace the {% c-line %}hi{% c-line-end %} utterance for a regex like {% c-line %}(.+){% c-line-end %}. This means that the bot will hear for everything. All the text received we will pass directly to Voiceflow and we manage the state of the conversation: if it is ended or if it is not ended yet:
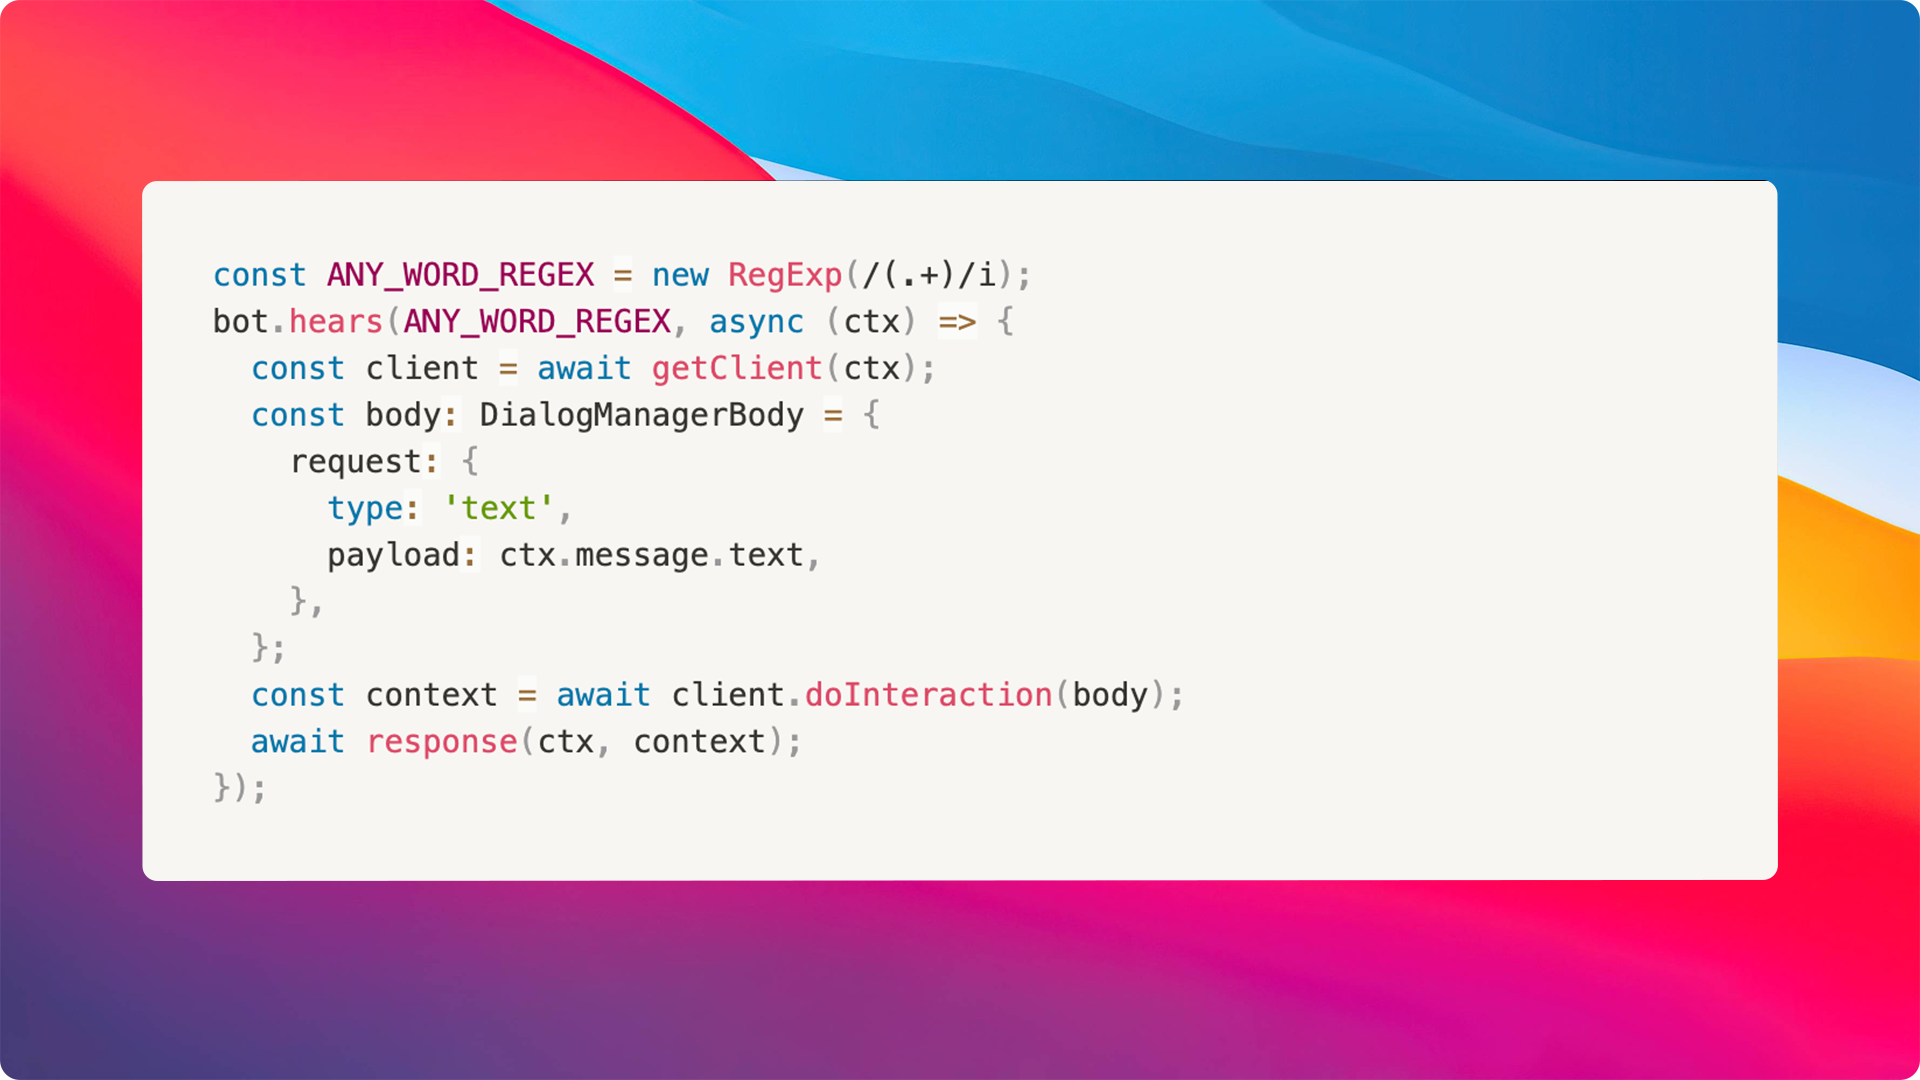
The response method is in charge of sending the user input in Telegram to Voiceflow using the runtime client SDK. This allows us to process the response:
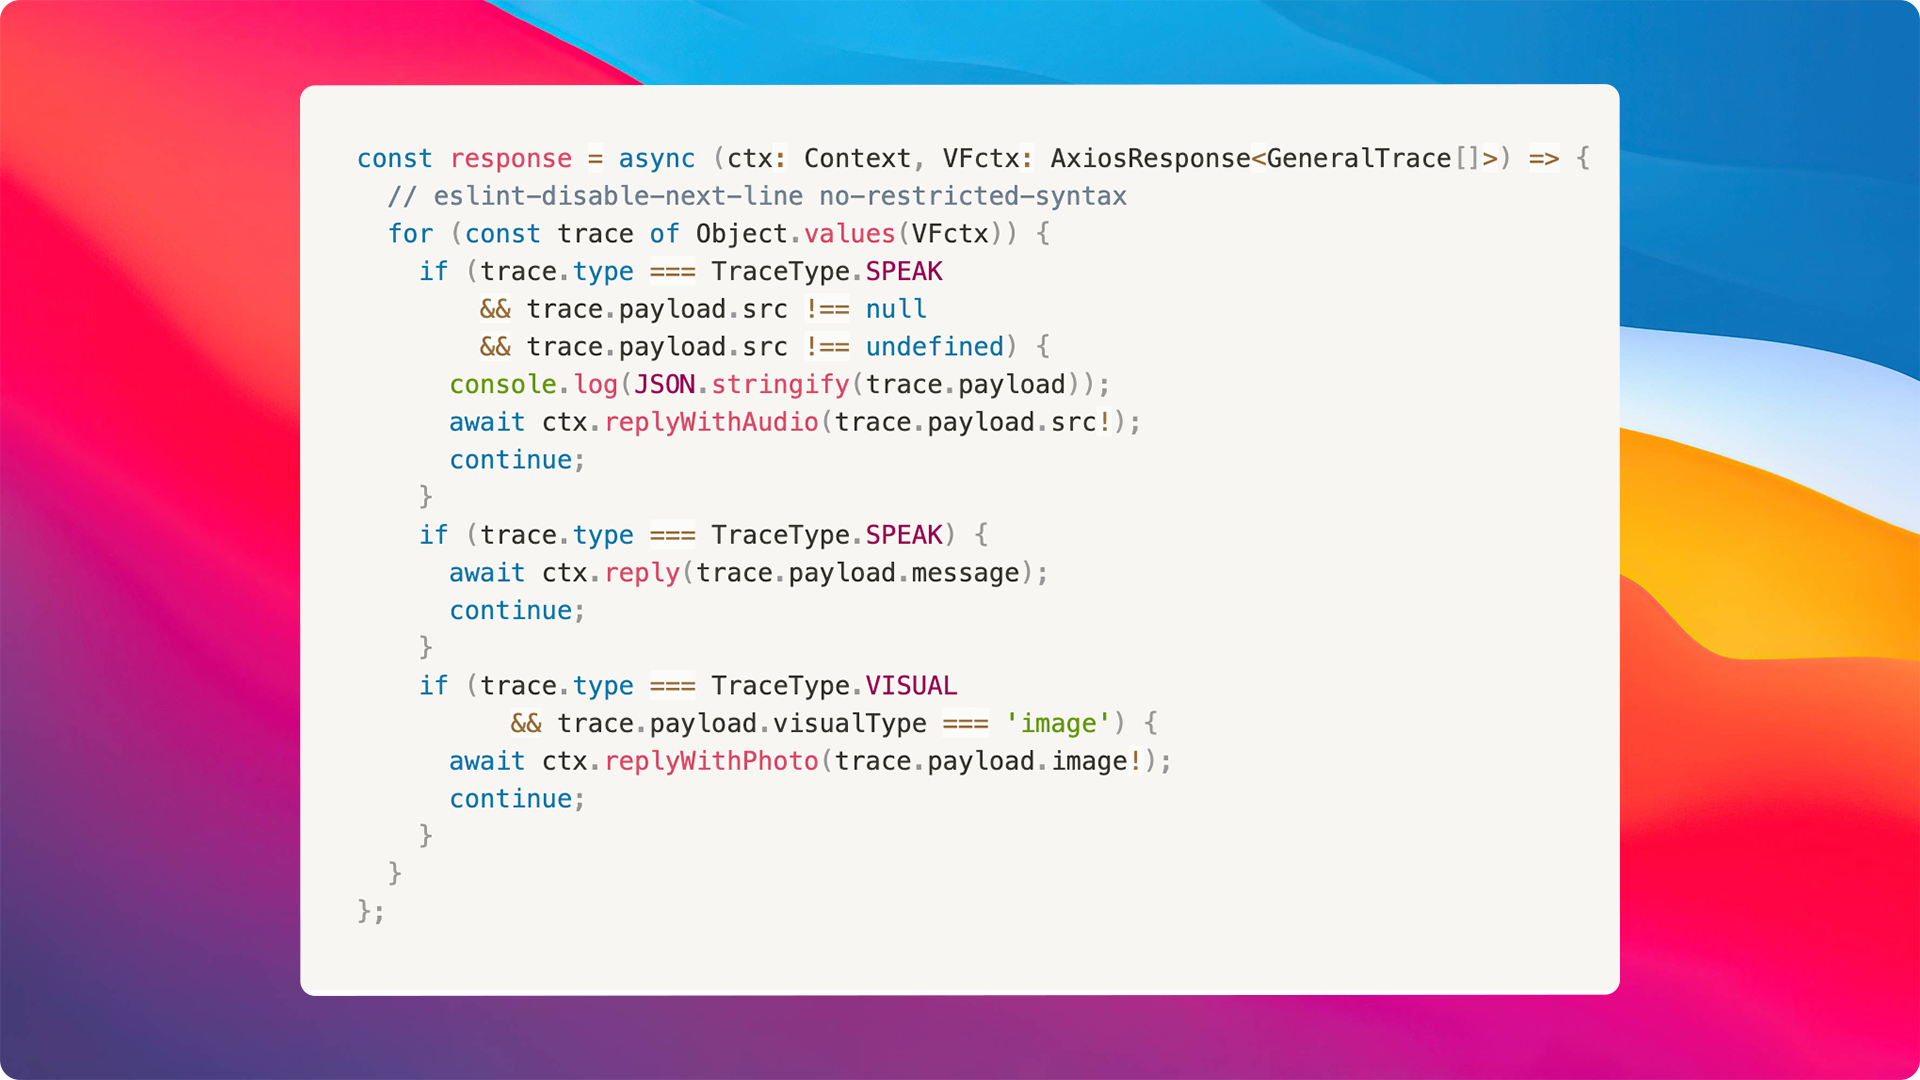
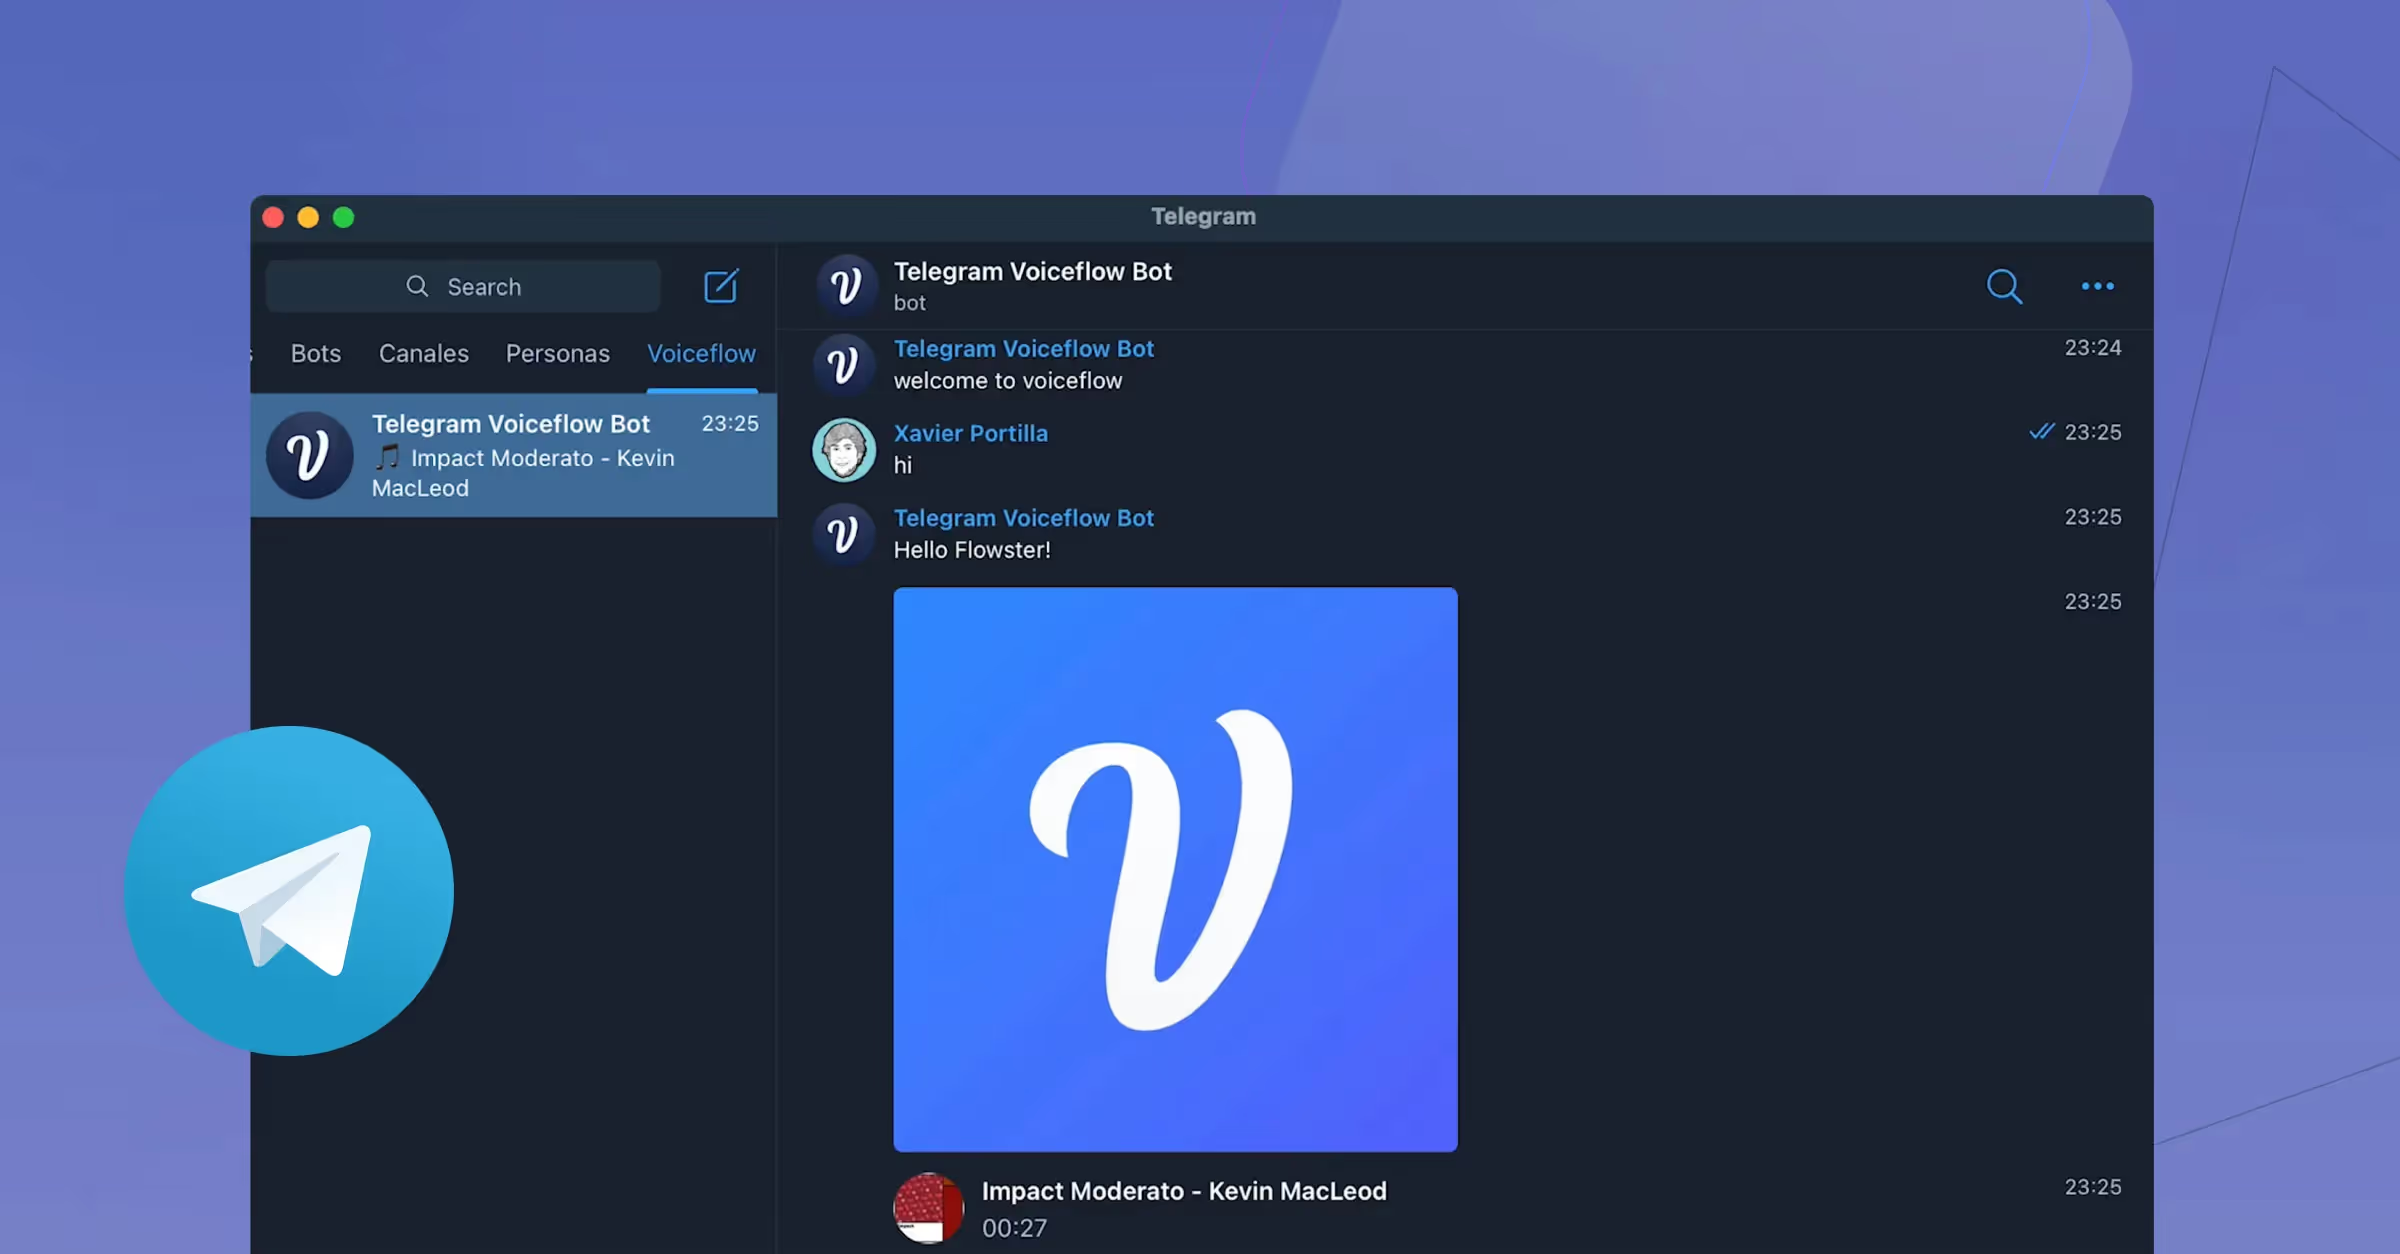
In the example above you'll notice different types of responses including {% c-line %}SPEAK{% c-line-end %}, {% c-line %}VISUAL{% c-line-end %} and {% c-line %}AUDIO{% c-line-end %}responses.

Interested in helping us improve this experience? You can submit a PR by following the steps below.
As you can see, with just 60 lines of code you can quickly bring your chat experiences to life. I hope this gives you a better understanding of how you can use Voicefow to bring conversational experiences into your very own interfaces and products. Happy coding!
Voiceflow is looking for more people who are excited to build the future of interactive conversations. You can visit this link to apply.


.avif)
.avif)