Voiceflow named a 2026 Best Software Award winner by G2
Read now


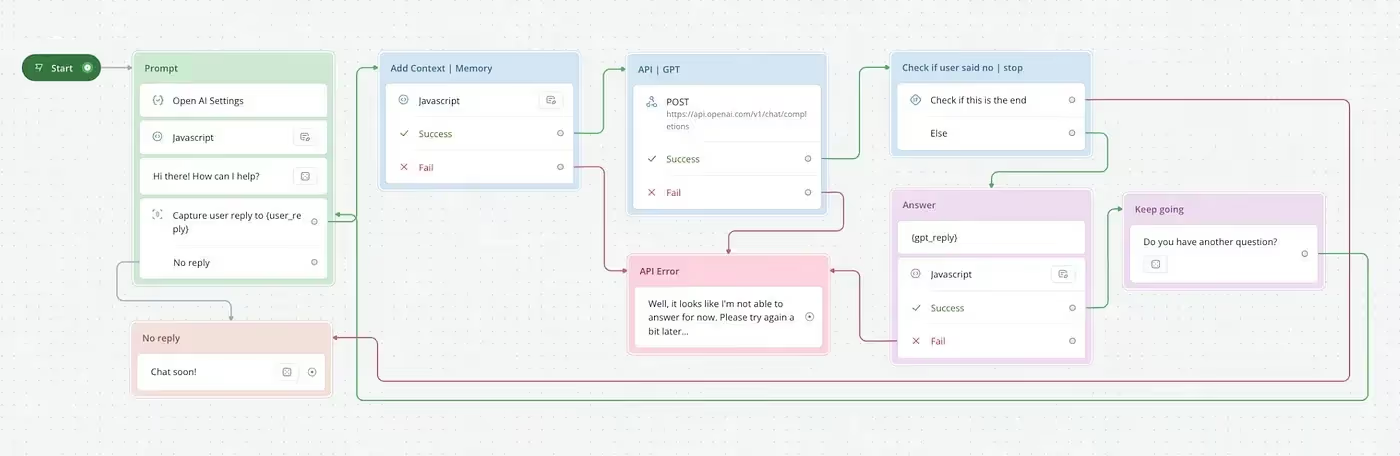
First, sign into your Voiceflow account and create a new Alexa assistant.
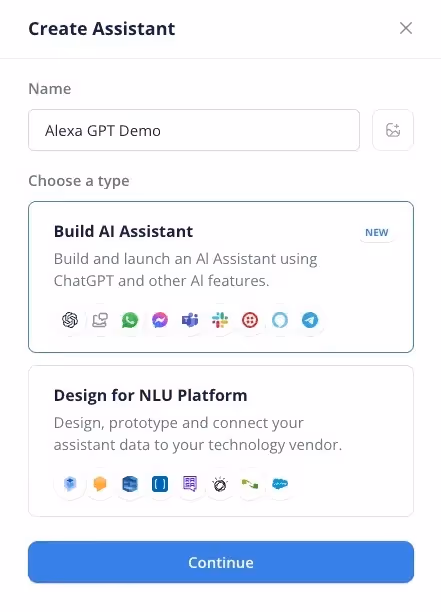
Select Amazon Alexa for the Channel, then choose the locale you want to use. (note: this feature has been deprecated)

Be sure to add the necessary variables to your project, such as:
gpt_reply
user_reply
messages
OpenAIAPIKey
OpenAIOrg
request
isEnd
Next, populate the Open AI Settings step with your OpenAI API key and your Org ID (if you have one).
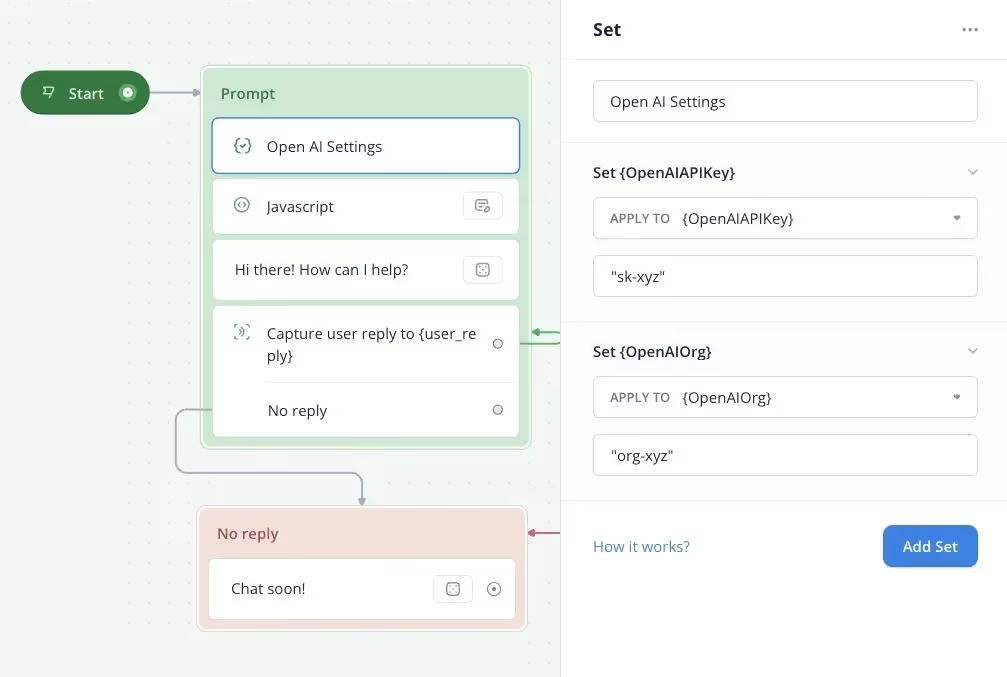
Then use a Javascript Step below to initiate the variables and push the first content to the {messages} array.
[.code-tag]gpt_reply = ''
user_reply = ''
messages = []
messages.push({"role": "system","content": `You are a AI Assistant who loves helping users! If at anytime the user wants to stop the conversation or means something similar to \"no\", \"stop\" or don't want any more help, return only \"1\" as your answer. If that's not the case, answer the question as truthfully as possible using the provided context, and if you don't know the answer, say \"I don't know.\".`})[.code-tag]
Here, we're adding some content and rules for the “system” to act as an AI Assistant, answer the user, or return 1 whenever the user wants to end the conversation and doesn’t need more help.
You are an AI Assistant who loves helping users! If at anytime the user wants to stop the conversation or means something similar to ”no”, ”stop” or don’t want any more help, return only ”1” as your answer. If that’s not the case, answer the question as truthfully as possible using the provided context, and if you don’t know the answer, say ”I don’t know”.
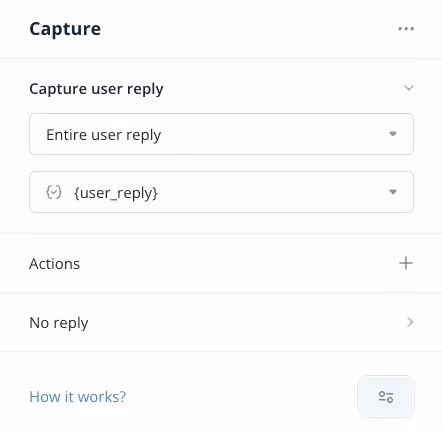
Capture user input using a Capture step and map the entire user’s reply to the {user_reply} variable.
Create a JavaScript code step to process user input, add user reply to the messages array, and generate a request object for the OpenAI API. The request object should include:
[.code-tag]messages.push({"role": "user", "content": user_reply})
request = {
"model": "gpt-4-0314",
"max_tokens": 256,
"temperature": 0.4,
"messages": messages
}
request = JSON.stringify(request)[.code-tag]
Last step is to JSON.stringify the request so we can use it in the API step without any issue.

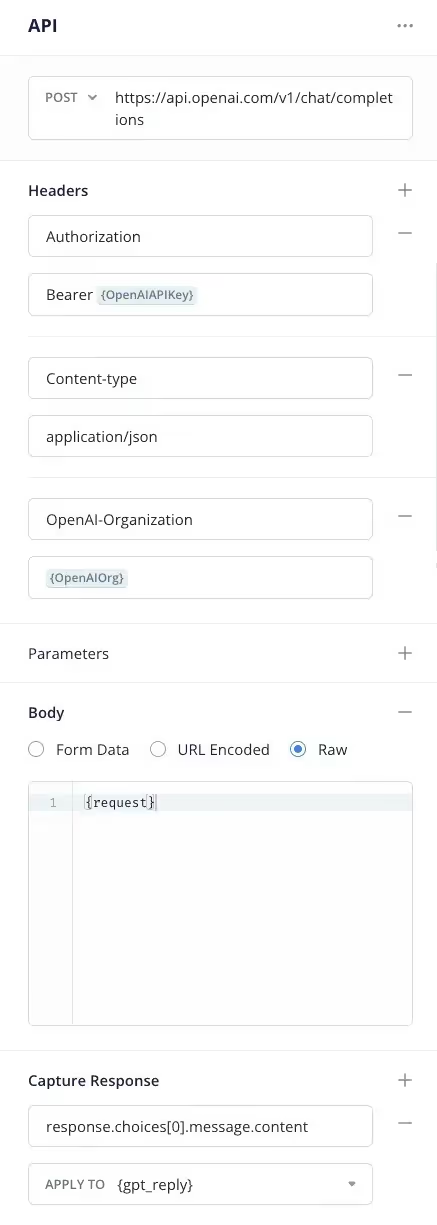
Next, use the API step to send the request object to the OpenAI API and store the response in the GPT reply variable.
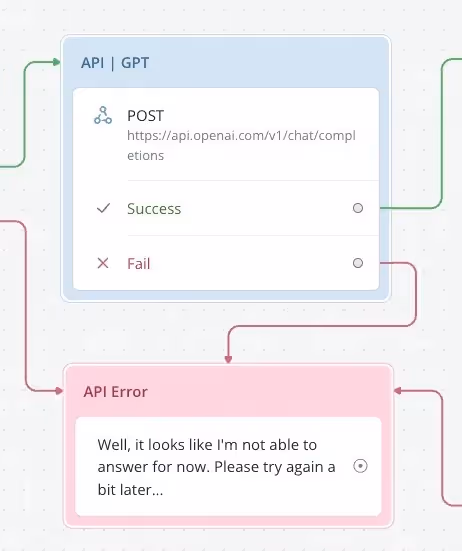
Set up the API step in Voiceflow using the following configuration:
[.code-tag]Content-Type: application/json
Authorization: Bearer {OpenAIAPIKey}
OpenAI-Organization: {OpenAIOrg}[.code-tag]
If you’re not going to use the OpenAI-Organization, simply remove it from the headers.
[.code-tag]response.choices[0].message.content
{gpt_reply}[.code-tag]
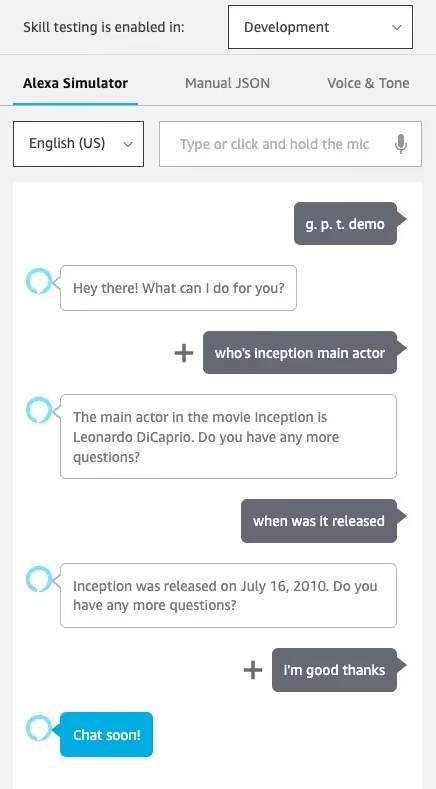
Create a condition step to check if the gpt_reply value is equal to “1.” If it is, this indicates that the user wants to stop the conversation, and the skill should respond with a farewell message like “Chat soon!”
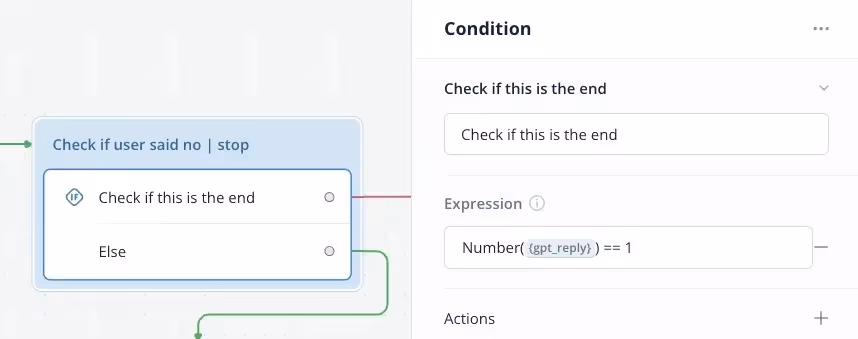
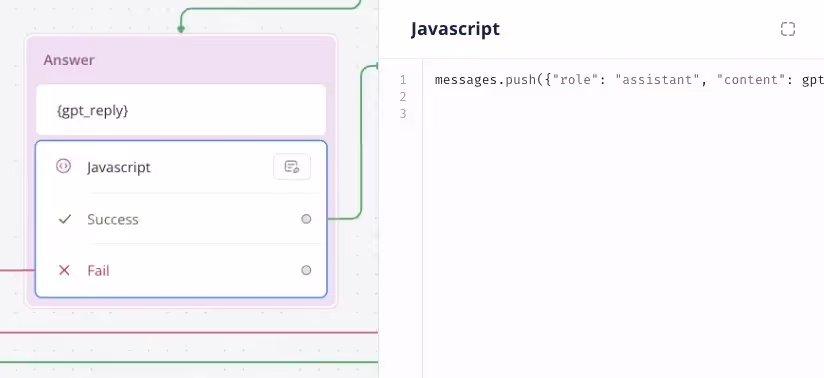
If the gpt_reply value is not equal to “1,” continue the conversation by sending the gpt_reply to the user in a Speak step.

The Javascript Step below the Speak step add the gtp_reply to the message array as the assistant content.
[.code-tag]messages.push({"role": "assistant", "content": gpt_reply})[.code-tag]
Loop back to the Capture step to allow the user to ask another question or end the conversation if gpt_reply is “1”.
1. Test your assistant in the Voiceflow test tool.
2. Make any necessary adjustments to improve the conversation flow and user experience.
3. Publish your skill to the Amazon Alexa Developer Console.
Congrats! You’ve successfully created an Alexa skill using Voiceflow and GPT-4. From here, I encourage you to have some fun exploring the capabilities of OpenAI’s GPT models and engaging in conversations with your new Alexa AI assistant.


.avif)
.avif)