Voiceflow named a 2026 Best Software Award winner by G2
Read now

At the heart of modern conversational agents is the "dialog manager". Though definitions vary, at a high level, all dialog managers determine the most fitting output given some (set of) user input(s).
Inputs and outputs can be divided into 2 broad categories: audio and transcript. Most dialog manager implementations that accept audio inputs usually implement some variation of speech-to-text functionality to rectify the input audio (large parameter space) into a text transcript (smaller parameter space) in order to reduce the computational cost and duration of the downstream processes.
Similarly, on the output-side, dialog managers usually produce a text output so that different implementations of text-to-speech can be used to produce the desired voice(s) based on branding and context. To ensure maximum flexibility, Voiceflow's dialog manager API expects a text transcript input and produces both a text and an audio output based on a preconfigured voice persona.
Now that inputs and output formats are specified, the dialog manager problem is simplified to a "black box" application that ingests an input transcript from the user and outputs the response transcript to the user. Many competing implementations for this black-box exist; in many cases, they are quite literally black-box machine learning models.
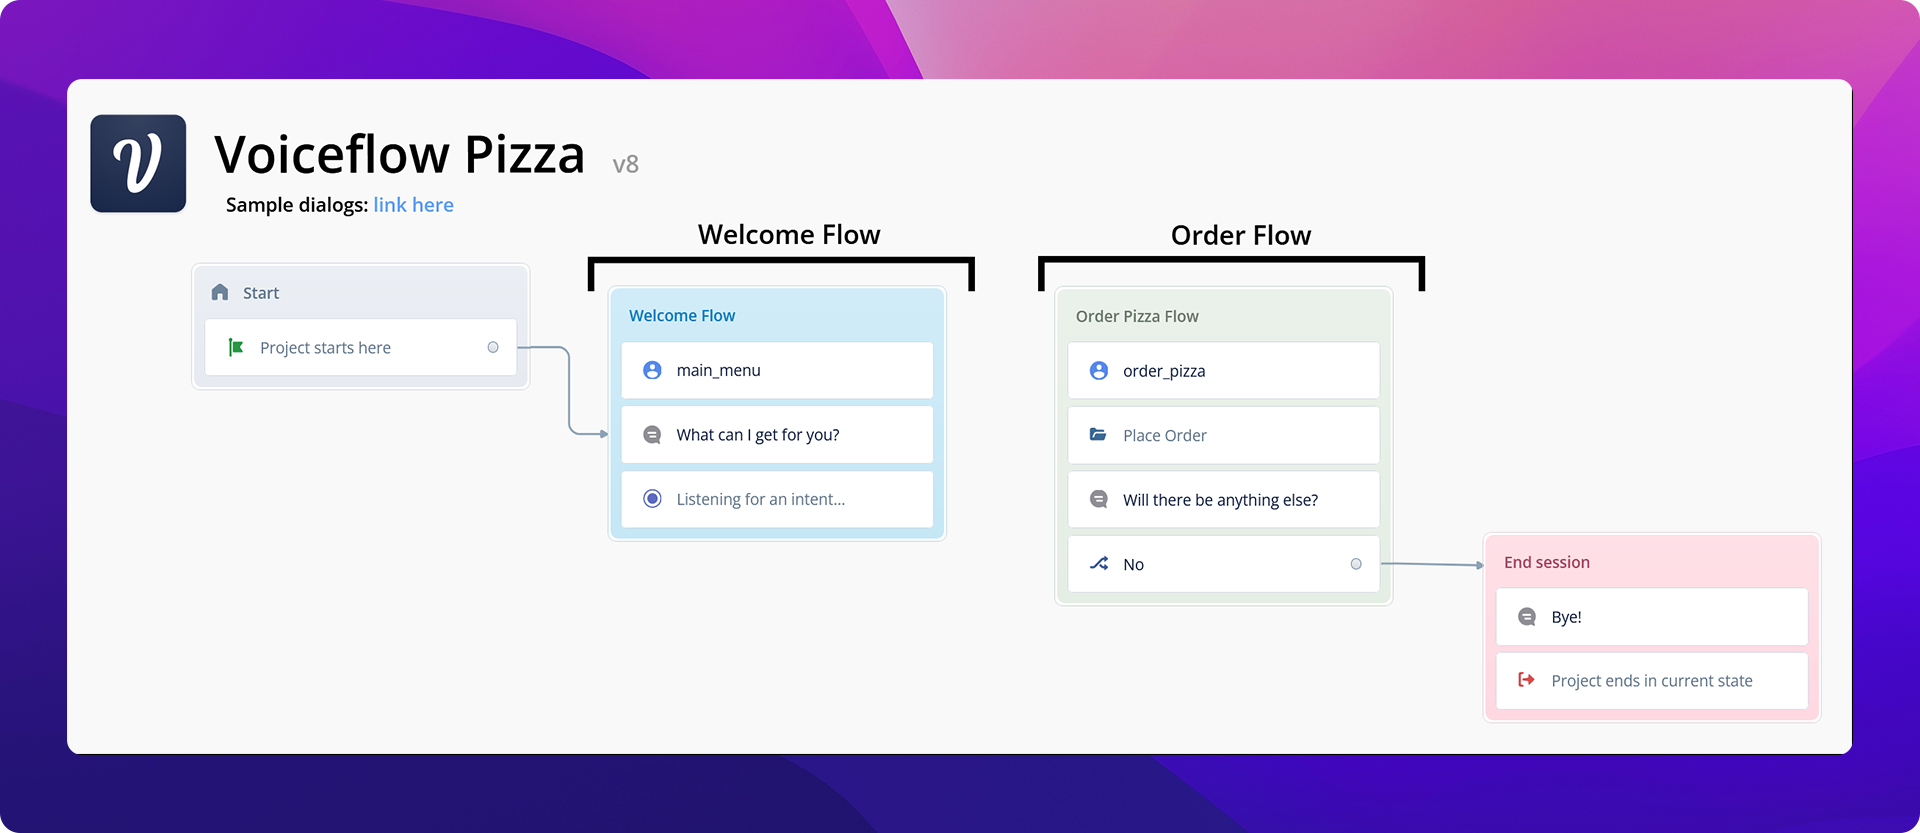
Voiceflow approaches this problem from a different perspective: allow the designer to specify an observable and explainable logical transition graph that can be triggered by various different user intents. Two concepts are introduced here:
Intent classification and entity extraction are two natural language processing techniques used to further simplify the problem space for the dialog manager. Instead of training machine-learning models to directly ingest the input transcript and determine the appropriate response, the input transcript can be parsed by a specialized model to classify what the user "intends" to do; in other words, an "intent".
This process is akin to a familiar subconscious process in our every day conversation: simplifying the amount of something from concrete numbers (eg. "550mL") into several broad categories like "large", "medium", and "small". Someone telling you they'd like a "large" soda is simpler to understand and process than someone telling you they'd like a "750mL cup" of soda.

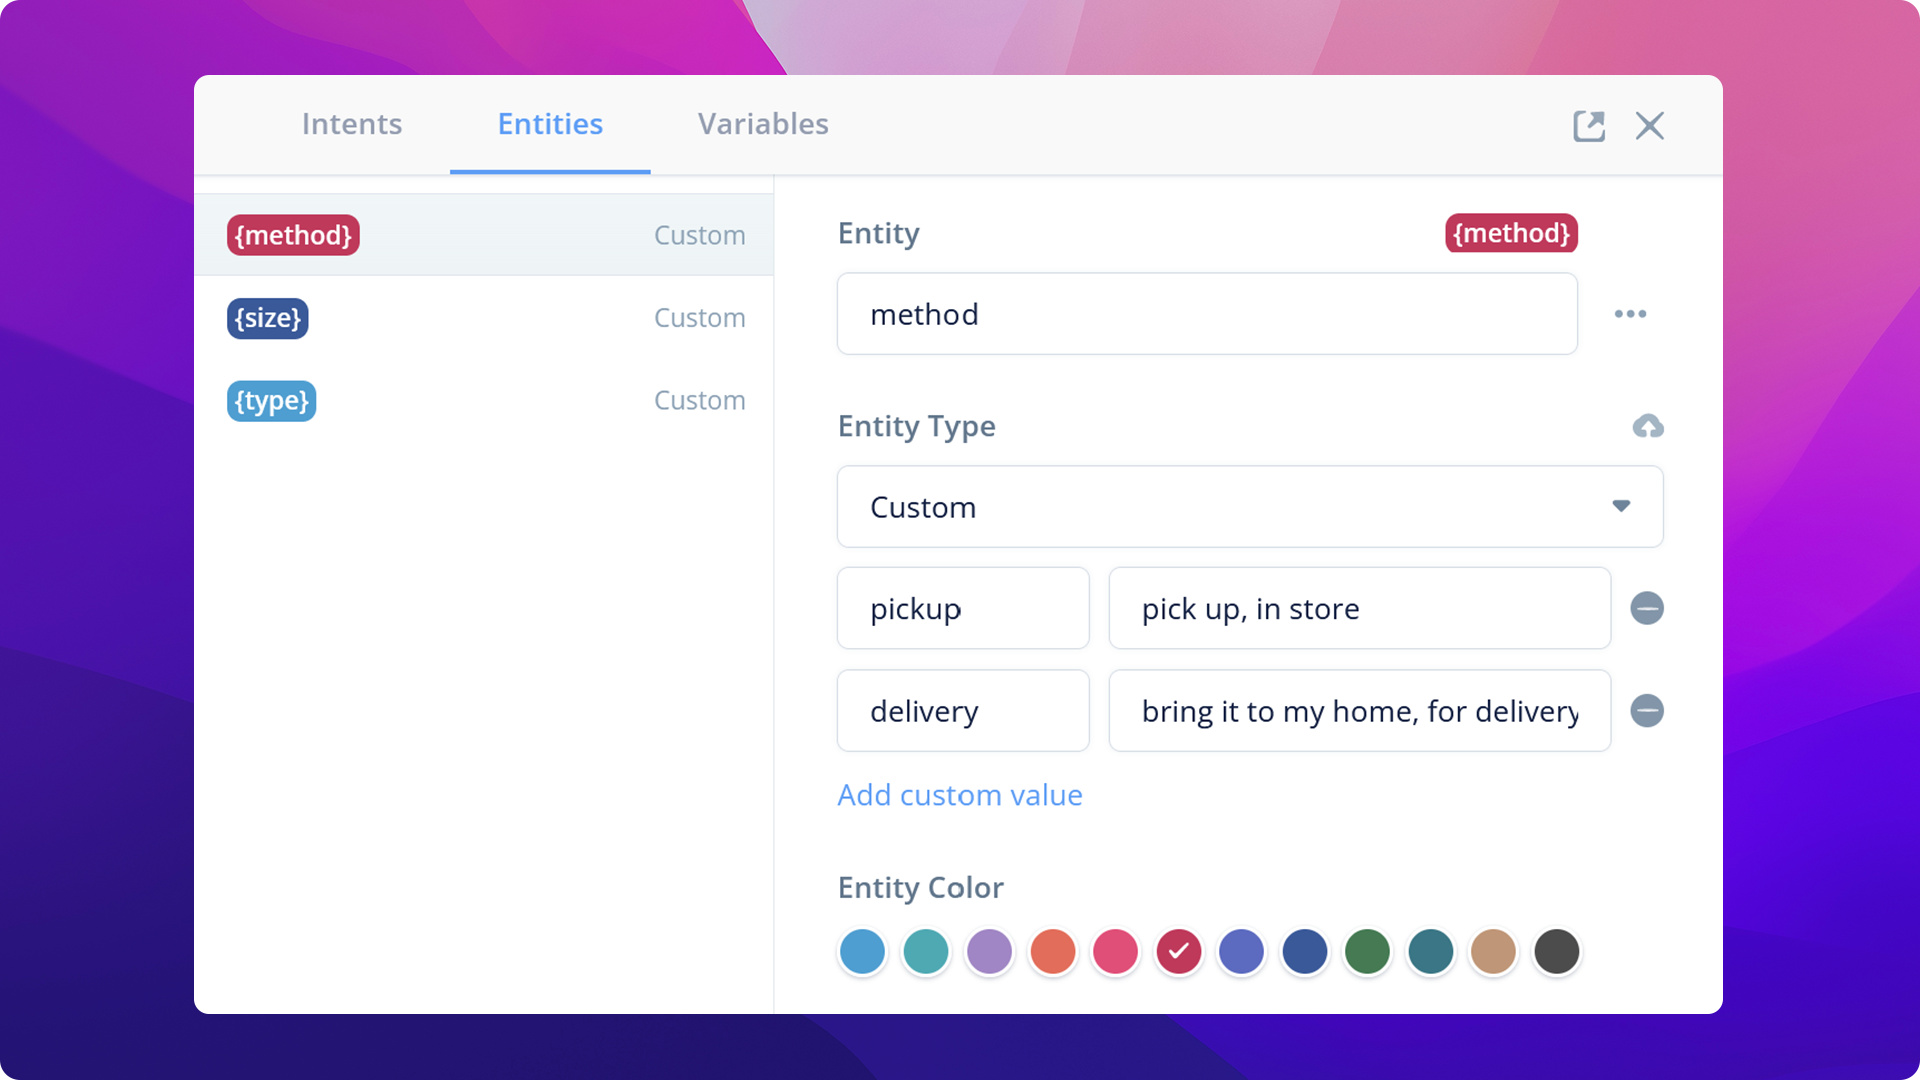
What if you wanted to parse specific user inputs? For example, you want to get the size of a pizza that the customer wants to order. That's where entity extraction comes into play.
In your language model, you can define mark specific words and sentence positions as entities. The natural language processing engine will then be able to extract the words that are of a similar category (eg. size, color, location) and/or in a similar structural position (eg. and adjective) to be used in other parts of your conversational application.
A diagram is a container for various logic paths that can be invoked by different user intents. Each node in the directional graph represents a concrete change in the conversational state, whether it's to update certain variables in the application (eg. counters) or to invoke the client interface (eg. Alexa, Google Home assistant, webchat) to produce an output (eg. Speak, display graphic).
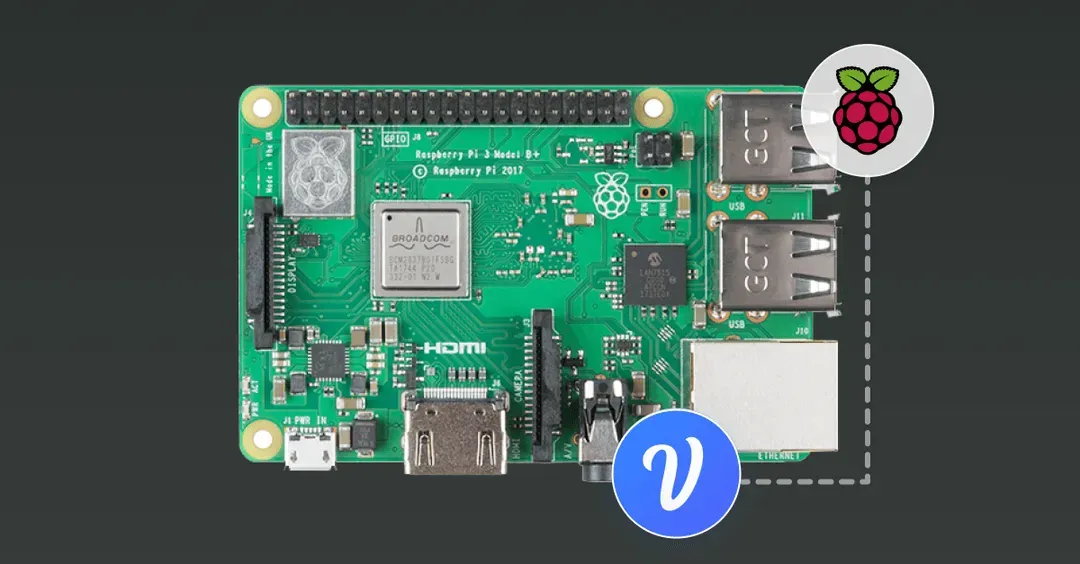
Integrating all of the components, we can create a simple Raspberry Pi conversational client:

The Raspberry Pi is a thin client, in this application, since it is only responsible for calling Voiceflow's dialog manager API with the user input transcript, and playing back the audio generated from Voiceflow. The language model and logic of your conversational agent can be designed and tested on the Voiceflow Creator tool.
On the Raspberry Pi, we will make use of the following technologies:
Note: This system was tested with the Raspberry Pi Zero W+ and the Seeed Studio ReSpeaker 2-Mics Pi HAT. Other audio input/output systems may not work!
Feel free to skip this step if you already have WiFi configured on your Raspberry Pi. These instructions are condensed from the instructions:

After booting up the Pi, ensure connectivity by SSHing into {% c-line %}pi@raspberrypi.local{% c-line-end %}. It's always a good idea to change the default password of the {% c-line %}pi{% c-line-end %} user; or better yet, disable password authentication and use certificate authentication!
Following this:

If you'd like your LEDs flashing too, remember to enable the SPI driver:

Restart the Rpi.
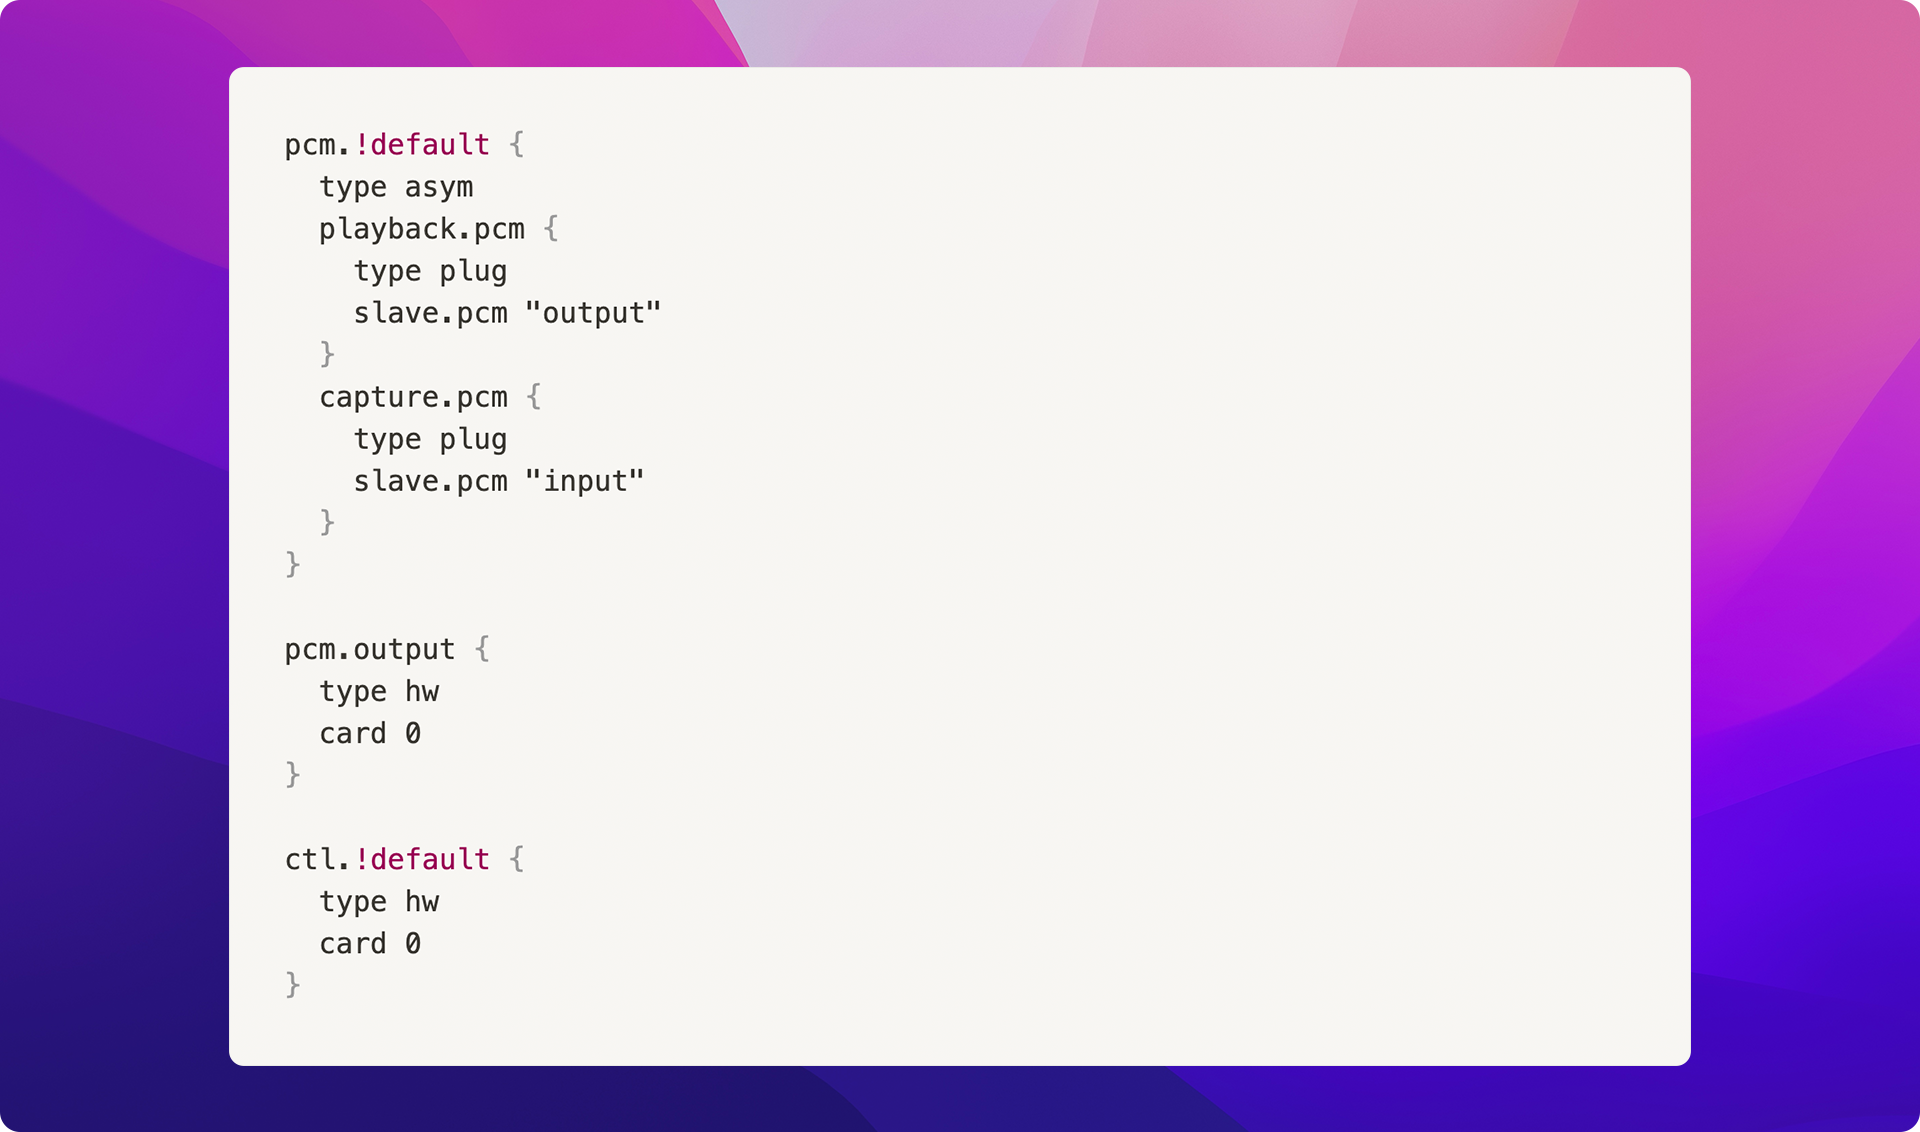
In order for the picovoice library to work optimally, we must configure an additional file ~/.asoundrc with the following contents:
The Google Speech-to-Text service is used by the program to effectively "convert" the audio captured by the microphone into text for later stages of the processing pipeline.
You can learn more about setting up a Google Service Account under the "Setting up Authentication" section on their official guide.
Repository: https://github.com/voiceflow/rpi-voice-assistant.git
NOTE: the {% c-line %}main{% c-line-end %} branch code is distributed with the MIT license; the {% c-line %}gpl2-leds{% c-line-end %} branch contains the GPLv2 code for driving LEDs and thus is licensed under GPLv2.
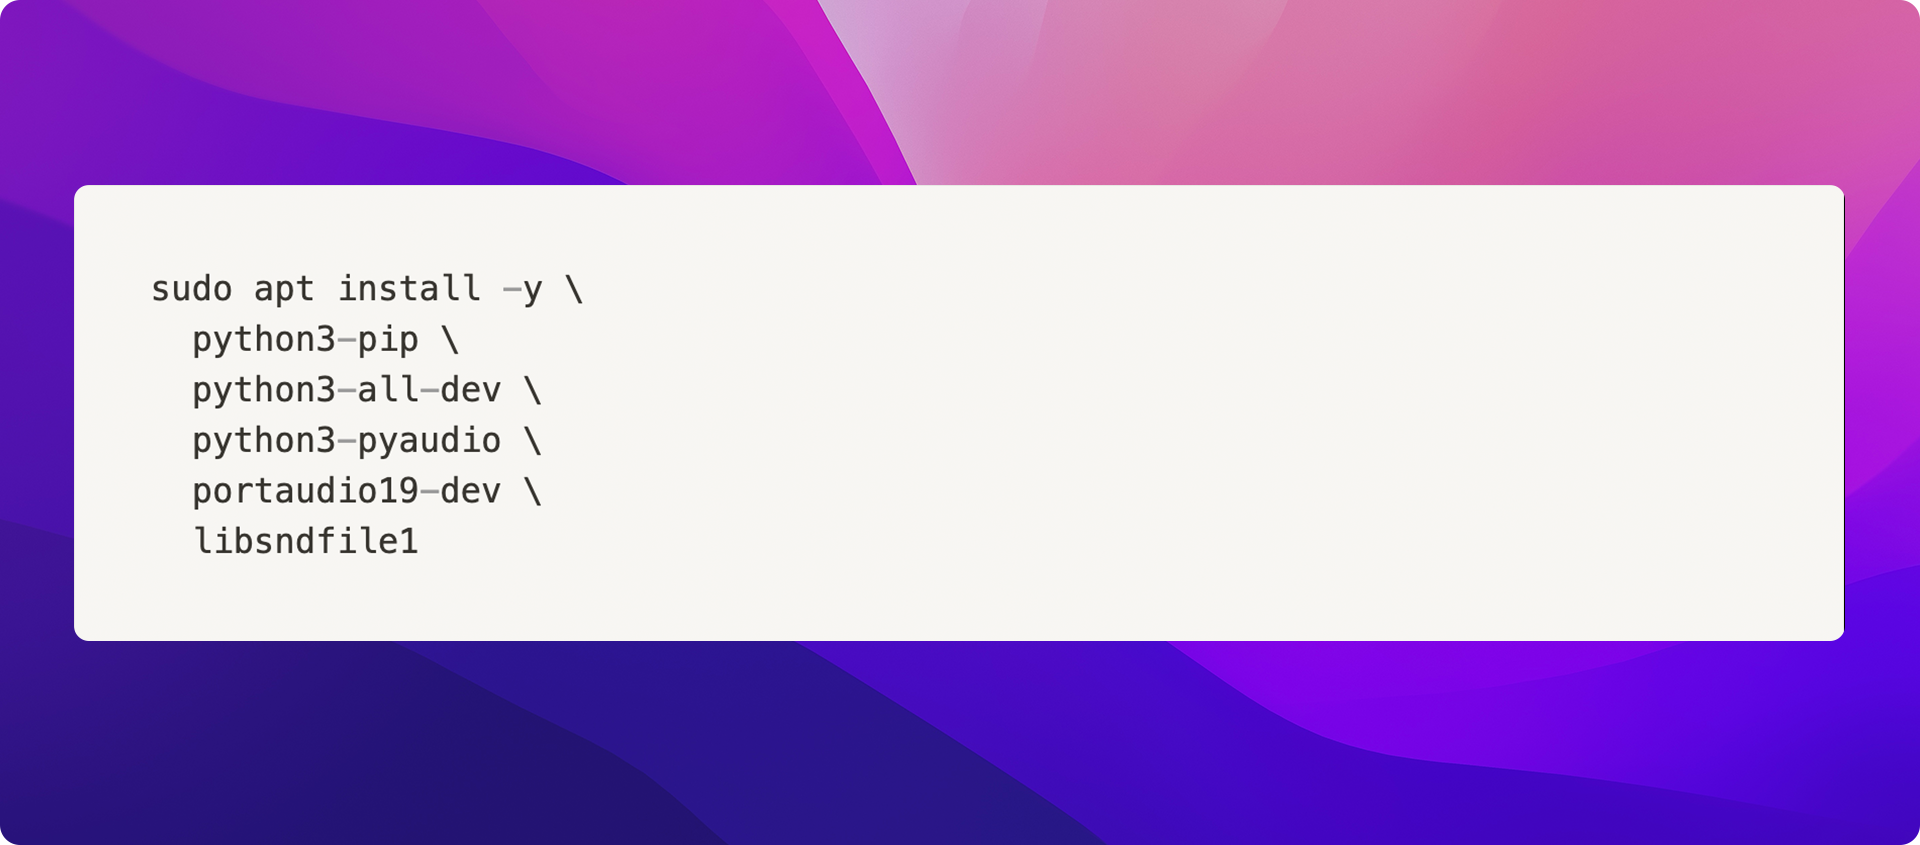
Install system dependencies:
Install dependencies: {% c-line %}pip3 install -r requirements.txt{% c-line-end %}
In the cloned repository directory, you will need to create a {% c-line %}config.yaml{% c-line-end %} file and populate it with the following fields:
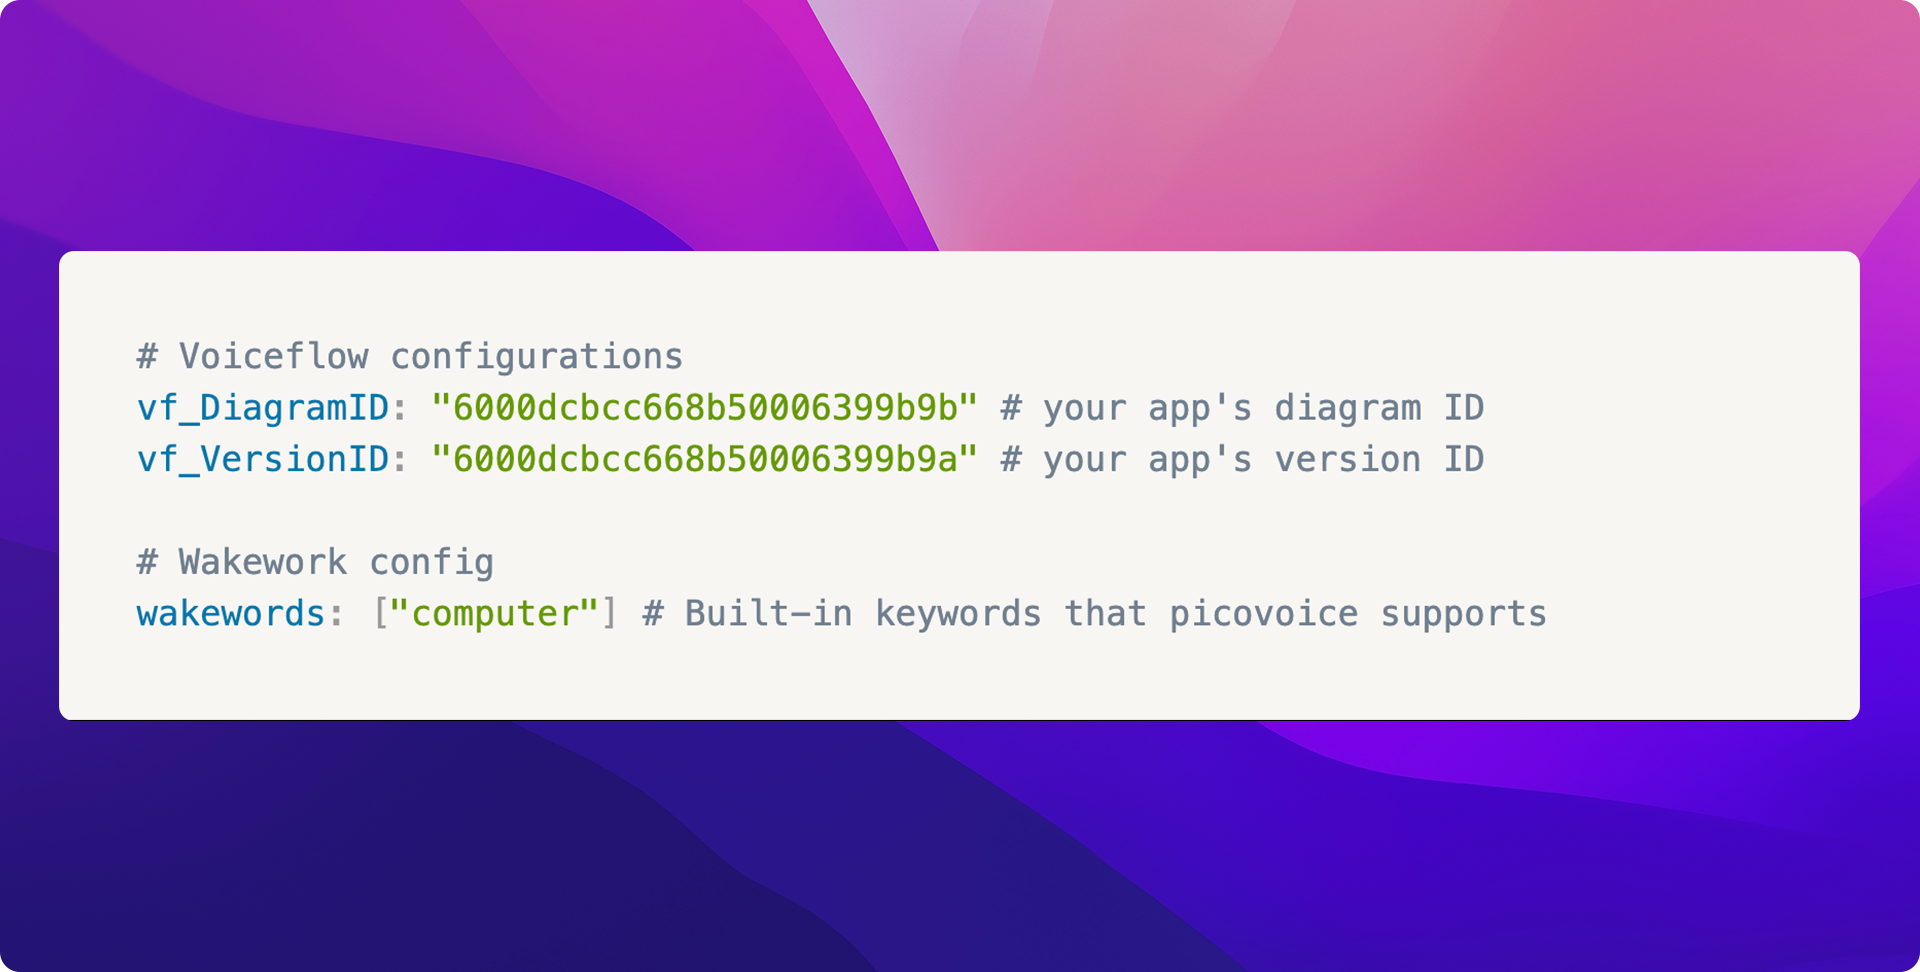
Custom wake word models can be trained on the Picovoice console, subject to commercial/personal license agreements. The wake word itself and several audio samples should be provided and the trained model is specific to particular CPU/OS environments. The details of this process can be found here. Some code changes are required to make use of the custom-trained model, but this is beyond the scope of this article.
Source: {% c-line %}src/audio.py{% c-line-end %}
This project uses Picovoice's Porcupine wake word detection engine to trigger on some pre-trained words. A special audio generator wrapper was implemented to ensure that the opened audio stream is compatible with both the {% c-line %}porcupine{% c-line-end %} library and the streaming Google Speech-to-Text library.
Source: {% c-line %}src/voiceflow.py{% c-line-end %}
Voiceflow SDK clients are currently a work in progress and not production-ready. This demo implements a simplified Python3 Voiceflow client for demonstration purposes.
Any Questions? You can learn more about how developers use Voiceflow, join our Community, or follow us on Twitter here.


.avif)
.avif)