Voiceflow named a 2026 Best Software Award winner by G2
Read now

Bots are conversational apps that a user can send and/or receive messages to/from the bot.
See the instruction below to see how you can create your chatbot package using App Studio
Here's the step-by-step how to set up the chatbot and install it on Teams.
Open App Studio in the Teams client.
Click Create a new app and fill out all the required fields including the Bot names, descriptions, etc.
Generate an App ID.

In the App URLs section, include your privacy and TOU webpages. In this example, I am using the placeholder URL, {% c-line %}https://example.com{% c-line-end %}.
From the left menu, select Capabilities > Bots.
Then, click Set up to configure a new bot. Fill out the bot name, and let's select the Personal scope for now.
Next, click Generate new password. At the prompt, copy the password. You will need to paste it in your .env file in the next step.
Copy the ID under your bot name (something looks like {% c-line %}123xx567-123x-...{% c-line-end %}) and paste it as an environment variable in your {% c-line %}.env{% c-line-end %} file.
Under App Passwords, generate a new password, and copy it. Then paste it in your {% c-line %}.env{% c-line-end %} file.
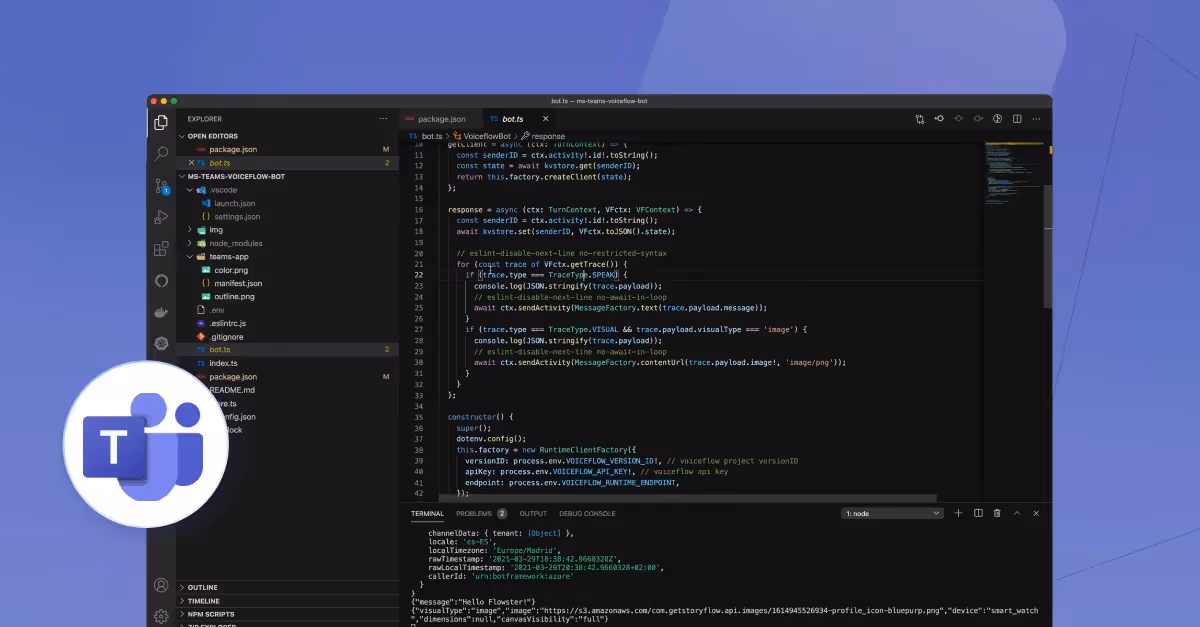
These credentials are used to initialize your bot adapter. (See index.ts).
For Messaging Endpoint, we will use ngrok. The URL should be something like: {% c-line %}https://<id>.ngrok.io/api/messages{% c-line-end %}.
Go to Finish > Test and distribute.

If you get any errors, you'll need to fix it. Otherwise, click Install.
You can also download the zip file that contains {% c-line %}manifest.json{% c-line-end %}, and two icon images to install later or distribute.
NOTE: Before we continue, it's important we create a general project on Voiceflow.
Let's create the Voiceflow client to work with Voiceflow's cloud using its Dialog Manager API:
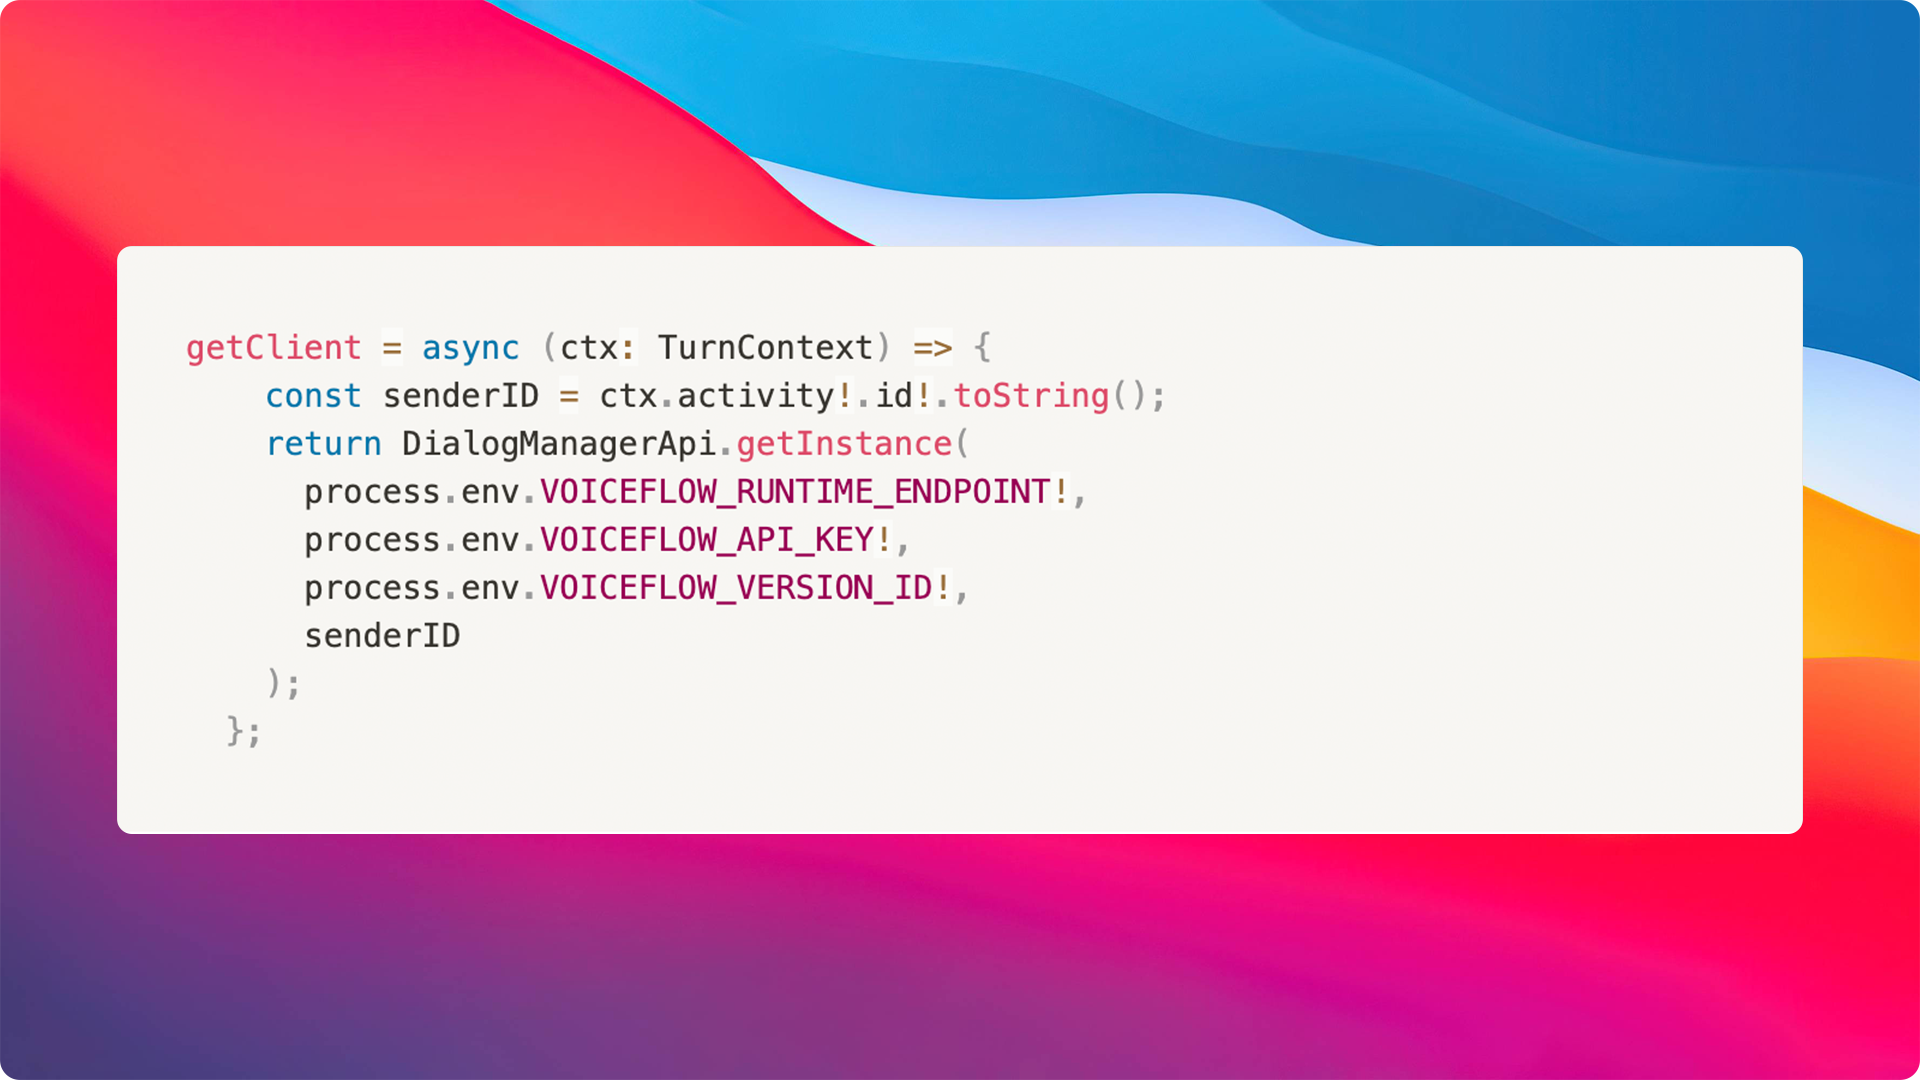
The {% c-line %}getclient(){% c-line-end %} function calls the {% c-line %}DialogManagerApi{% c-line-end %} This is the initialization of the API client.
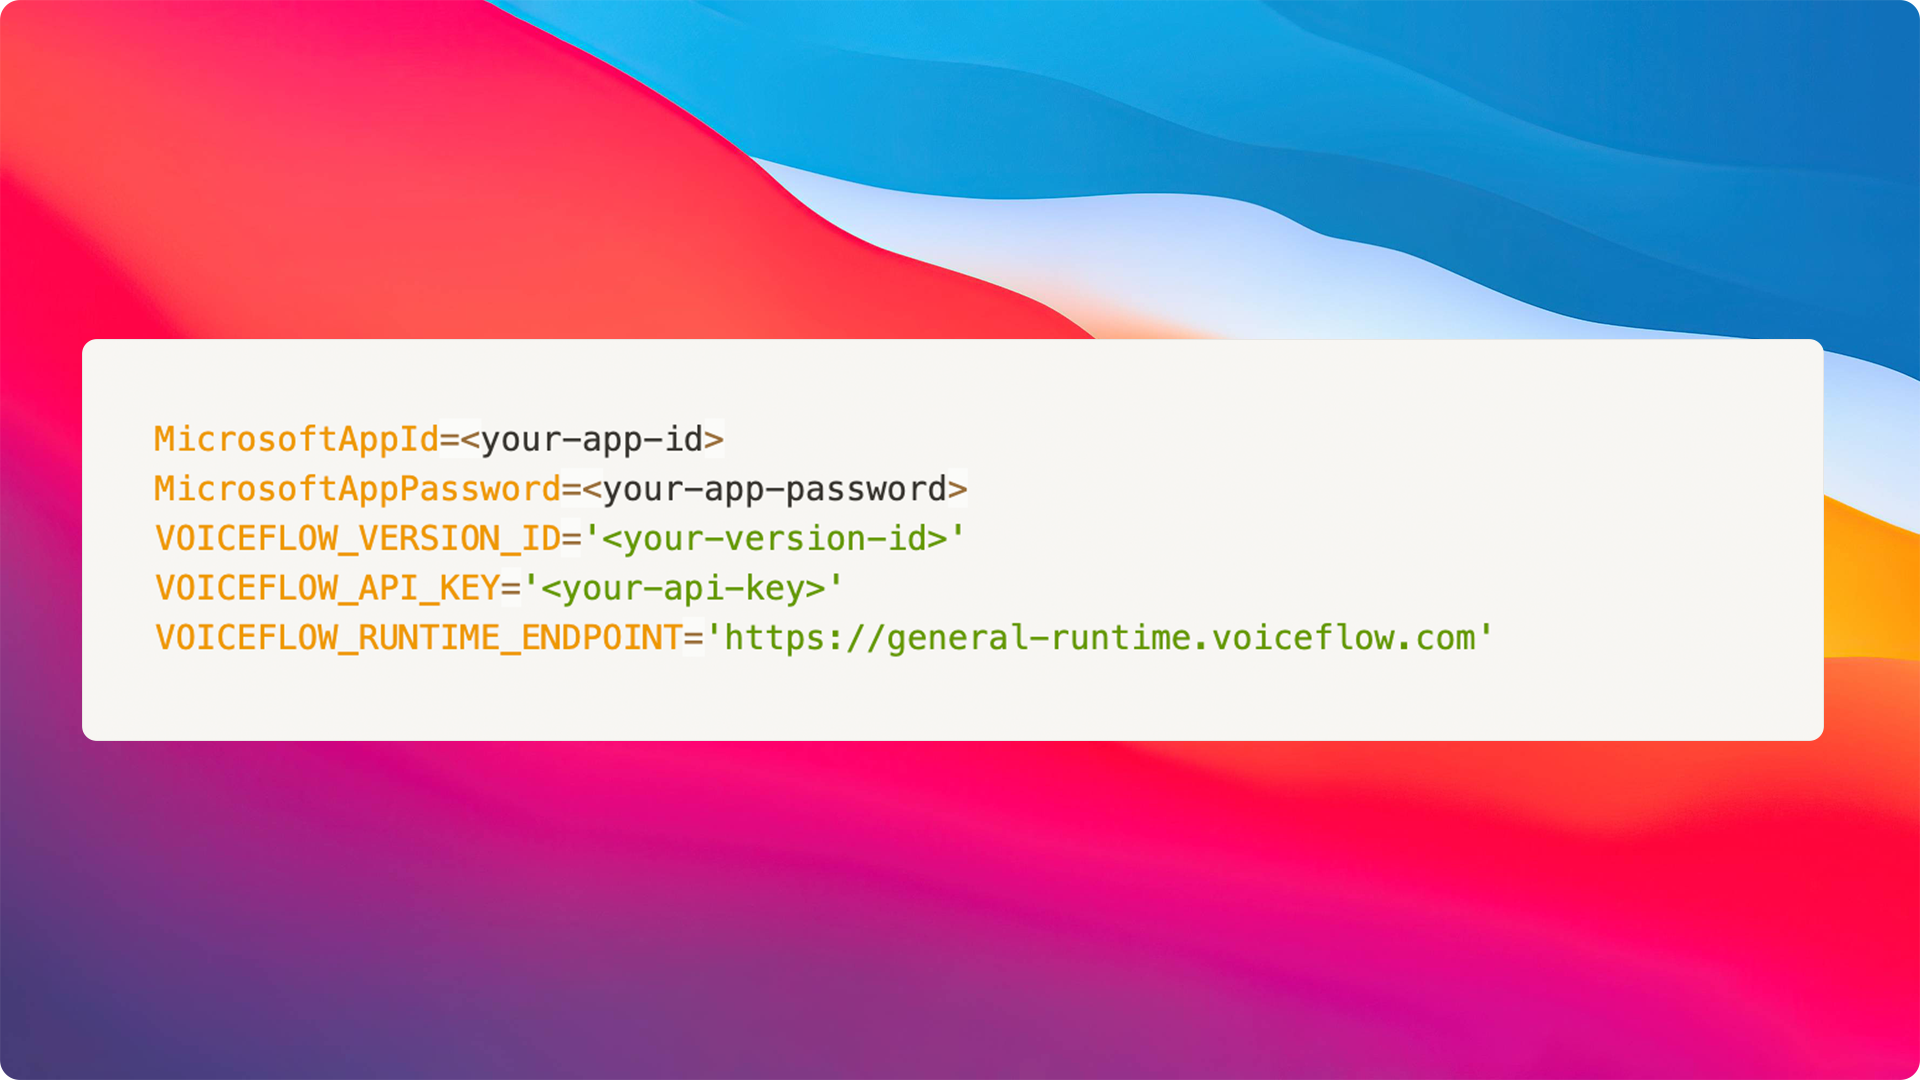
As you can see, there are some values that will be added to our {% c-line %}.env file{% c-line-end %}. Let's explain how to obtain these variables.
To obtain your VersionID, you have to go to your Voiceflow Project:

Then copy the {% c-line %}VERSION_ID{% c-line-end %} from the URL in your address bar. When you are inside a Voiceflow project, your address bar should have a URL: {% c-line %}https://creator.voiceflow.com/project/{VERSION_ID}/...{% c-line-end %}
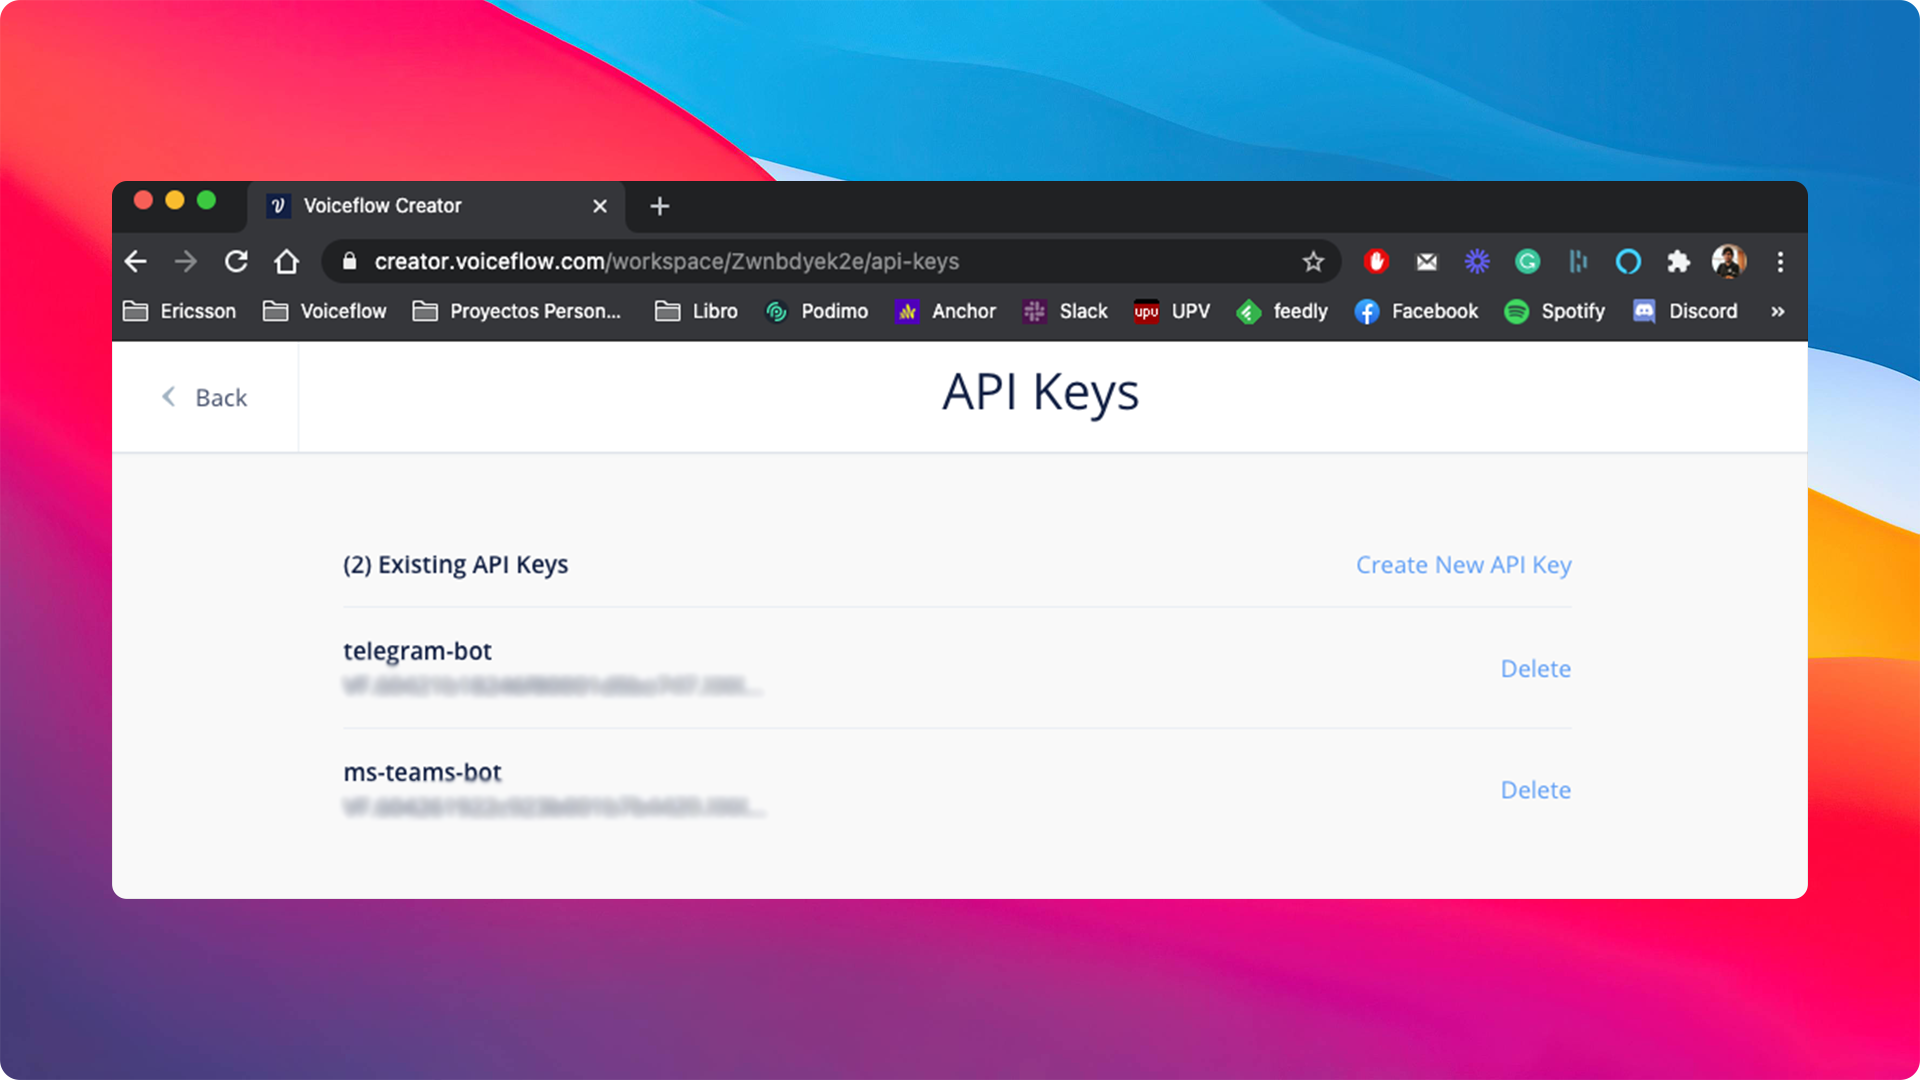
To obtain the API Key, we need to go to our workspace where we created our General Project. After this, go to the settings of this workspace and click on the developer tab:
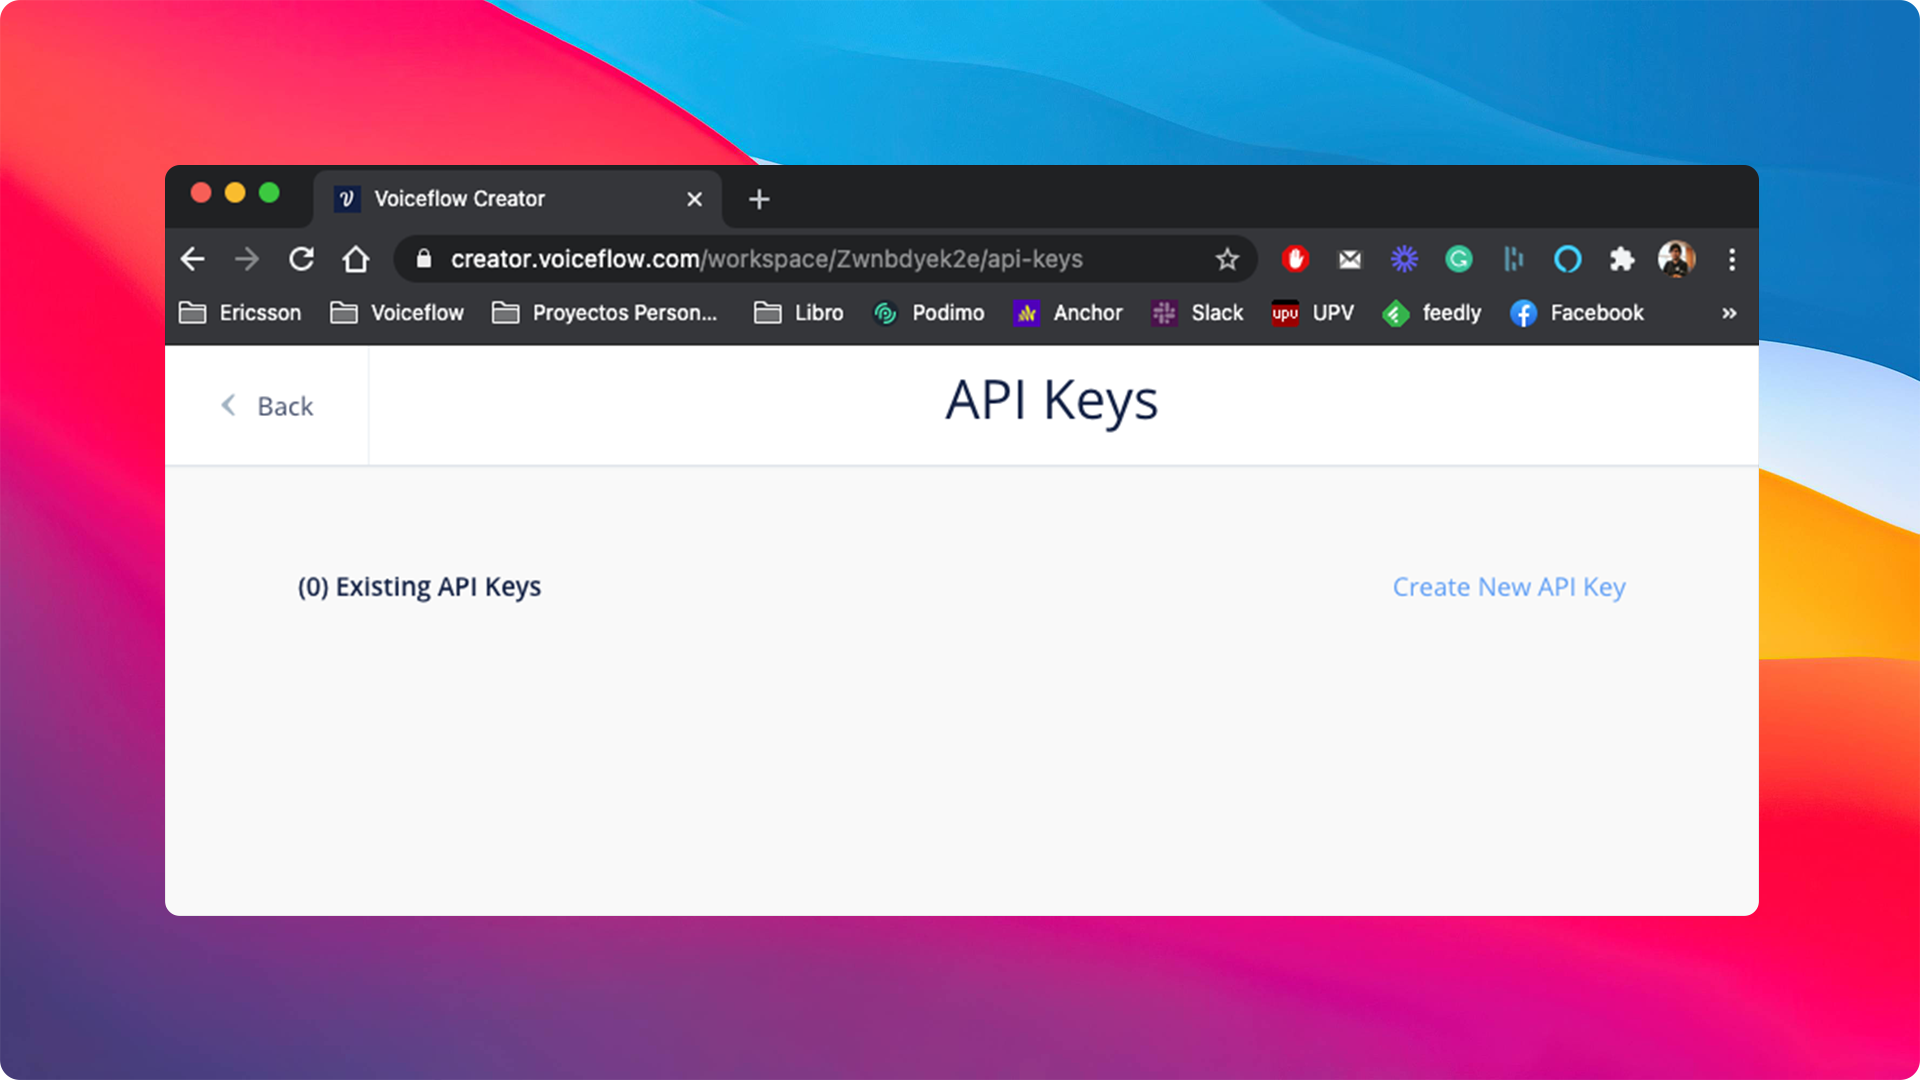
Next, click the {% c-line %}Create new API Key{% c-line-end %} button to create a new one:
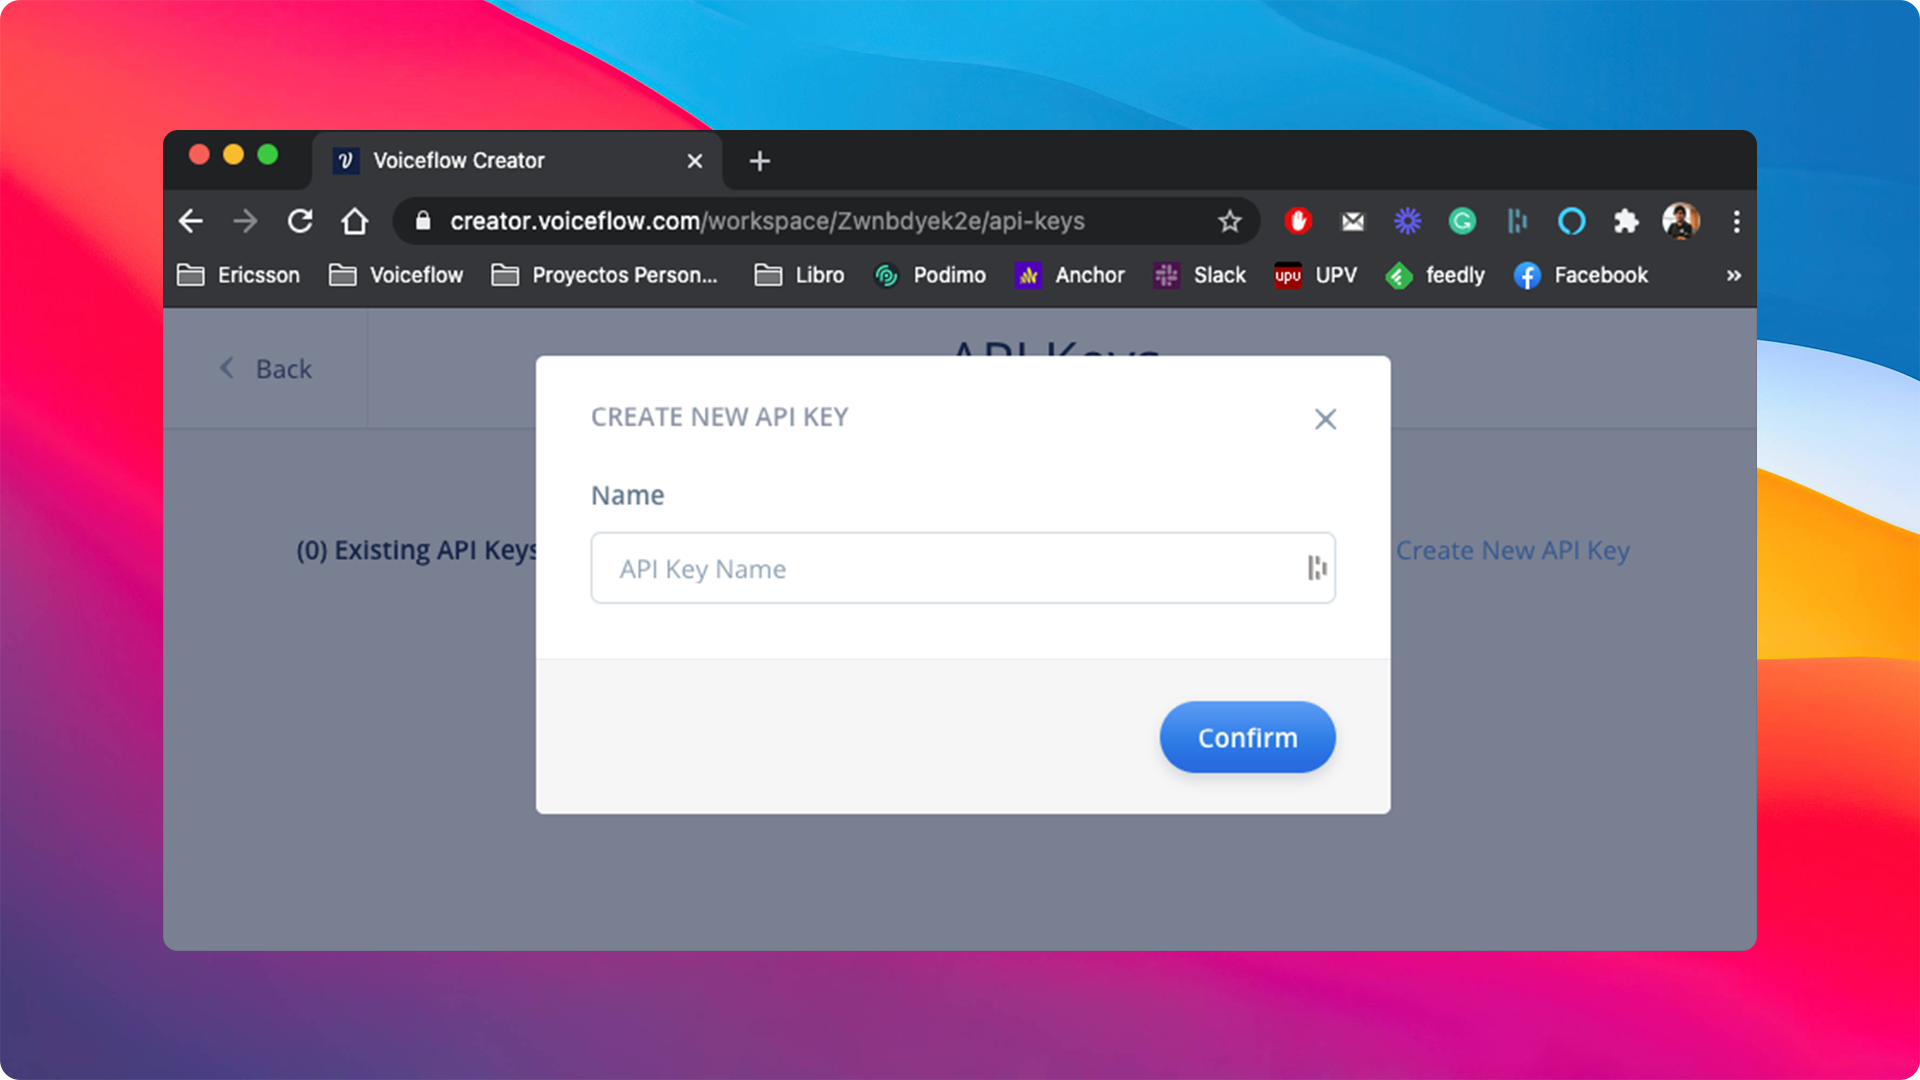
You'll need to add a name for the new API Key, for example, {% c-line %}ms-teams-bot{% c-line-end %}. Once this is completed, we can click the {% c-line %}Confirm button{% c-line-end %}:
Finally, we have to add these variables to our final {% c-line %}.env{% c-line-end %} file. It should look like this:
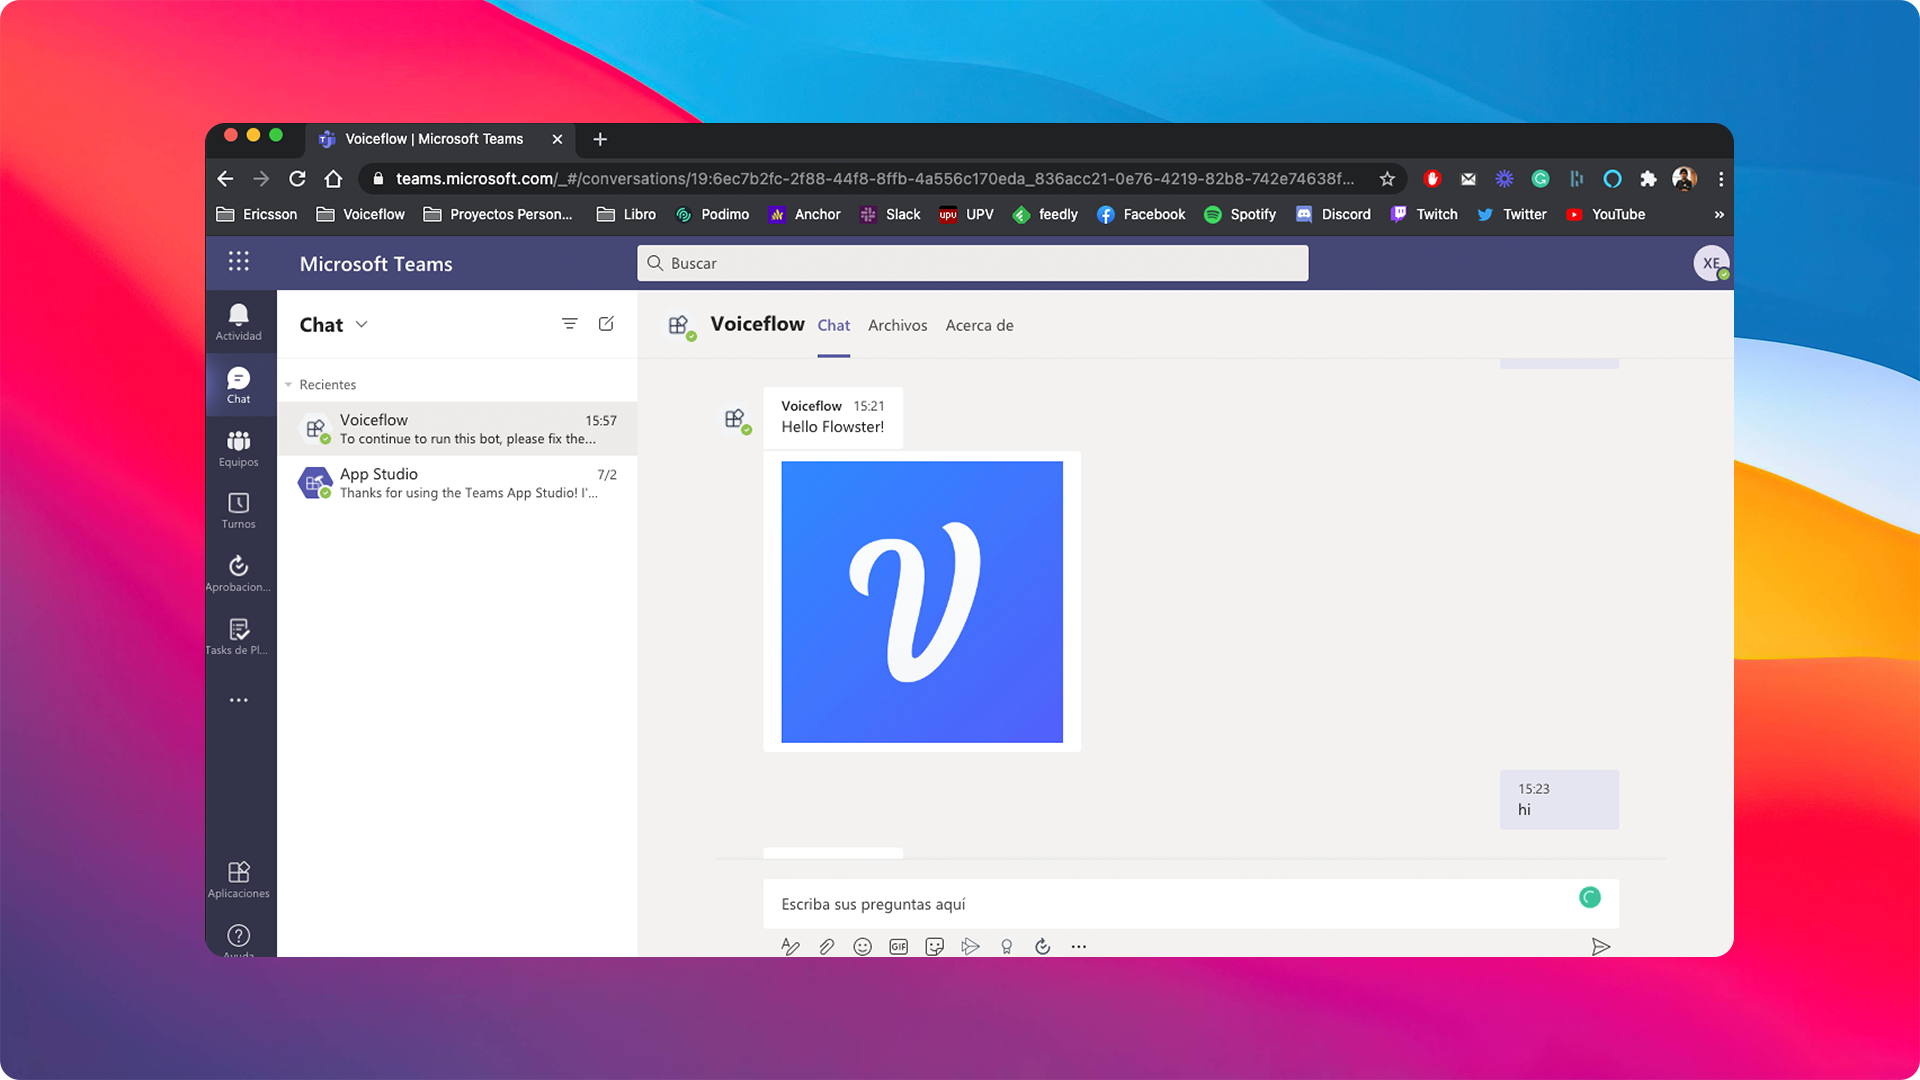
In your Microsoft Teams client, we can now try out our personal bot. You can access the bot you installed from the sidebar on your left.
Now you have a 1:1 chat interface with the bot. Let's type sending a message.
Please note: Ngrock is a great tool; however, this does not work for production environments.
To deploy your chatbot, view the following: Deploy your bot to Azure.
Resources
And so with less than 200 lines of code we now have a Microsoft Teams bot connected to Voiceflow. I hope this gives you a better understanding of the how you can use Voicefow to bring conversational experiences into your very own interfaces and products. Happy coding!


.avif)
.avif)