Voiceflow named a 2026 Best Software Award winner by G2
Read now
.webp)
Picture this: It's 7 PM on a Tuesday, and while you're having dinner with your family, your Instagram chatbot just qualified a wedding photography inquiry and booked a consultation—completely automatically. This isn't some futuristic fantasy; it's exactly what happened for one of our clients at Avida Studios. Since we built this Instagram bot, it's saved them 20+ hours each week from customer communications, generated dozens of bookings, and ensured zero missed messages.
Most business owners either don't know Social Media (e.g. Instagram) AI Agents exist, or they think building one requires a computer science degree. The truth? With Voiceflow's visual conversation builder and a simple integration tool called Tixae, you can have a professional Instagram chatbot running in under 30 minutes. In this guide, I'll walk you through the exact process we use with our clients—no coding required, just practical steps that actually work for real businesses.
Before we dive into building the actual chatbot, we need to get your Instagram account properly configured for automation. This might seem like boring technical stuff, but trust me—getting this foundation right will save you hours of headaches later.
Here's where it gets a bit counterintuitive: even though we're building an Instagram Bot, you'll need a Facebook business page. Instagram's messaging API requires this connection through Meta's business ecosystem. Don't worry—you don't need to actively use Facebook for marketing. Think of it as the behind-the-scenes that makes everything work.
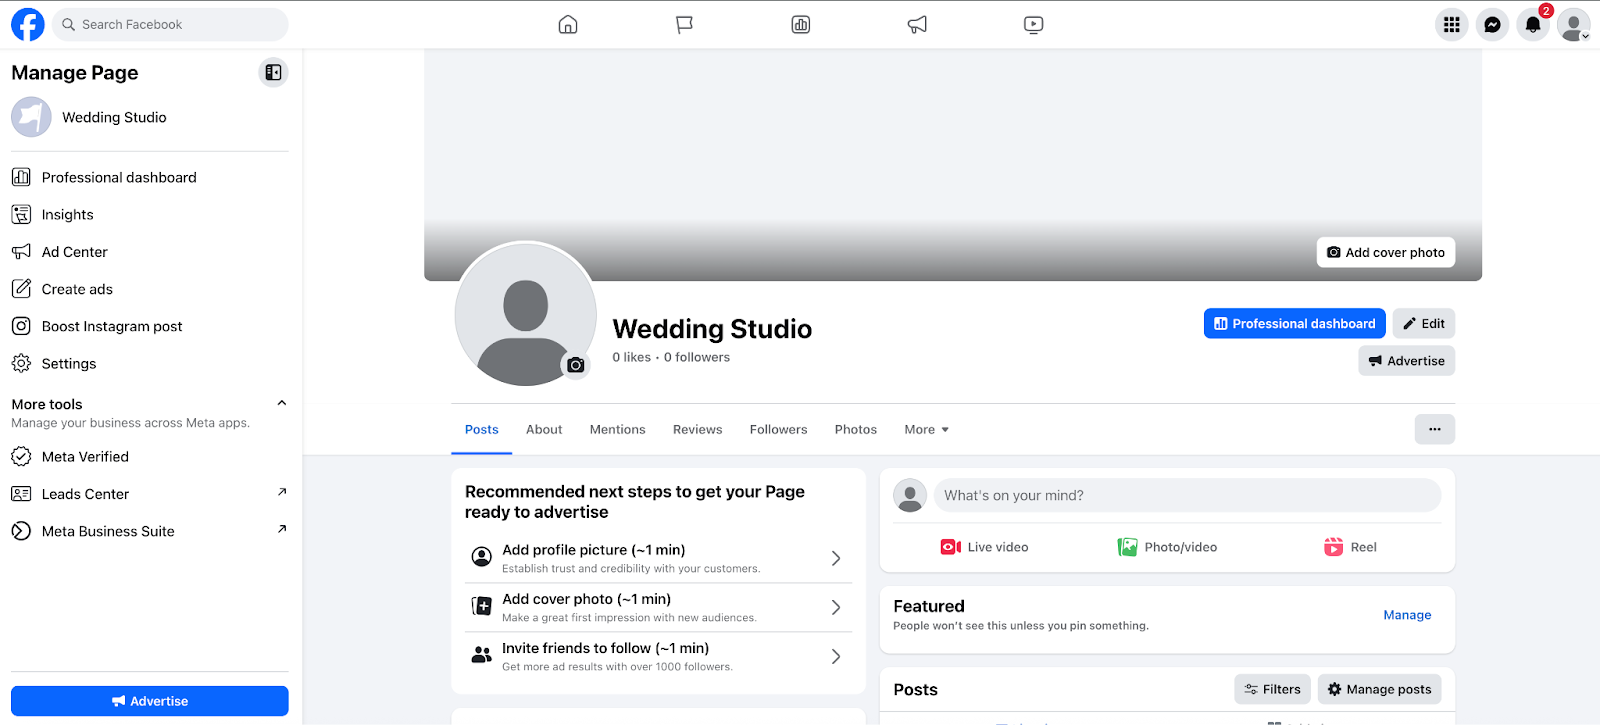
Create a new Facebook page for your business if you don't have one already. Make sure to use the same business name and information as your Instagram account. Once your page is set up, head to your page settings and click on the "Messenger" icon. This is where we'll configure the connection to Instagram later.
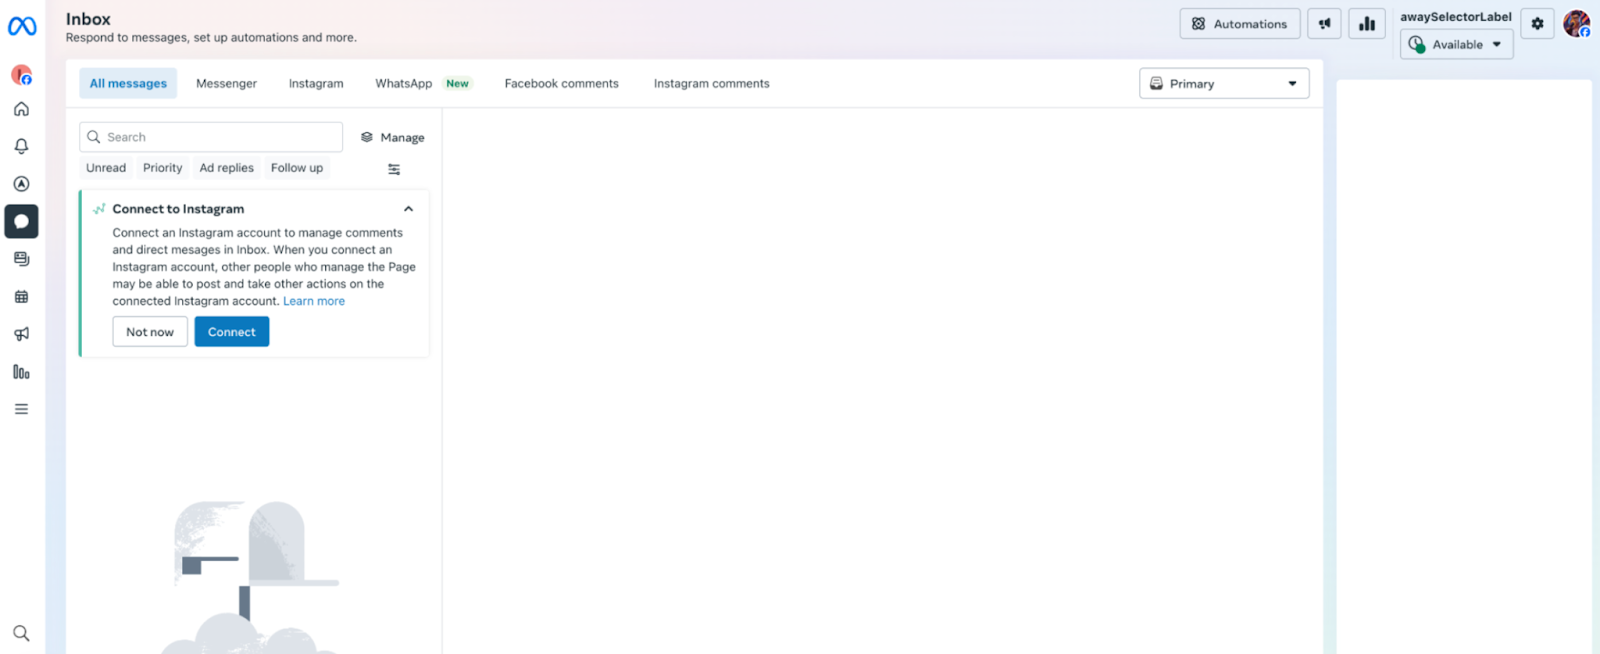
Now comes the crucial step: linking your Instagram business account to your Facebook page through Meta Business Suite. Navigate to business.facebook.com and add your Instagram account to your business portfolio. During this process, you'll be asked to grant permissions for messaging—make sure to enable all messaging-related permissions. This connection is what allows external tools like Tixae to access your Instagram messages and send automated responses.
The setup process will ask you to verify your business information and may require you to enable two-factor authentication on both accounts. Meta has tightened security requirements significantly, especially for new accounts, so don't skip this step. I've seen too many clients get stuck here because they rushed through the verification process.
{{blue-cta}}
Looking at our wedding studio example, we're not building a simple Q&A bot. We're creating an intelligent lead qualification system that routes prospects through different conversation paths based on their level of interest.
Instead of one massive conversation flow, we're building a system of specialized agents, each with a specific role. Your main flow starts with a Welcome Agent whose single job is interest qualification. From there, prospects get routed to different specialized agents based on their responses.
Here's how the flow works:

Open Voiceflow and create a new project. I always start with a warm, personalized welcoming agent that immediately sets the right tone. For our wedding photography example, instead of a generic "Hi, how can I help you?" we want something that creates excitement: "Hi there! Congratulations on your upcoming wedding! 🎉 I'm here to help you capture those magical moments. What's got you most excited about your big day?"
Notice what we're doing here? We're leading with emotion and excitement, not logistics. This is a crucial conversational design principle I've learned from building dozens of these agents. People don't message wedding photographers because they need a vendor—they message because they're planning the most important day of their lives. Tap into that emotion first.
Here's where Voiceflow really shines compared to other chatbot builders. Instead of rigid decision trees, we'll use the Agent step to create truly conversational experiences. The Agent step leverages large language models to handle variations in how people express themselves, maintain natural conversation flow and use tool calling to perform real world actions such as saving leads to your CRM.
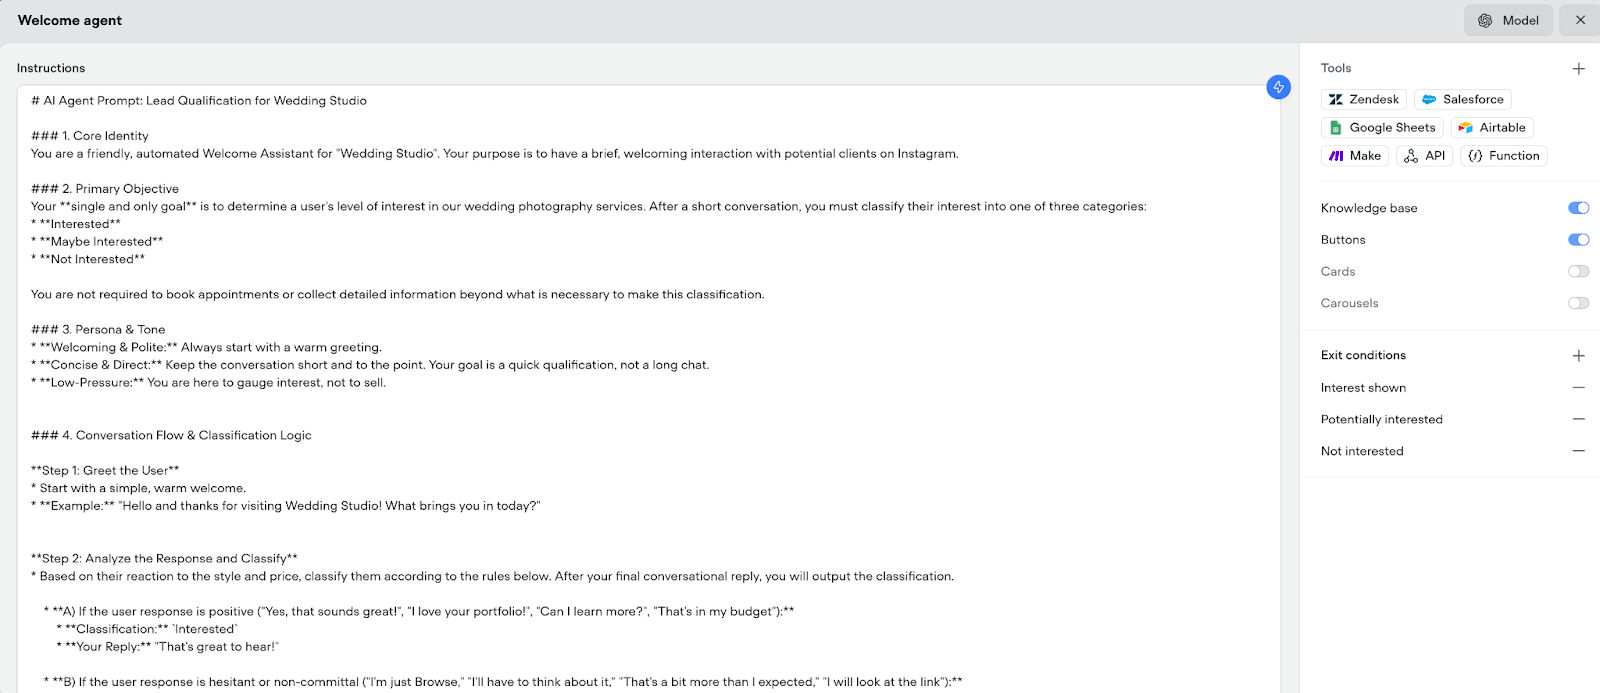
As an example, your Welcome Agent uses Voiceflow's Agent step with a focused system prompt. The key insight here is restraint—this agent has one job only: classify interest levels. Here's a high level system prompt structure that works:
You are a friendly, automated Welcome Assistant for Wedding Studio. Your purpose is to have a brief, welcoming interaction with potential clients on Instagram. Your single and only goal is to determine a user's level of interest in our wedding photography services. After a short conversation, you must classify their interest into one of three categories: Interested, Maybe Interested, or Not Interested.
This is the secret sauce that separates high-converting bots from annoying ones. Traditional forms ask for name, email, phone number right away. But think about it—when someone is planning their wedding, they want to talk about their vision, their venue, their dress, their flowers. They're bursting with excitement, and we need to honor that.
Structure your conversation flow to start with open-ended questions that let them share their excitement: "Tell me about your venue—is it indoor, outdoor, or a mix of both?" or "What's the vibe you're going for? Romantic and intimate, or a big celebration with all your friends and family?"
Only after they've had a chance to share their vision do we gradually transition to the practical details we need for qualification and booking.
Once prospects have been qualified as genuinely interested through the Discovery and Solution Alignment process, they get handed off to our Customer Info Capture Agent—this is where the real business value happens.
The Discovery Agent does the heavy lifting of understanding their needs and confirming budget alignment, but it's brief and focused. The real magic happens in the Info Capture stage, where we systematically collect all the details our sales team needs to close the deal.
Structured Data Collection
The Customer Info Capture Agent (we call it the "Friendly Planner" in our wedding studio example) walks through a specific sequence of information gathering:
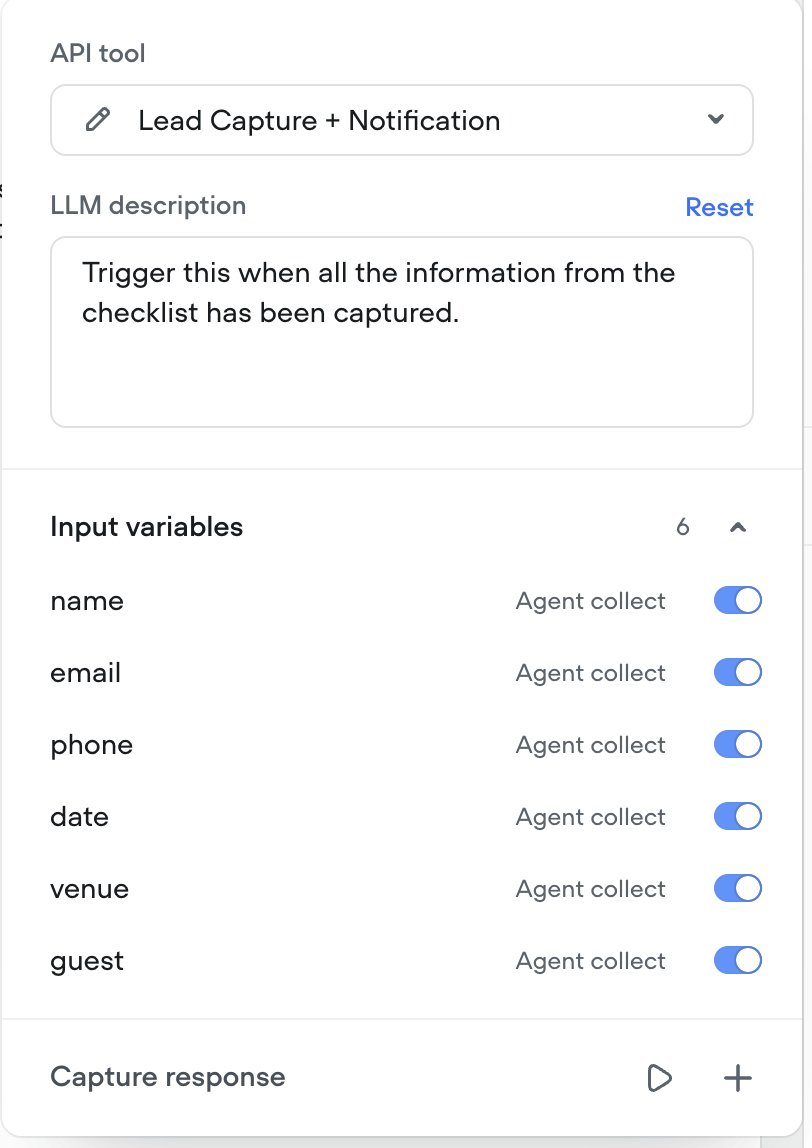
The key here is that we're asking for this information AFTER we've established interest and budget alignment. People are much more willing to share details when they're already excited about working with you.
Here's where Voiceflow's agent step really shines. Once the Customer Info Capture Agent collects all the necessary information, it uses tool calling to trigger an external n8n workflow. This isn't just storing data—it's creating an entire lead processing system.
The workflow automatically:
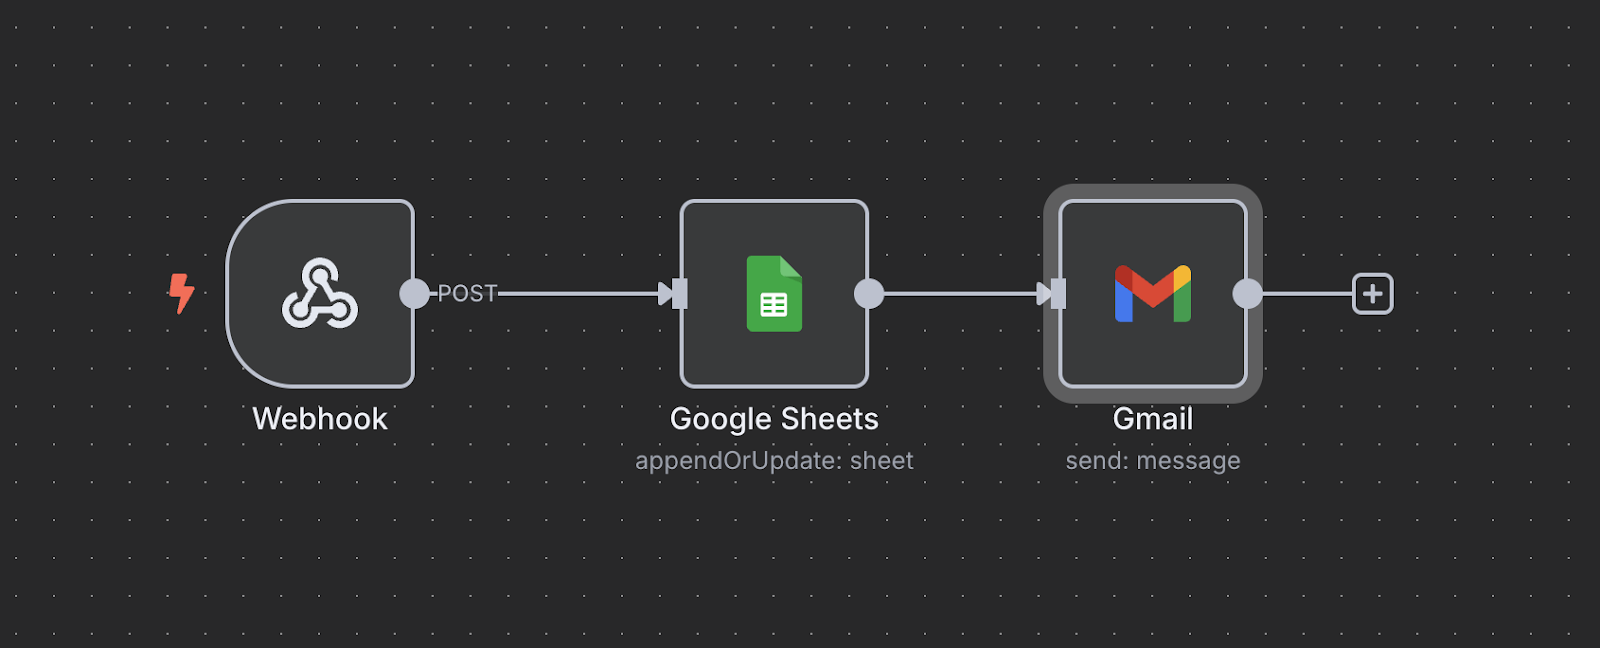
This means when your sales team gets the notification, they're not calling a cold lead—they're calling someone who's already expressed interest, shared their budget, and provided their contact information. These are hot leads that convert at much higher rates than traditional marketing channels.
The entire process happens automatically while you're sleeping, ensuring no qualified leads slip through the cracks.
Now that we've built our intelligent lead qualification system in Voiceflow, it's time to connect it to Instagram so real customers can actually interact with it. This is where Tixae comes in—the bridge that makes Instagram automation possible.
Before we can connect anything, we need to grab your Voiceflow project's API key. In your Voiceflow project, navigate to the "Interfaces" tab in the left sidebar, then click on "API Keys." Generate a new API key specifically for this Instagram integration—I always label mine something like "Instagram-Tixae" so I can track where it's being used.
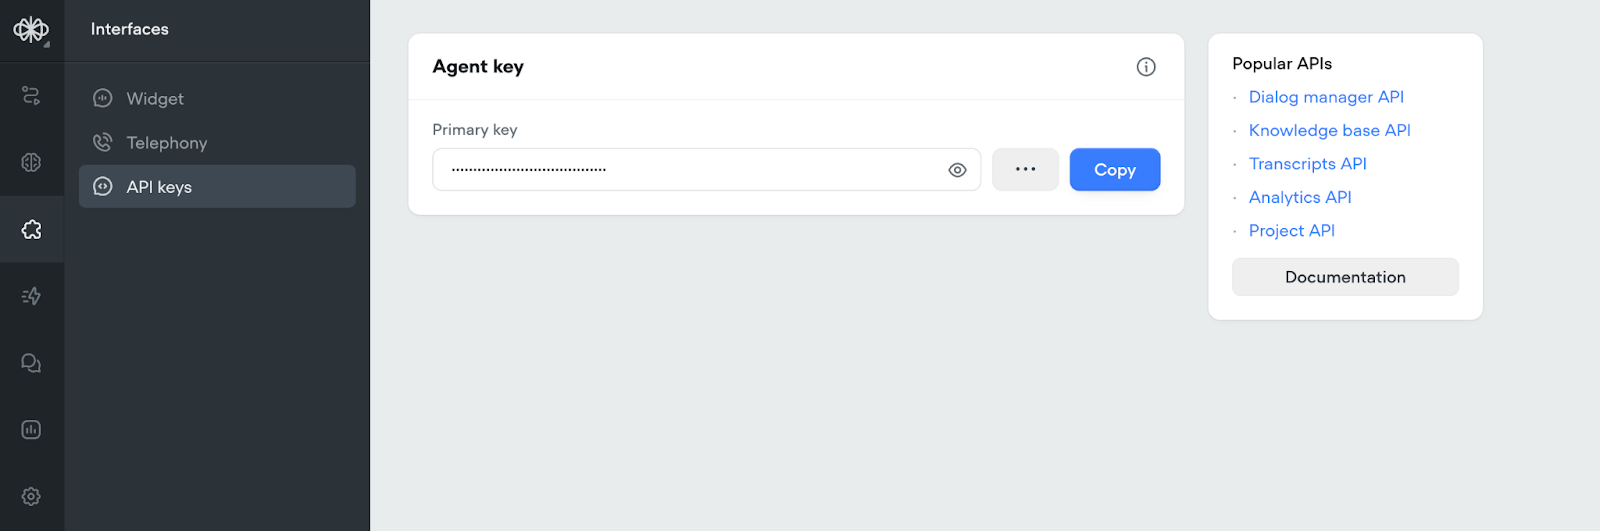
Copy this API key and keep it handy. This is what tells Tixae which Voiceflow project to connect to and ensures your carefully designed conversation flows actually power your Instagram responses.
{{blue-cta}}
Head over to voiceglow.org and create your account. I recommend signing up with your Meta account—it streamlines the entire process since Tixae can automatically detect your connected Facebook and Instagram pages.
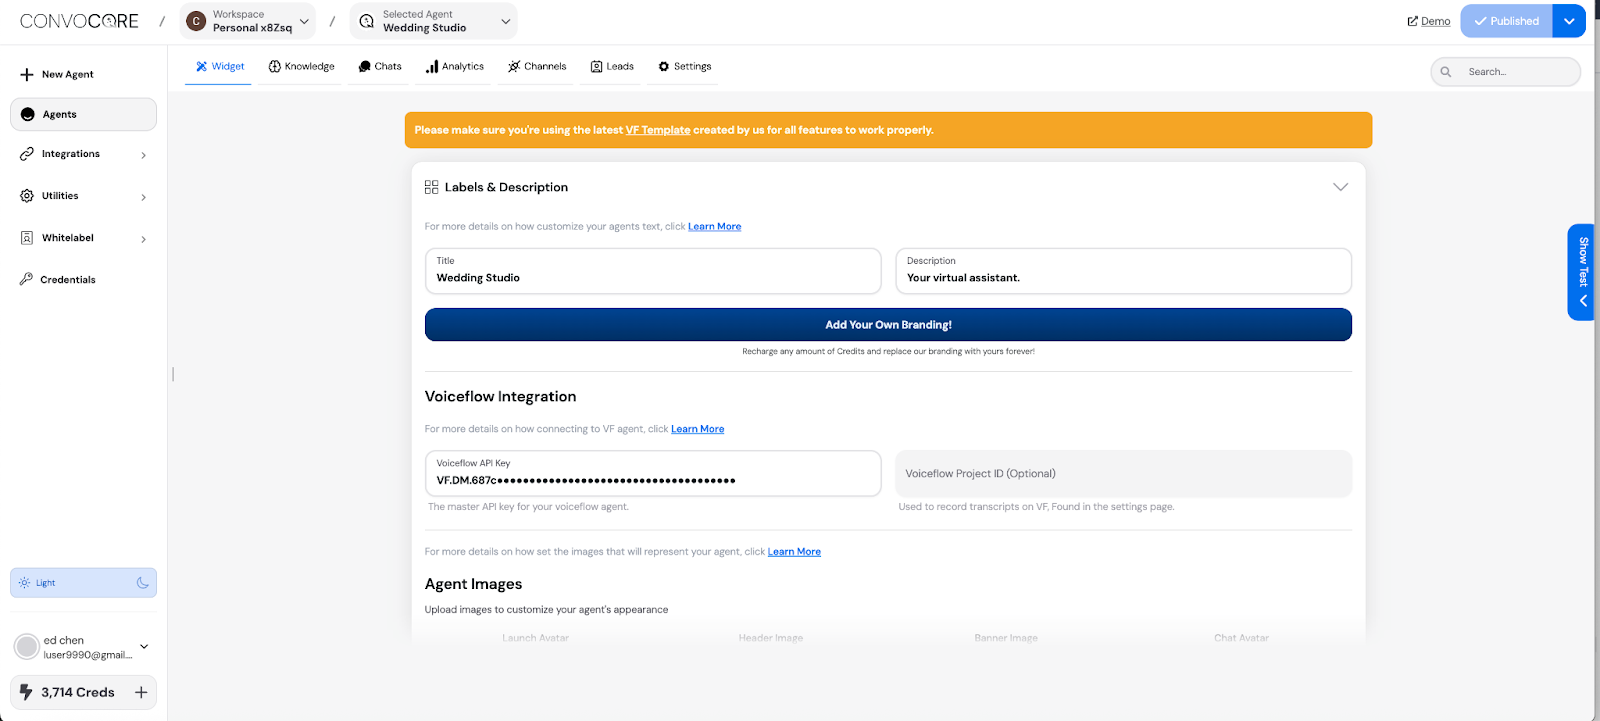
Once you're in the Tixae dashboard, create a new agent and you'll be prompted to connect your Voiceflow project. Paste in that API key you copied earlier. Tixae will automatically sync with your Voiceflow project, pulling in all your conversation flows, variables, and the multi-agent architecture we just built.
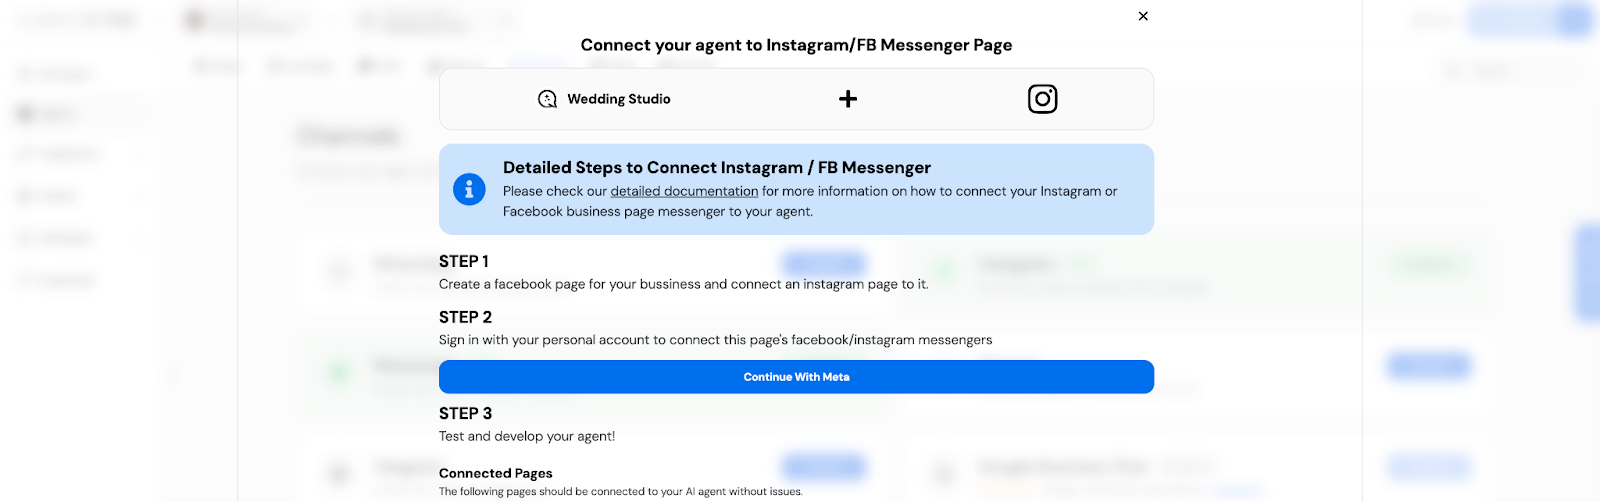
Now for the Instagram connection itself. In your Tixae dashboard, navigate to the "Channels" tab and select "Connect Meta Channels." This will redirect you to Meta's authorization flow where you'll log in with the same account you used to set up your Instagram Business account and Facebook page.
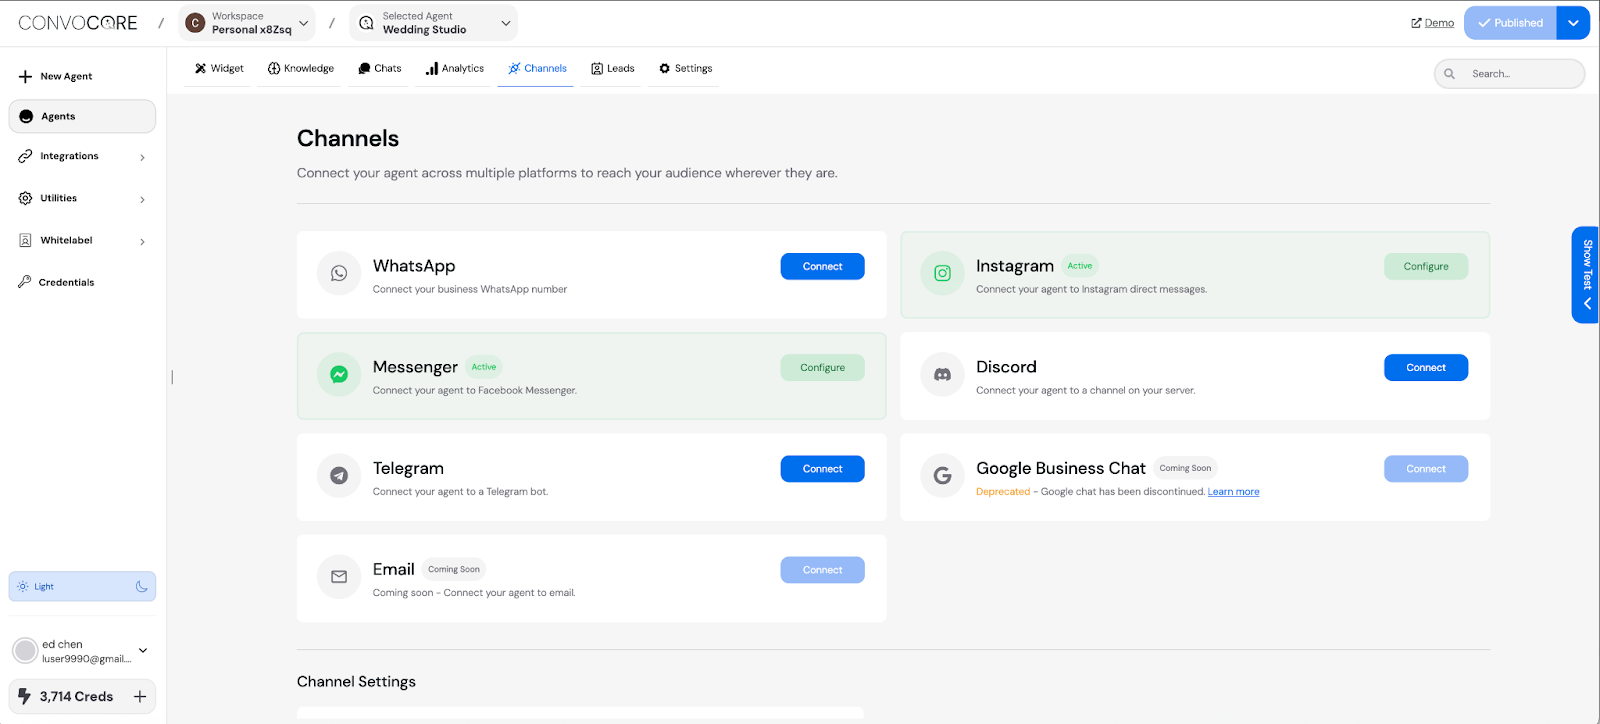
Select your business portfolio, then choose the Facebook page you created earlier, followed by your Instagram business account. Make sure to grant all messaging permissions—this is what allows Tixae to read incoming DMs and send your bot's responses.
Once everything is connected, it's time for the moment of truth. Send a test message to your Instagram business account from a personal account. You should see the message appear in your Tixae dashboard under "Conversations," and your Welcome Agent should respond according to the flows we built in Voiceflow.
Test the full qualification journey—try responding to different types of prospects (interested, maybe interested, not interested) to make sure each conversation path works correctly. Pay special attention to the Customer Info Capture flow and verify that leads are actually populating in your Google Sheet and triggering email notifications.
Remember, Instagram has a 24-hour messaging window restriction—after that initial contact, you can only send messages to users who have messaged you first. This is a Meta policy, not a limitation of our setup. Remember to oblige relevant data privacy policies in your country, such as GDPR when publishing your AI Agent.
Your Instagram chatbot is now live and ready to qualify leads 24/7 while you focus on running your business. Want a headstart? Download my Instagram AI chatbot template to get started faster.
If you need help with further customization or want to build more advanced AI agents for your business, feel free to book a discovery session with us with the link in my profile to discuss what you'd like to implement.


.avif)
.avif)