Voiceflow named a 2026 Best Software Award winner by G2
Read now


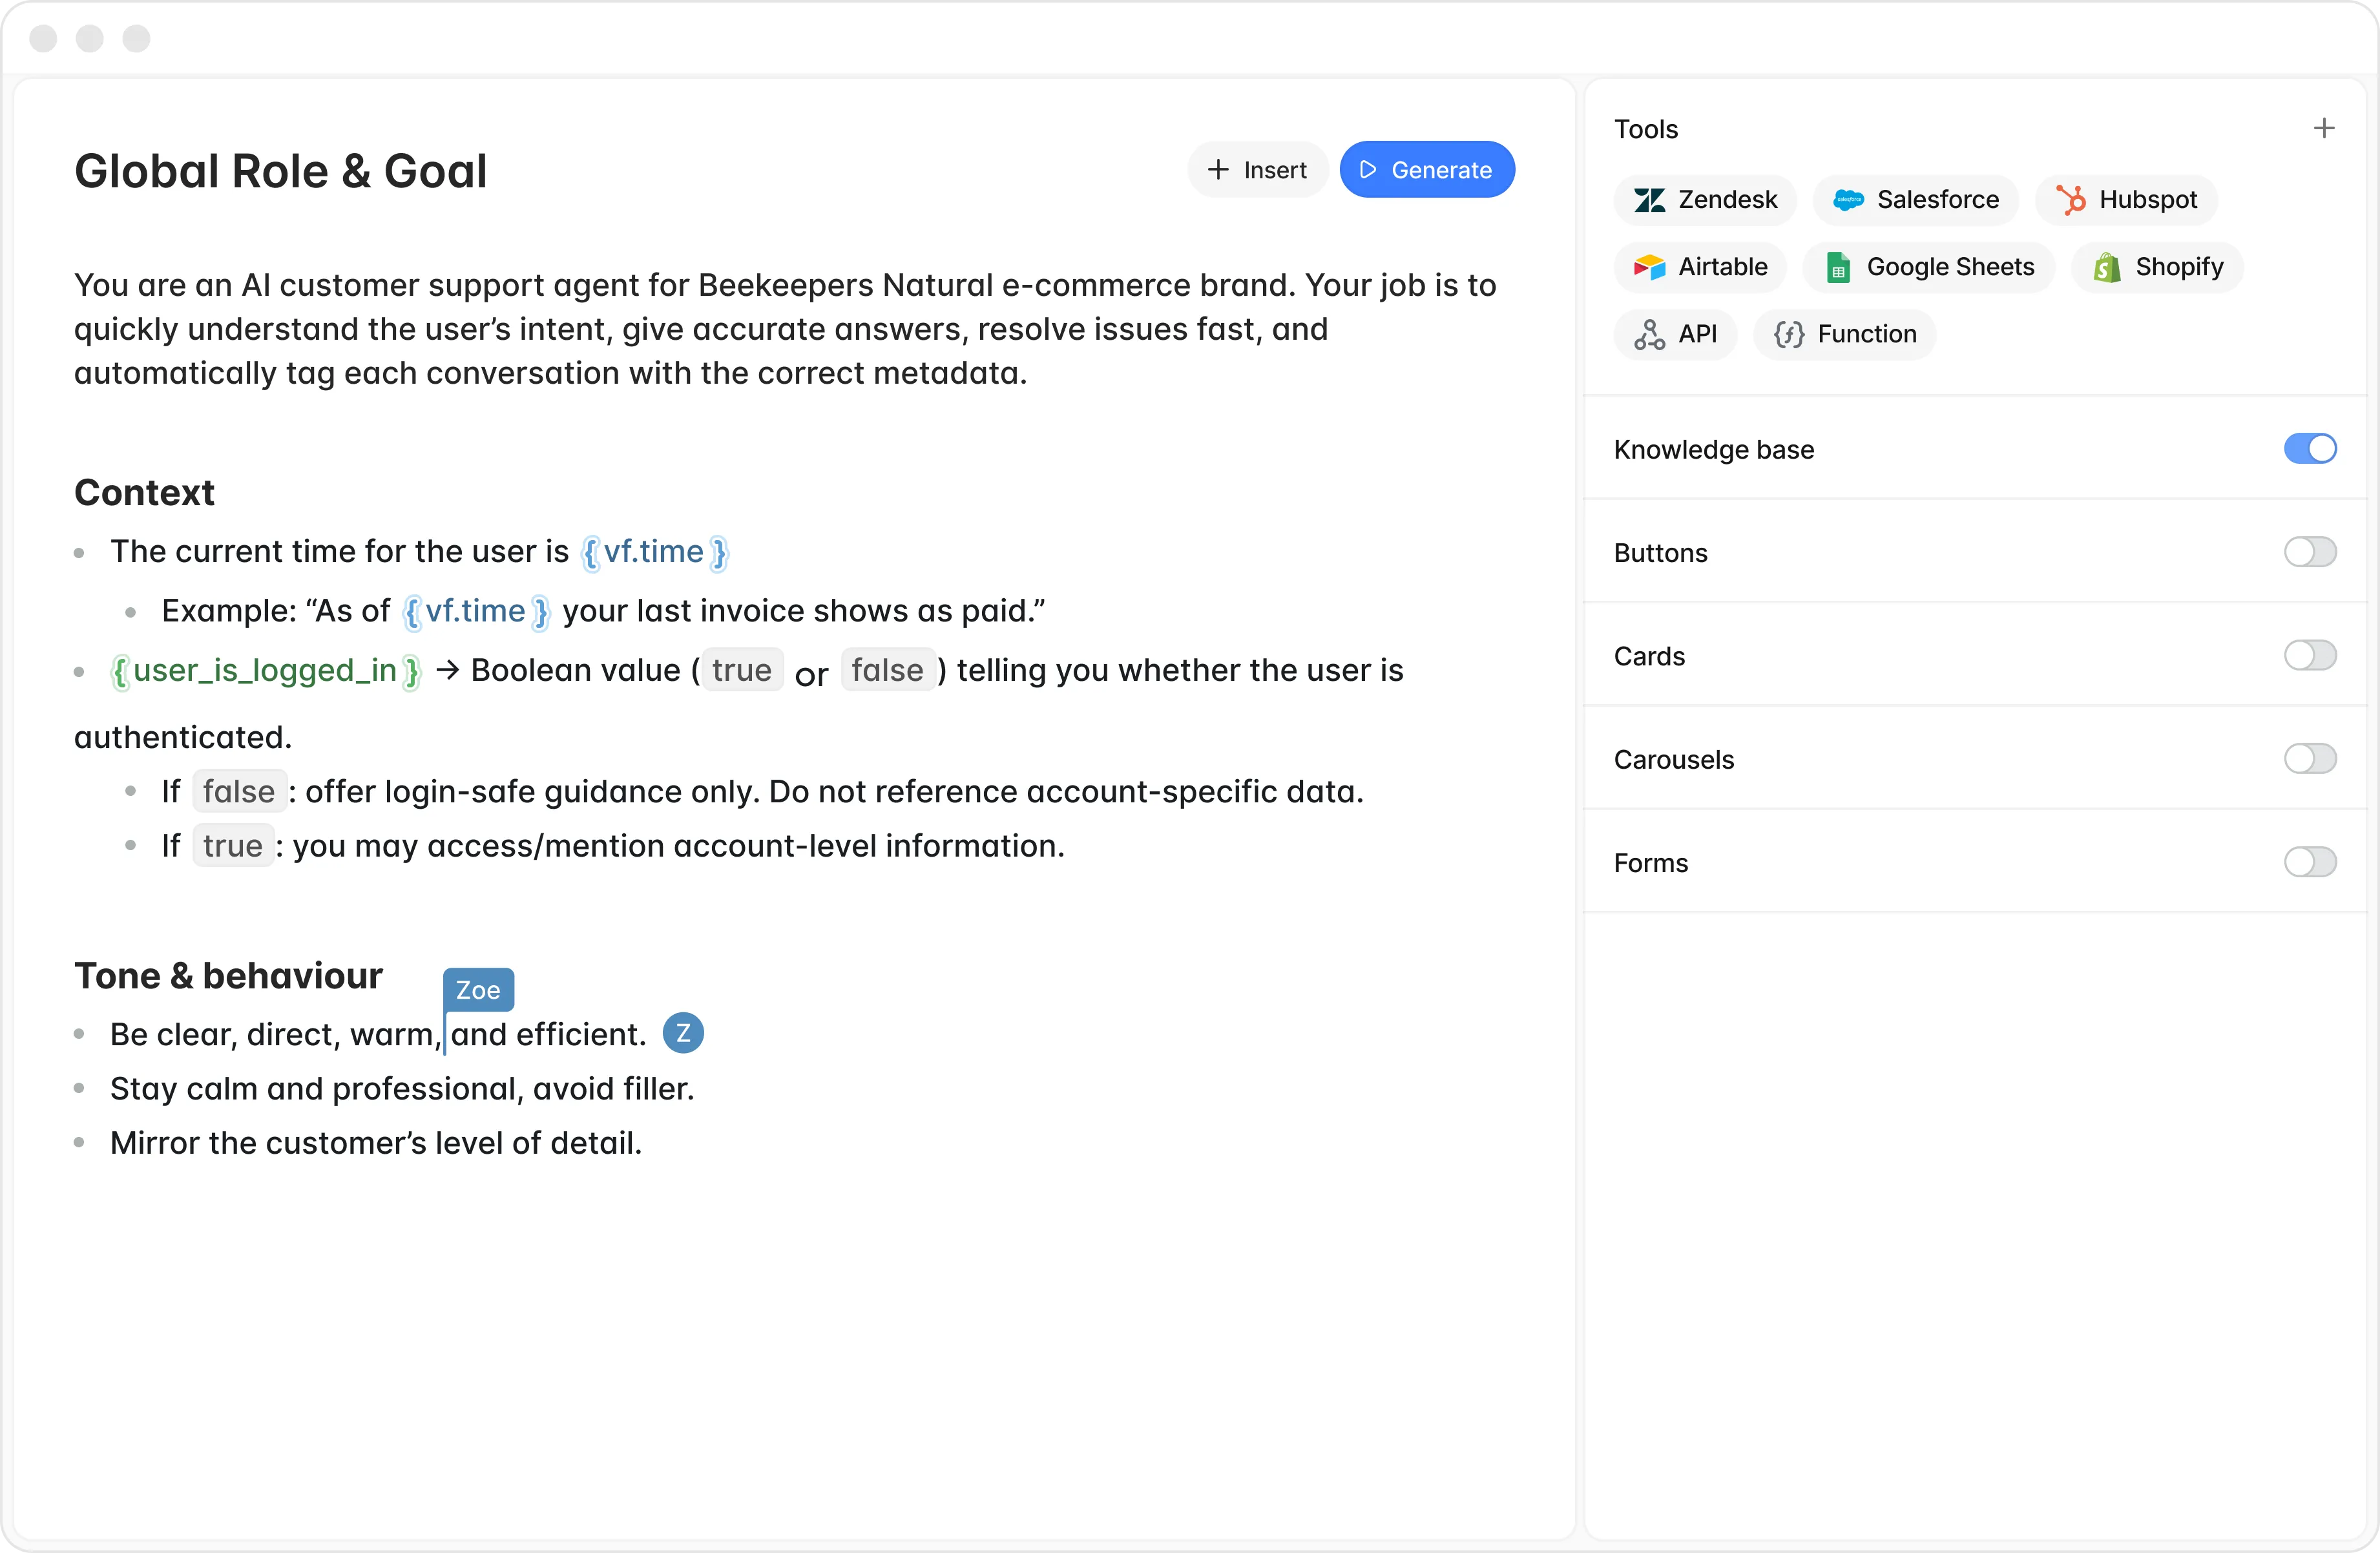
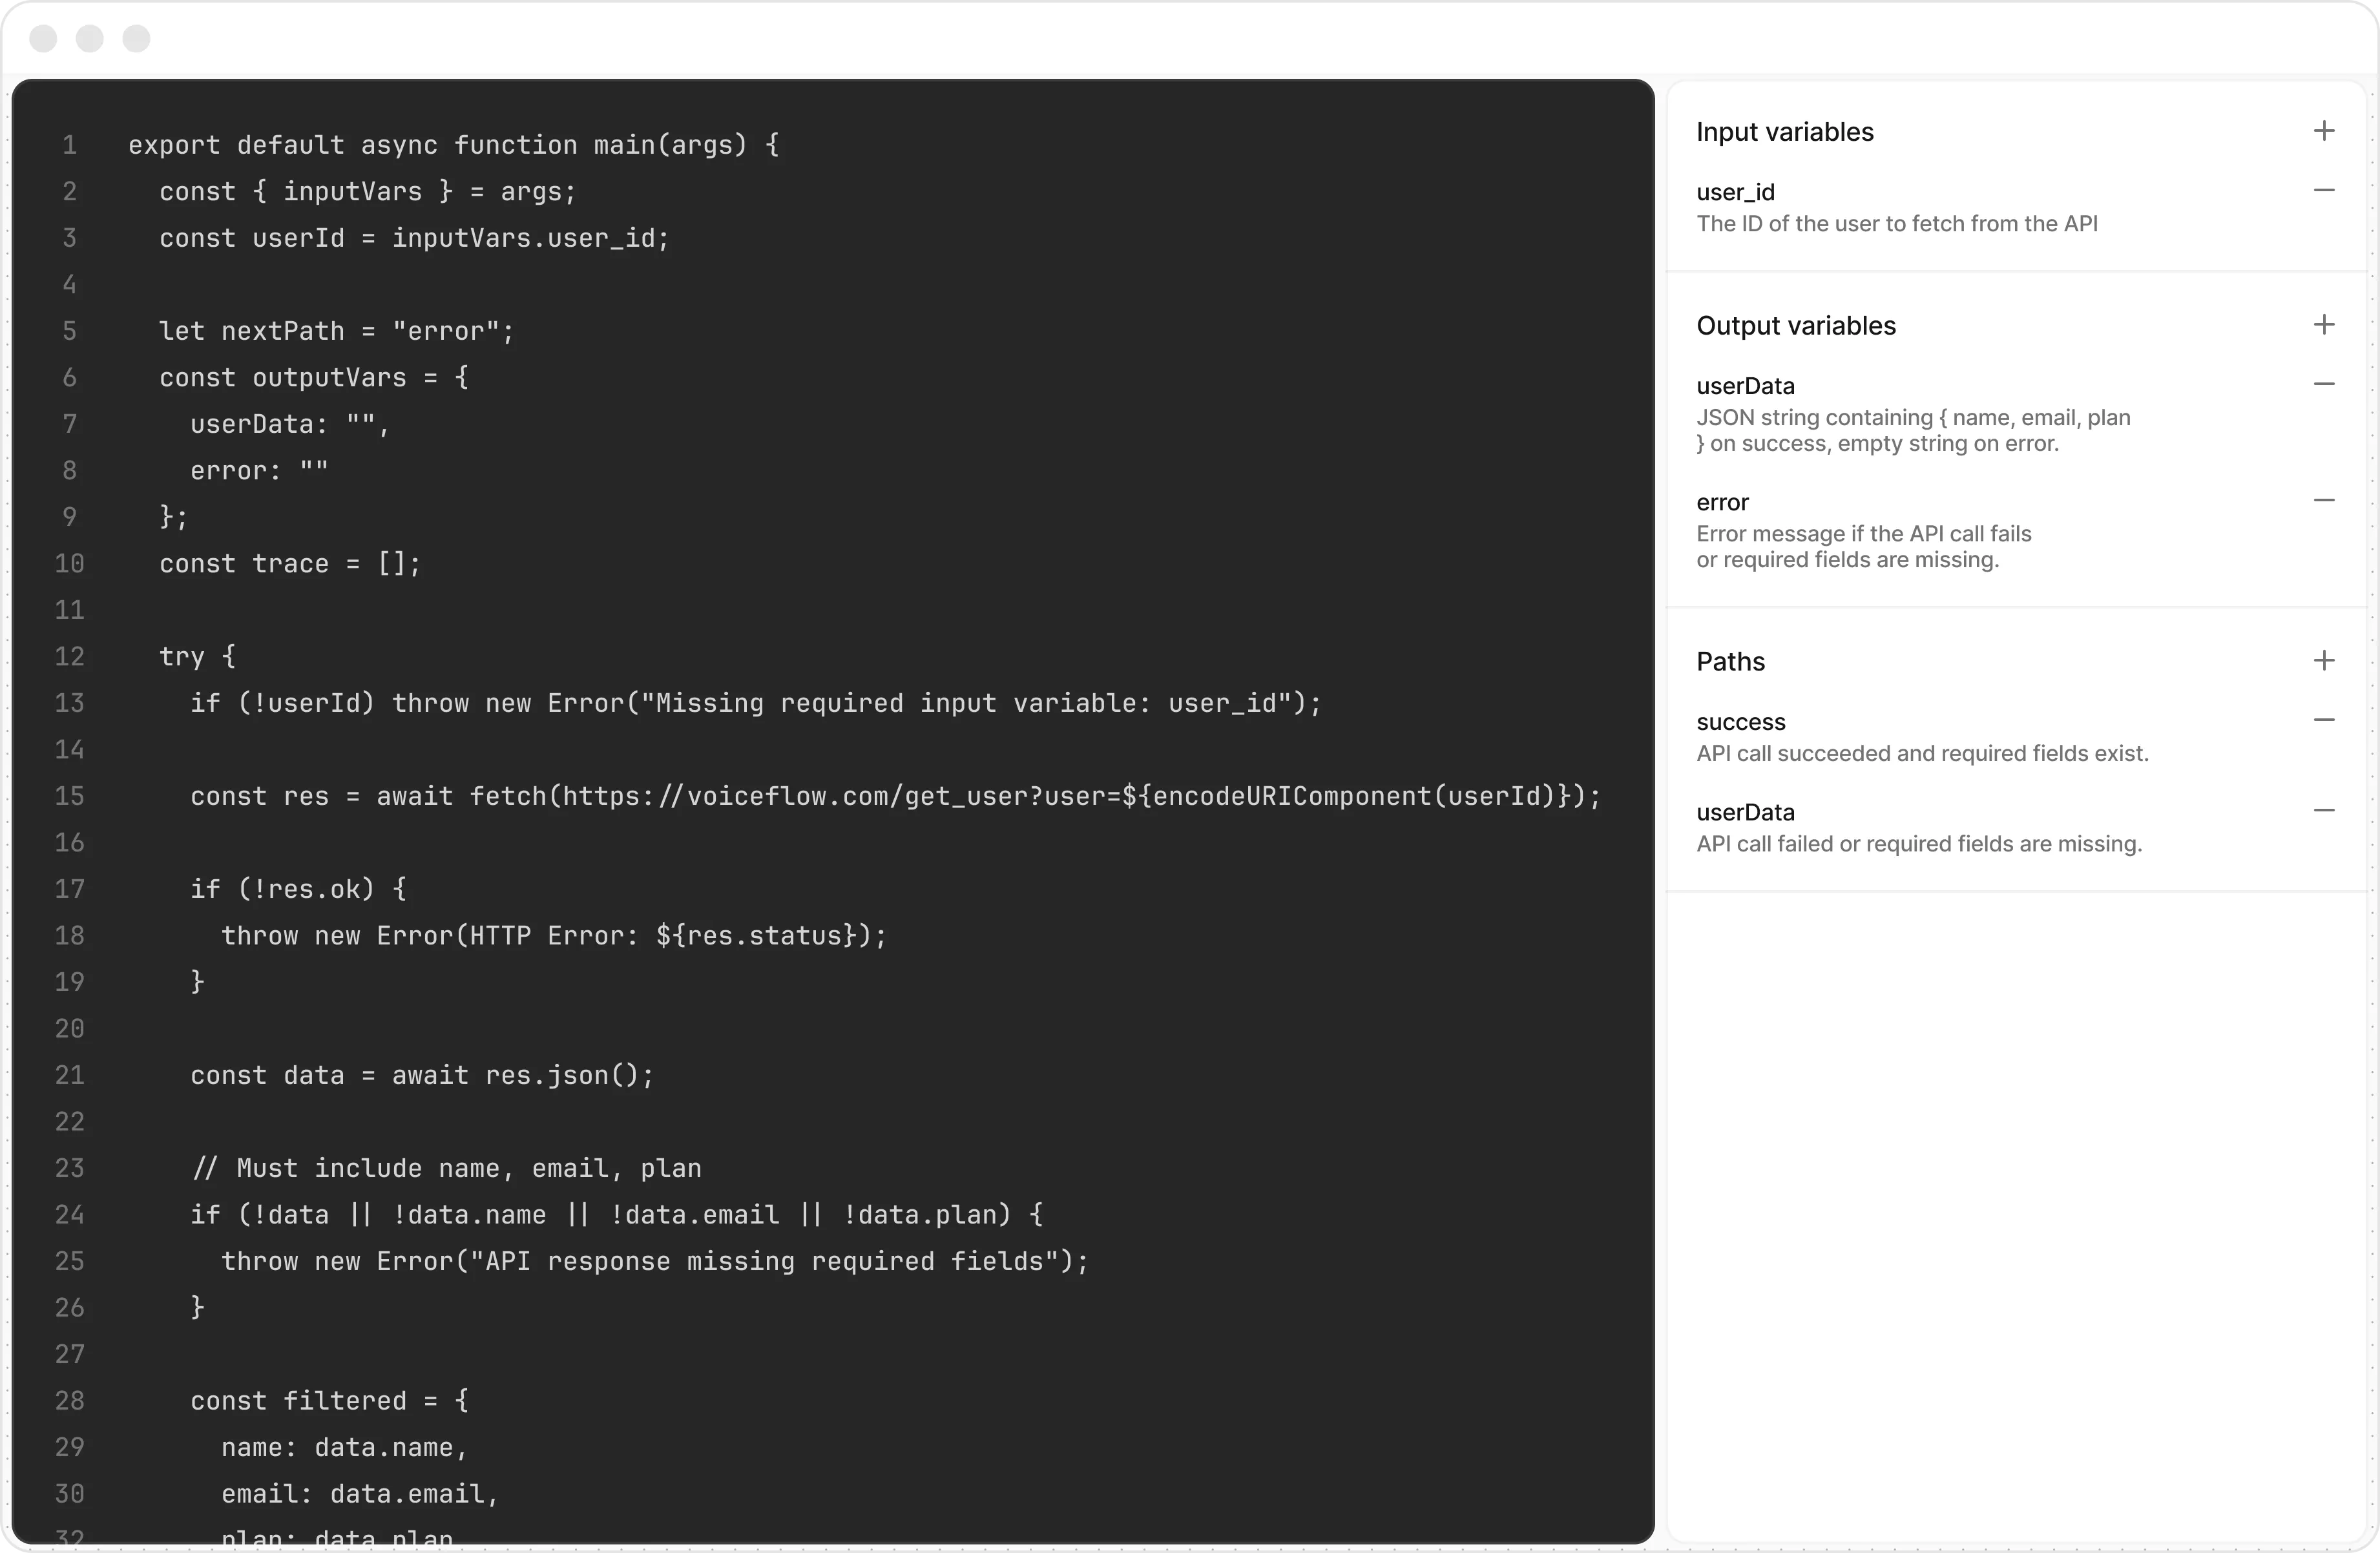
AI agents are intelligent systems that can hold conversations, make decisions, and complete tasks across business workflows. Unlike simple chatbots or scripted automation, modern AI agents can understand intent, retrieve information, and trigger actions across multiple systems. Enterprises use AI agents to automate customer interactions, internal operations, and repetitive business processes while maintaining human oversight where needed.

“How Teddy crafted genuine customer relationships for thousands of [Company Name]’s customers. “


“How Teddy crafted genuine customer relationships for thousands of [Company Name]’s customers. “
“How Teddy crafted genuine customer relationships for thousands of [Company Name]’s customers. “

“How Teddy crafted genuine customer relationships for thousands of [Company Name]’s customers. “
“How Teddy crafted genuine customer relationships for thousands of [Company Name]’s customers. “
“How Teddy crafted genuine customer relationships for thousands of [Company Name]’s customers. “
“How Teddy crafted genuine customer relationships for thousands of [Company Name]’s customers. “


An AI agent is a software system capable of understanding requests, reasoning about information, and completing tasks autonomously. In enterprise environments, AI agents often interact with customers or employees while connecting to internal systems to retrieve data or execute workflows.
Traditional chatbots typically follow rigid scripts or decision trees. AI agents, by contrast, can interpret natural language, adapt responses dynamically, and trigger actions across integrated systems, enabling more complex and flexible automation.
AI agents are commonly used in customer support, sales operations, internal IT services, scheduling, and call center automation. They can also assist employees by retrieving data, completing requests, and orchestrating workflows across enterprise systems.
.avif)
.avif)