Voiceflow named a 2026 Best Software Award winner by G2
Read now


If you've never built a chatbot before, you're in the perfect place. In this guide, I'm going to teach you the fundamentals of creating AI agents using Voiceflow, starting from absolute zero.
My name is Alex, and I’m the co-founder of Parnidia, an AI development agency. Over the past year, we’ve created and deployed 15+ AI chatbots for our clients using Voiceflow. Today, I’m going to share how you can build similar solutions for your business or clients
We'll cover three core concepts that every AI builder needs to know:
By the end of this guide, you won't just have a working insurance FAQ bot—you'll understand HOW it works. You'll know why we make certain choices, what each component does.
This is designed for complete beginners. If terms like "knowledge base" or "prompt engineering" sound intimidating right now, don't worry. We'll break everything down as we move along the way.
You can also follow along with the video guide and Voiceflow template below!
Think of an AI insurance agent as your digital team member who never sleeps. It's a smart chatbot that can answer customer questions, help with claims, explain policies, and handle all those repetitive tasks that bog down your human agents. https://www.salesforce.com/financial-services/artificial-intelligence/ai-for-insurance-agents/
The best part? It learns from your actual insurance knowledge—your policy documents, FAQs, procedures—so it gives accurate, helpful answers specific to your business.
Let's look at real examples on how insurance companies are already using these AI chatbot agents:
Zurich tackled one of insurance's biggest pain points—the confusing claims process. Their Claims Bot acts like a friendly guide, asking simple questions to understand what happened and what the customer needs. Based on the answers, it either directs them to the exact information they need or connects them with the right human expert. No more customers getting lost in endless FAQ pages or calling the wrong department.
If you want to test the agent: https://www.zurich.co.uk/insurance/make-a-claim/home-insurance-claim
Leon is the overachiever of insurance bots. He handles 150-200 conversations daily—answering FAQs, checking claim status, even identifying opportunities for additional coverage. The impact? Leon reduced call center load by 120 staff-hours per month. That's like giving your team three extra full-time employees who only handle the repetitive stuff, freeing humans for complex cases.
Check out the chatbot at: https://www.generali.pl/
These aren't futuristic concepts—they're working right now, helping real customers and saving real money. Let’s see how we can build similar AI Inusrance agent using Voiceflow.
Today we’ll be focusing on the basics and we’ll build out an agent that can answer typical FAQ questions using business data that we get from insurance websites.
We will break this into:
Looking to speed up the build? I've included a Voiceflow template for you to download.
{{blue-cta}}
We’ll build our AI agent using Voiceflow's agent block (Image 1). Think of it like GPT's assistants—it's a smart AI that can use tools to complete tasks. Your agent can search databases, calculate quotes, capture leads, and connect with your existing systems. The secret sauce? A well written prompt that tells your agent exactly who it is and what it can do.

Your agent prompt needs these 4 essentials:
💡 Pro tip: Voiceflow has a built-in prompt editor that lets you quickly write and tweak prompts on the fly—no need to jump between chrome tabs! (Image 2)

Need help crafting better prompts? Check out this Prompt Engineer GPT that uses Claude and Manus system prompts as examples. It's like having a prompt expert in your pocket.
FAQ Insurance AI agent prompt template
Start by collecting all your content: website URLs, PDFs, policy docs, FAQs—basically anything your customers might ask about. Voiceflow lets you upload all this into a knowledge base, and here's the cool part: your agent actually searches through it to find answers.
Here's how to set it up:
💡 Pro tip: Most websites have a sitemap that lists every page. You'll usually find it at https://[yoursite]/sitemap.xml (like https://www.allianzcare.com/sitemap.xml). If that doesn't work, check /robots.txt (example: https://www.allianzcare.com/robots.txt)—it often points to the sitemap.
Why does this matter? Because Voiceflow lets you import the entire sitemap in one go (Image 3). Instead of uploading pages one by oneyou just paste the sitemap URL and boom—your whole website content is there, ready to be used by your AI agent.

The last step, that will allow your agent to answer user questions using your specific business data is Integrating knowledge base with the agent block. The best part? You don’t have to worry about this, as I have written a Voiceflow function that allows us to accomplish exactly this.
I’m using this function myself, for all of our clients. It’s reusable, it allows you to customize it by using:
If this is your first time, I know it might sound confusing and hard to understand. If you want to learn more, I recommend you reading more inside Voiceflow documentation: https://docs.voiceflow.com/docs/knowledge-base
Use the provided function template, you can import it (Image 4), and worry about it. To do this:

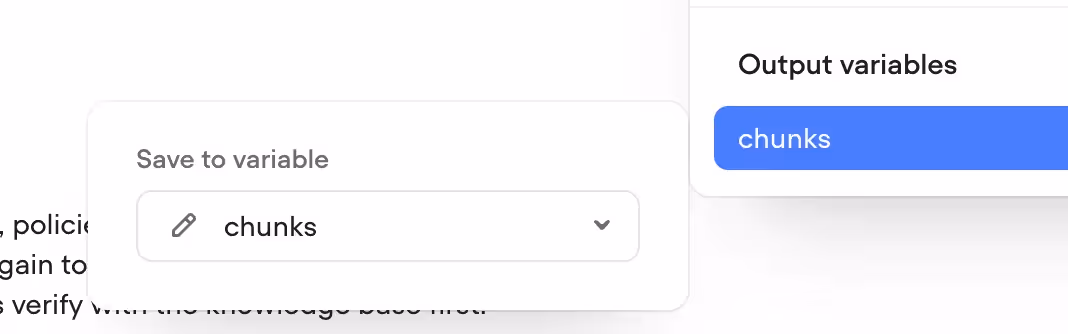
Next, head over to your to canvas, select the agent block and and choose the function we just imported (Image - 5)

Before, we can use the the function, couple of things we need to do:

Conversation starting options are an integral part of creating conversational agents. You need to understand your customers and anticipate their questions. This is one of the core design principles in conversation design (see: Conversation Design Principles).
In Voiceflow, you can do this by setting up buttons, allowing users to quickly choose from provided options instead of typing their questions. You can set this up in the Canvas UI by selecting the “Listen” and “Buttons” options (Image 8).

Think about the kinds of questions users might ask. For travel insurance, it could be about supported destinations; for car insurance, it might be policies and pricing. Every business will be a little different. Here’s what I set up for our example (Image 9)

We did it! We built our first AI agent. We learned:
All of these are the fundamentals of how to build AI agents. Just by learning this you’ll be ahead of the game. Here how the complete canvas looks like (Image 10).

If you think this looks too simple—good. Too often, I see people trying to overcomplicate things, adding unnecessary complexity or features that nobody even uses in their agents. I say, “Keep it simple, stupid!”—you’ll get a lot more done, faster and with better quality.
I say this because, in the beginning, I tried to make my AI chatbots as fancy as possible, but that complexity didn’t help me or the users. Now, most of my agents are simple and easy to use—and they’re 10x better.
{{blue-cta}}
Ask questions like:
And see if the AI provides accurate questions (Image 11). You might want to adjust the tone or instruct the AI to shorten its responses. If the chunks provided by the `knowledge_base_search` tool don’t include the information you need, try increasing the chunk size in the function from 10 to 15 or 20.
This is all a normal part of working with generative AI. You’ll need to test it and make adjustments along the way. Don’t get too hung up on making everything perfect—most insights will come from deploying the Agent and seeing what real questions users are asking. Voiceflow allows you to monitor transcripts, and later, you can use this data to add more context to your knowledge base or update the starting options to better fit users’ needs.

If you’re ready to deploy the AI chatbot to your website, here is what to do:
✅ Go to Voiceflow and open your project
✅ Copy your widget code (Image 12)
✅ Publish your agent
✅ Go to your website builder settings (or wherever you add scripts)
✅ Paste the Voiceflow embed script (they provide it)
✅ Save and refresh your site
✅ The chat widget will appear in the corner — you're live!

Once you get comfortable with the basics? The sky's the limit. You could add integrations with your CRM to automticlly report claims or even integrate voice.
If you’re ready to start building, you can download all of Voiceflow templates that were used to create the Agent:
If you only care about working solution for your business, you can book a call with us and we will take care of development https://www.parnidia.com
Happy building!


.avif)
.avif)