
Connect Zendesk to your agent


The easiest way to connect to Voiceflow is using the Agent step. Drag the Agent step onto your project's canvas then click Create agent.
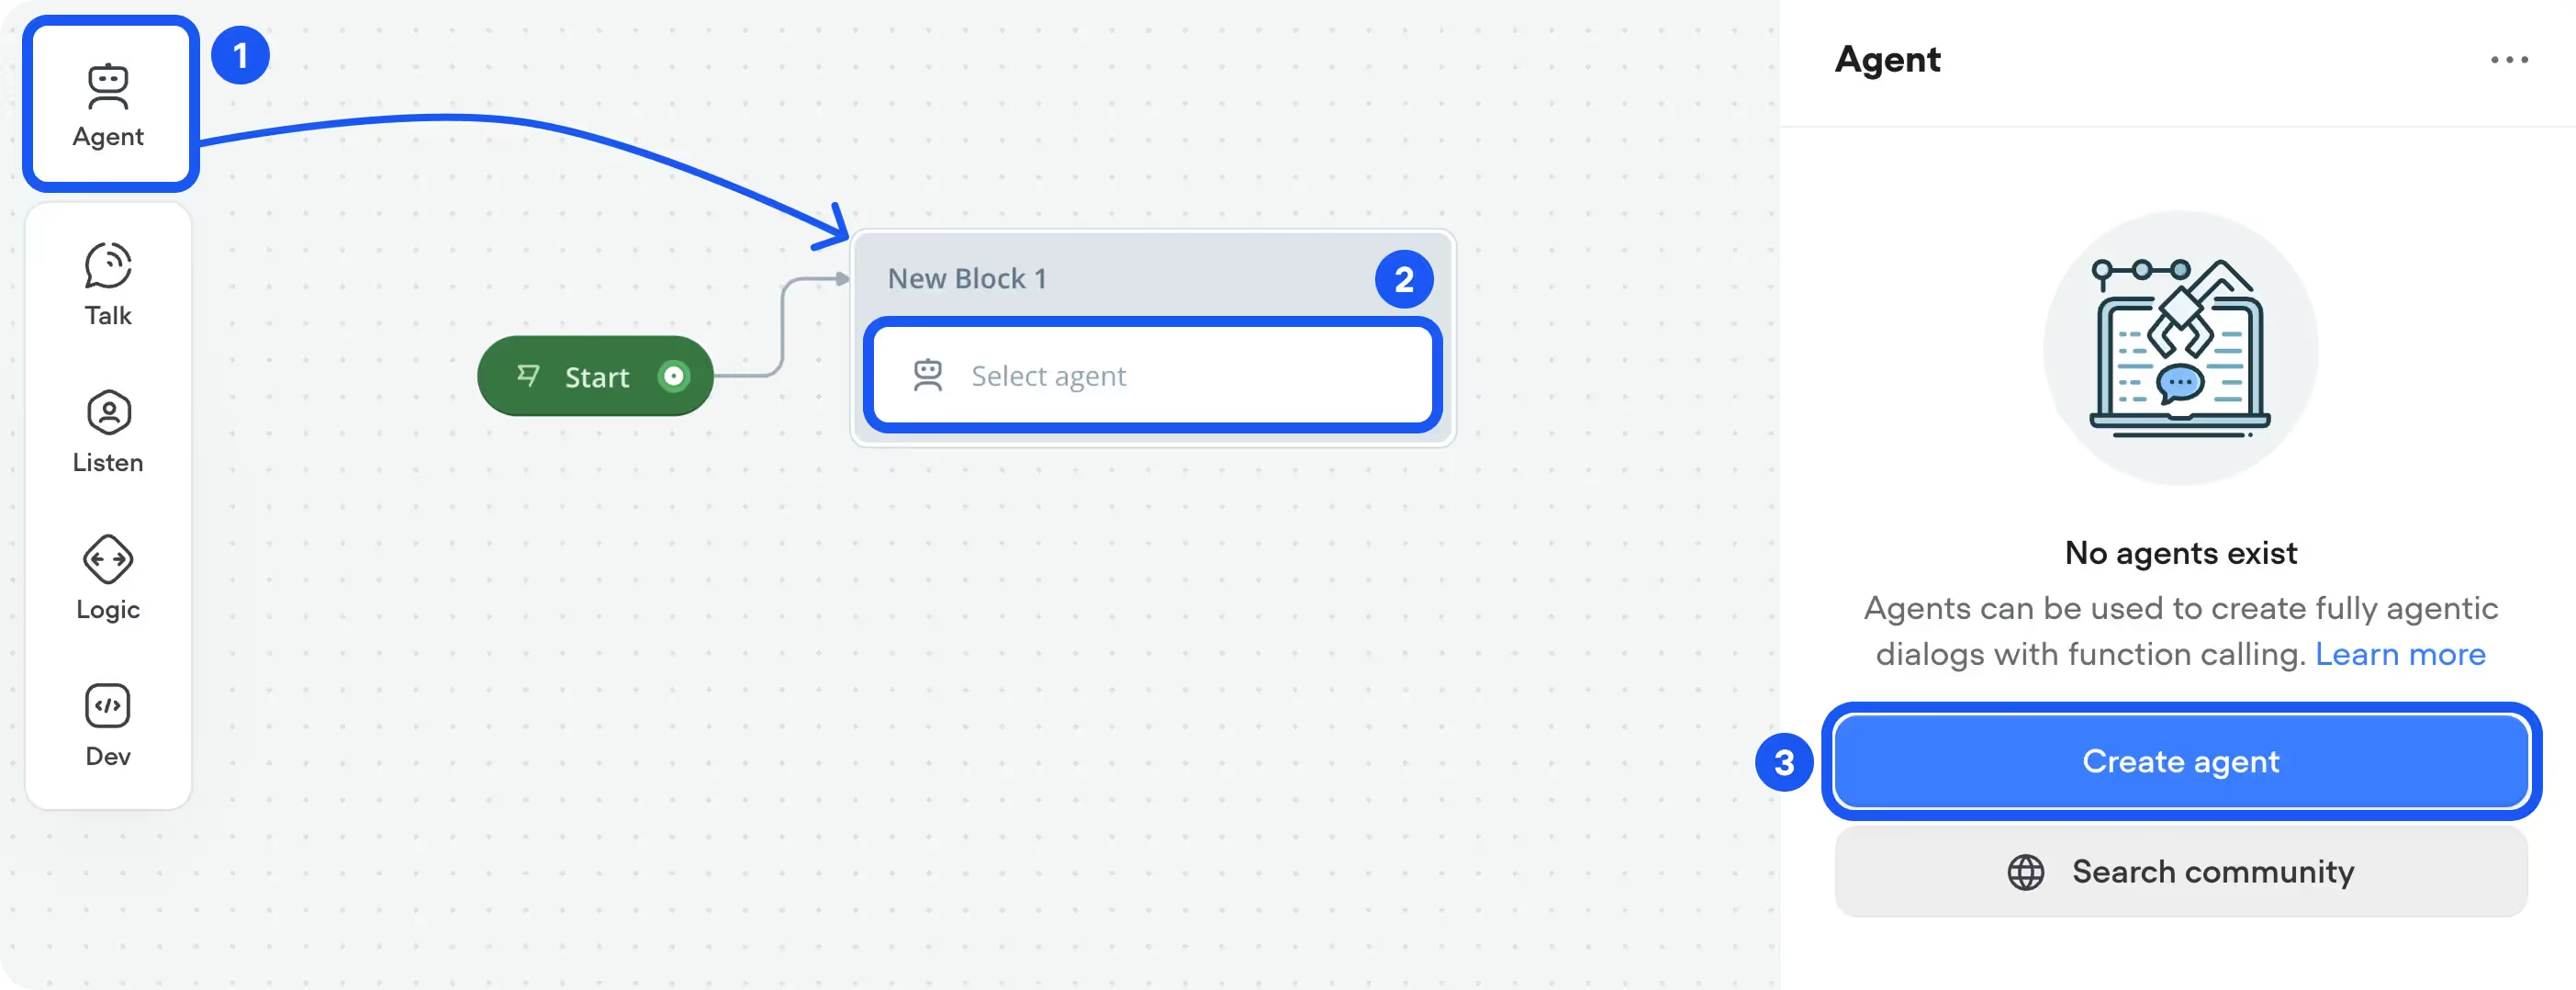
From inside the agent modal, click the Zendesk tool, then click Connect.
.avif)
You'll then be asked to add your Zendesk subdomain URL. You can find this URL by opening your Zendesk instance - it looks like this: https://[your company].zendesk.com . Once you've pasted it into the box, press Connect.
.avif)
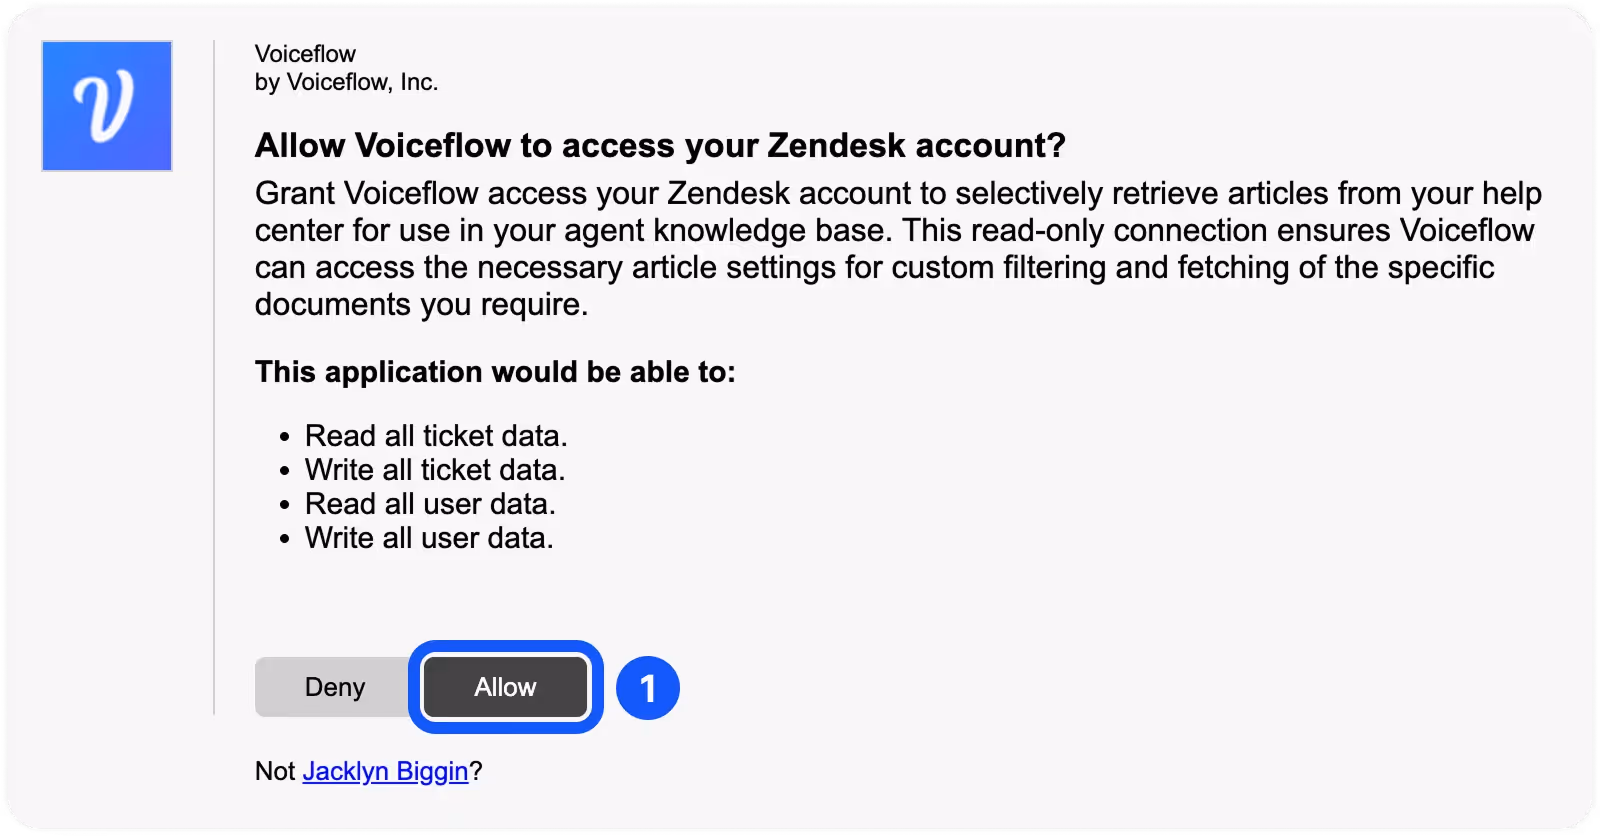
Almost there! Finally, click the Allow button to connect your Zendesk instance to your Voiceflow account. If you don't see this option, this is likely because you don't have admin access to your Zendesk instance.
Congratulations! Your Voiceflow project is now connected to your Zendesk instance. Next up, we'll show you how to make your agent interact with Zendesk, such as by creating tickets.
Resources

Build AI Agents for customer support and beyond
Ready to explore how Voiceflow can help your team? Let’s talk.